What is Brewing?
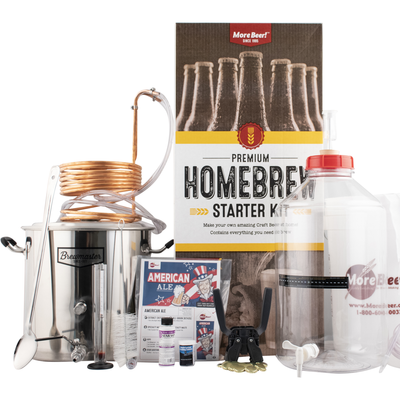
Browse Five Gallon Home Brewing Starter Kits
The 3 Basic Brewing Steps:
Brewday: This is where you the brewer essentially makes sugar water also called “Wort” for yeast to feast on and make beer. A typical extract brew day takes about 3 hours where an all-grain brew day can take about 6 hours. The brew day is where a majority of flavors are being created. These flavors come from the different types of malt extracts or grains and hops being used. Click here to jump to the Brewday section.
Fermenting: During fermentation yeast eat sugars present in wort and produce alcohol and cO2. The amount of yeast needed to ferment a beer is dependent on how much sugar is present. Different types of yeast like specific fermentation temperatures and also can add to the flavor and aroma of the finished beer. A typical fermentation takes about 7-14 days to complete. Click here to jump to the Fermenting section.
Packaging: Once the beer is finished fermenting it needs to be carbonated prior to serving. Most homebrewers either carbonate in bottles or a keg. That’s why this step is called packaging, you will be moving the fermented beer into its package where it will be carbonated and then later enjoyed. If your carbonating in a bottle or can you will need to add some more sugar for the yeast to eat and produce cO2. You can also do this in a keg but most homebrewers force carbonate using a canister of cO2. Click here to jump to our Packaging section.
Check out our video, Learn How to Homebrew in 6 Minutes!
Looking for More! info on brewing? Check out this hour long video, How to Make Beer at Home!
The Diffrence Between Extract & All-Grain Brewing
Extract is what most brewers start with as it allows you to learn the basics and fermentation before diving into more advanced steps like mashing. With extract you will be using malt sugars that have already been extracted from grains, hence the name extract. These malt extracts come in two different types called Liquid Malt Extract (LME) or Dried Malt Extract (DME). There are also sub types of each of these that offer different flavor & color options.
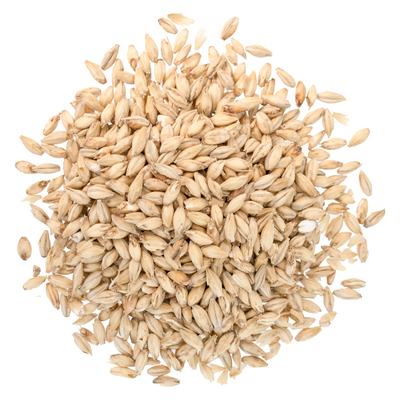
With All Grain Brewing you will start with grains and convert them into sugars. These grains can be whole kernel or pre-milled grains depending on if you have a mill or not. Either way the grains must be milled to break open the outer husk and expose the inner portion for proper sugar conversion. These crushed grains are then mixed with water to create a mash. During the mash enzymes on the grains will convert starches into fermentable sugars. The types of grain being used and the amount of fermentable sugars being created can be controlled by the brewer. This gives all grain brewers more control over the process and intern the flavors of wort being created.
If you are just starting out with brewing we recommend using a beer recipe kits. Our kits come with most everything you need to brew a delicious batch of beer at home. Yeast is typically sold separately so the brewer can choose to use dry or liquid yeast. Our beer recipe kits include easy to follow directions that will guide you through the extract and all grain process. Our kits also include a cut out that perfectly fits our tap handle (#D1282).
To see our selection of Beer Recipe Kits, click here
Brewday
Mashing: Making the sugar water (All Grain Brewing)
One of the first steps in all grain is mashing. A mash is a mixture of milled grains and hot water at a specific ratio and temperature. Both grain and water are added into a vessel referred to as a “Mash Tun”. The milled grain is typically a majority malted barley but can also contain wheat, oats, rye, etc. depending on the style of beer being brewed. This mixture is referred to as “grist” or “grain bill” by the brewer. The water being added is referred to as “liquor” and is typically heated in another vessel called a Hot Liquor Tank or HLT for short. The mash is stirred to ensure all milled grains are properly hydrated and no dried clumps “dough balls” are present. In a commercial brewery this is typically done with mechanical rakes and grist hydrators. In a home or nano brewery this mixing is done by the brewer with a mash paddle. The water and temperature activate enzymes present in the malt. These enzymes then break down the starches and convert them into fermentable sugars. Based on the temperature of the mash and amount of time it’s allowed to rest the sugar water (wort) will have different levels of fermentable and less fermentable sugars. The normal temperature range for a mash is 145 – 158F (63 – 70C).
Want learn more about Mashing? To check out our complete article on the subject, click here.
Sparge & Lautering: Separating the Wort from solids (All Grain Brewing)
Once the mash is complete the brewer needs to separate the wort from the left over malt, also referred to as the spent grains. This process is called lautering and is also typically performed in the Mash Tun vessel. Most commercial and homebrewing mash tuns have a false bottom on the vessel with holes small enough to allow liquid to pass and filter out the solids. Single vessel systems are also becoming very popular in homebrewing. These types of systems were originally referred to as BIAB (Brew In A Bag). Essentially the kettle would have a bag or stainless steel baskets inside it where the mash step is performed. Then the bag or basket is removed and the liquid wort is left behind to boil in the same vessel. The liquid wort that is being drained or left behind is typically first recirculated back over the grain bed. This process is called a Vorlauf and helps filter out any smaller sized solids that passed through bottom of the vessel. It also helps rinse or free up any sugars in the grain bed. In most styles of brewing your initial addition of water “hot liquor” is a fraction of the total volume you will need to make a batch of beer. So brewers will add more water from their hot liquor tanks to rinse the grain and achieve their desired pre boil volume of wort. This process is called sparging and allows for a better extraction of sugars from the grain. The two main methods of sparging are batch sparging and fly sparging. With batch sparging you first drain the initial wort and then add the remaining amount of sparge water to the mash. The brewer then mixes the new infusion water and existing grains together and then proceeds to drain this “batch” of wort into the kettle where it mixes with the first amount to reach the desired total pre boil volume of wort. With fly sparging the brewer continually adds water to the top of the grain bed to replace the wort that is being drained from the bottom of the mash tun. This is typically done with gravity or a pump and a device called a sparge arm. A sparge arm is meant to evenly distribute water being added across the grain bed in an effort to reduce the creation of drain channels. Ideally the brewer will keep an even flow rate that keeps the water level an inch or two above the grain bed. With either method the process should take about an hour to complete as you do not want to quickly drain the grain bed. This would lead to channeling and not effectively rinse the grain of its sugars. Once the mash is complete its time to boil your sweet wort.
Boiling: Creating flavors & sterilization of the wort (Extract & All Grain Brewing)
The boil is where Extract and All Grain brewing converge and the steps are essentially the same for the rest of the process with some slight differences. In extract brewing you typically have some steeping grains that add flavor and color but do not add a significant amount of sugar. Also depending on the size of the kettle, extract brewers will either be perform a full or partial boil. If using a 5 gallon kettle the extract brewer would fill it with 3 gallons of water. This allows room for the liquid malt extract being added later in the process. If using an 8 gallon or larger kettle they would fill it with 6 gallons of water. This extra gallon of water accounts for what will be boiled off during an hour boil. In the case of the smaller kettle sizes they would top off with water to reach the desired 5 gallon batch size. In either case they would then Start heating the kettle water and prepare the steeping grains. The steeping grains are placed into a mesh bag and allowed to steep in the water as it heats up. The bag of steeping grains is removed when the water reaches 170 degrees F. Then the water continues to heat until it comes to a boil. At this point the heat source is turned off and the malt extract is added. The heat source is then turn back on and the wort is brought back up to a boil. From this point out the steps are virtually the same as all grain. A typical boil is about 60 minutes but some styles of beer may call for longer boil times. Depending on the recipe being brewed hops are added at different times during the boil. For instance hops added early in the boil will add to the bitterness flavor of the beer. Whereas hops added later towards the end of the boil will add to the aroma of the beer. Most recipes will also include a clarifying agent that is added in the last few minutes of the boil. Once the boil is completed the next step most brewers like to do is a whirlpool. This can be done by simply stirring the wort or in commercial and some homebrewing systems it’s done with a pump. This step amongst other positives allows for the solids to bind and settle out in the middle of the brew kettle away from the spigot where the wort will be drained from. After the wort has had some time to settle typically 10-15 minutes it’s time to chill to pitching temp.
Chilling: Preparing the finished wort for the yeast
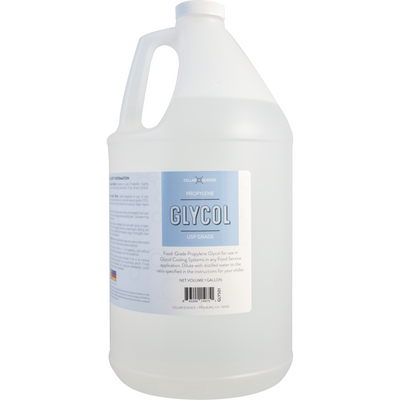
Once the boil is completed the next step is to chill your wort down to an adequate temperature for your yeast. The pitching temp for most ale yeast is in the 62-68F degree range, but specific strains have different recommended temperatures. If a partial boil was performed adding the top up water will help in the cooling process. Another common and inexpensive way is to place the entire kettle in an ice bath in a sink or bath tub, etc. This however can take a while to get the wort down to pitching temp. That’s why most brewers use a heat exchanger to help in this process. A heat exchanger basically takes heat from one source and transfers it to a cooling medium. This cooling medium in most homebrew applications is typically water. Homebrew heat exchangers normally come in two different types, Immersion and plate chillers. An immersion chiller goes into the wort inside the kettle. It’s then hooked up to a hose or sink faucet and cold water is pushed through the copper tubing sitting inside the kettle. A plate chiller normally requires the use of a pump as you need to push the wort through the plates and run water through it at the same time. Commercial brewers typically use two stage plate chillers that utilize both ground water and colder glycol to quickly chill their wort. Both have their advantages and disadvantages, but the idea is the same to quickly cool the wort. This not only speeds up the brew day it helps make better beer by slowing DMS (Dimethyl sulfide) production and stopping continued alpha acid isomerization (Bittering). Once the wort has dropped below 180 degrees anything that comes in contact with the wort must be properly sanitized.
To see our selection of Beer Brewing Equipment & Supplies, click here
Fermenting
Fermentation: Wort becomes beer
There is an old saying that goes “Brewers make wort, yeast make beer” and that’s spot on. The fermentation phase is when the sugars made on brewday get converted into alcohol and carbon dioxide gas by the yeast. There are several keys to a successful beer fermentation but the single most important is sanitation! The fermenter, tubing, funnels, and anything that comes contact with cooled wort should be sanitized. Even though they cannot be seen there is wild yeast and bacteria all around. Brewers want the yeast they pitch to ferment the beer and give it the flavor intended. Another key to a good fermentation is using healthy yeast. All yeast manufactures label their products with a best by date. This helps brewers determine the viability of the yeast. Brewers also build up yeast cell counts and viability by making yeast starters. This is done by creating a smaller volume of wort prior to the brew day and pitching yeast into it. This allows the yeast to reproduce before getting pitched into the larger volume of beer being brewed. In commercial breweries brewers will purchase yeast from the laboratory and pitch it into a lower ABV beer first building it up before harvesting and adding to other higher ABV beers. Yeast need oxygen to reproduce and oxygen are driven off during the boiling of wort. Another key to a healthy fermentation is properly oxygenating the wort. This can be done as simple as shaking the wort inside the fermenter or as advanced as directly injecting oxygen from a tank into the wort with a diffusion stone. The last and probably most important aspect of fermentation right behind sanitation is temperature control. Most commercially available yeast strains have a recommended fermentation temperature range. The temperature a beer is fermented at can have a huge impact on the finished flavor of the beer. Typically the higher the fermentation temperature the more esters (Fruity) and fusel alcohol (Hot) are produced. Knowing the ideal temperature range of the yeast you are using and being able to keep it in that range help make better beer.
Want to learn more about Fermentation? To check out our complete article on the subject, click here.
Different Fermentation Types: Ales, Lagers & Spontaneous fermentations
Fermentations can be separated into three types. Ales are typically fermented warmer in the 60F to 75F range depending on the yeast strain. Some strains like the newer Kviek ones are fermented as high as 95 F. Ales typically have a fruiter ester flavor and aroma profile. They are also referred to as top fermenting yeasts since the yeast tends to clump together and rise towards the top of the vessel during fermentation. Lagers are typically fermented at cooler temperatures around 50F to 54F range. This lower fermentation temperature leads to a cleaner flavor with much less ester production. They are often referred to as bottom fermenting yeast since they clump up towards the bottom of the fermentation vessel. The key to either fermentation profile is being able to control the fermentation temperature. Most homebrewers do this by keeping their fermenters in a space that free of huge temperature swings. Repurposed refrigerators work great for this as they can hook up a thermal probe on the fermentation vessel and turn on or off the refrigerator with a temperature controller. Most commercial brewers use jacketed tanks that are connected to a glycol unit. These types of configurations are now starting to become available to homebrewers as well. Another type of fermentation is Spontaneous, as previously mentioned there is wild yeast all around us. Spontaneous fermentation utilizes these wild yeasts to create sour and other unique beer flavor. Historically these beer styles were referred to as Lambic and were brewed in the Brussels and other nearby regions. These brewers would cool the wort in open vats called “coolships” allowing the wild micro flora to spontaneously ferment the wort. Most commercial brewers in the US pitch lab cultivated forms of these wild yeast. But many still utilize traditional techniques as well.
To see our selection of Brewing Fermentation Equipment, click here
Packaging
Bottling, Canning & Kegging: Preparing Beer to be enjoyed
Once the beer has finished fermentation it’s now almost ready to be packaged. Just like with fermentation cleanliness and sanitation is very important at this point. Also trying to minimize oxygen exposure is very critical to maintaining the flavor of the finished beer. Most commercial and homebrewers drop the temperature of the beer at this point to clear it up and also help with cO2 absorption. This process is called cold crashing and clarifying agents like biofine or gelatin are frequently added as well. If the brewer is using a unitank they will start the carbonation process once the heavy particulates have settled out and been removed. Some commercial breweries move the finished beer to brite tanks for further clarifying and carbonation. Beers being carbonated like this are force carbonated by adding cO2 directly into the beer from a cO2 tank. Once the beer has reached the appropriate carbonation level for the beer style it can then be moved into kegs, bottles or cans. The other process for packaging and carbonating beer is bottle conditioning. This is when a small amount of sugar is added back to the finished beer and residual yeast in the beer eat the sugar and produce cO2 to carbonate the beer. This process can be done in a bottle, can or keg even but is typically done in a bottle hence the name. If the brewer is carbonating their beer via this method it must be left at room temperature for at least two weeks. Colder temperatures, 6f F or below will require additional time for carbonation. Once the beer has become fully carbonated it can now be placed in a refrigerator to be chilled and served!
Want to learn more about bottling beer? To check out our complete article on the subject, click here
To see our selection of Beer Bottling & Kegging Equipment, click here