What is kefir? First let’s start by saying that there are two types of kefir and they are drastically different. The process and the cultures used may be similar in appearance, but the end products cannot be confused. With either Milk Kefir or Water Kefir it’s a simple ingredient list and very little equipment needed. So it’s perfect for beginners or those who like to keep it simple. This is why I love kefir it is just so easy to make. This is why I love kefir it is just so easy to make.
Let’s get into it.
Milk Kefir is made with milk, and Water Kefir is made with water and a sugar source. They both use a Symbiotic Culture of Bacteria and Yeast, or a SCOBY, like Kombucha does. Unlike Kombucha though this SCOBY does not produce a pellicle on top of the fermenting liquid, it instead produces little clear or white things that can look like weird pebbles or pieces of rock candy. These are often referred to as “grains”, and they vary in size depending on many factors. I have seen them very small, up to the size of a grape. These are not grains like corn or wheat grains though. Think of it more like grains of sand though they are usually bigger than that.
Let’s get into the differences between the two Kefir types.
Milk kefir is sometime just called kefir, to clarify which kefir is being talked about it is also referred to as milk kefir. In this article I will refer to kefir made with milk as “milk kefir” so nobody gets confused.
Milk kefir is probably even easier to make than water kefir but they are both very easy to make. The reason I say it is easier is because you only need two ingredients, the milk, and the milk kefir grains. The grains are white/whitish and look like funky pebbles that are soft, and can bounce. The SCOBY in milk kefir produce a polysaccharide called kefiran which is the most predominant polysaccharide in kefir. Most likely giving it most of its thickness and viscosity.
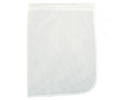
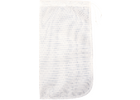
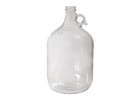
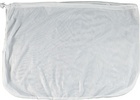
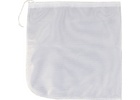
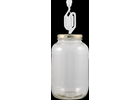
The process to make milk kefir is very simple, take a clean vessel, pour your milk in the vessel, pour in the milk kefir grains, and cover with a sanitary cover such as cotton or coffee filter. The goal with the cover is to let it breathe (let gasses in and out) without letting insects and other things in there. Insects and floating particles can introduce nasty organisms into that perfect medium milk, for things to grow.
Then put it in a place that doesn’t get to hot or too cold. If it is to warm or hot it can ferment to fast and you may end up with chunky milk in no time.
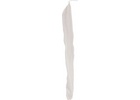
After roughly 24 hours the kefir should be done thickened and ready. Pour the kefir through a fine stainless (not chrome plated) filter or plastic filter into another clean vessel from which you can serve your kefir, and you’re done. Oh and keep it in the fridge because it is still fermenting. The grains may have been removed but it is still full of bacteria and yeast.
Some people heat their milk and let it cool before they mix it with the grains. This just helps kill anything in the milk that may be there that will compete with the SCOBY and possibly spoil your milk kefir. The milk has to cool to room temperature though. If it is to hot you may kill some or all of the SCOBY. I personally heat my milk.
How long until it’s done? Where I live it is warm enough to complete its fermentation overnight. If I leave it longer it starts coagulating and becoming more effervescent. To me this is not a pleasant stage to consume milk kefir. I like it creamy not chunky and bubbly. If you do wait too long and it has coagulated you can always strain it and make cheese, yeah kefir cheese is a thing.
After you are done making your milk kefir you will want to start a new batch or store your grains until next time. A new batch will keep you SCOBY alive and growing, but maybe you don’t have time, or you want a break. That is where storage comes in. Proper storage will help keep them alive until you are ready for a new batch. I have seen many ways online to do this some of which are very questionable. I just put my milk kefir grains in a little mason jar with milk in the fridge. This will give the milk kefir grains something to eat while they are in the fridge. They will keep on going but at a much slower pace than out of the fridge. Keep an eye on it if it looks like it might be coagulating, strain it and switch the grains to a new jar of milk, or make some more milk kefir.
If you don’t want to keep the grains, there is always the option of buying new grains later. When I started that wasn’t really an option. You had to go through the hippie underground and pass around secret bags or jars with grains in them.
It may be possible to make a dairy fee milk kefir but they culture (SCOBY) may not last. It is worth trying, I am always a fan of citizen science.
Water kefir, this is the one I prefer to make out of the two types. They are totally different foods/drinks, but I don’t have to make a new batch every day, that is me though and you can choose what you like.
The flavor can be compared to a mild kombucha I would say. Mild in the sense that there is less acetic acid, which is the acid that gives vinegar its sour punch. Instead water kefirs sour flavor is more from lactic acid and doesn’t tend to have that sour bite that kombucha can have.
Water kefir, like milk kefir uses “grains” or “water kefir grains” but these ones look like little pieces of rock candy but they are soft, and they bounce like the other ones.
One of the really fun things about water kefir as that the grains will bob up and down when actively fermenting, I just love watching it. This up and down motion is caused by the carbon dioxide produced during fermentation sticking to the grains. When there is enough carbon dioxide on a grain too lift it, it will float to the surface where it will lose some carbon dioxide and float back down.
The process for water kefir is very much the same as it is for milk kefir. Other than water and grains you only need one other ingredient, sugar. You can use different type of sugar but less refined tends to be better. The refining takes out some of the nutrients that are in the sugar in its more unrefined form. If you use white sugar, a little molasses can add some nutrients for the SCOBY.
If you try other sugars just make sure to use only some of your grains with the new sugar and see what happens. I did this with dry malt extract and it was not good. It destroyed my grains. They fell apart and it never fermented the same way again.
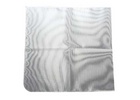
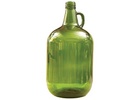
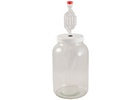
For water kefir mix your sugar with water, pour in your water kefir grains cover with a clean and sanitary cloth or filter (ex. Coffee filter), secure it around the vessel with a rubber band or a tie of some kind. Set it in a place that is not to warm and not to cold and after a few days you have water kefir to drink. You can pour or syphon your water kefir to another vessel or bottles. Just be careful because the grains can get stuck in tubing if you syphon.
As with milk kefir I heat the liquid and sugar mixture in water kefir. I bring it to a boil to kill things that could be in the water or on the sugar and then let it cool to room temperature before adding the grains.
I usually pour the water kefir through a stainless steel strainer into another large vessel to separate the grains from the liquid. I then syphon or pour the liquid from the new vessel into bottles or mini keg and let it carbonate. Caution must be taken if you are going to carbonate in glass containers as the can explode if the pressure is too high. Plastic soda bottles are a good option to carbonate in because they can be squeezed to test the pressure in the bottle. If it is firm, it’s probably ready, if it’s hard you should probably let some pressure out, or drink some.
As with the milk kefir, you need to start a new batch of water kefir or store the grains after each batch. With water kefir I make a sugar water mixture like I would for making a batch of water kefir but much smaller. I put it in a jar in the fridge and check on it once a week. You still need to be careful this way because it is still fermenting. That is why I open it about once a week and listen for a “pfft” sound. If I don’t hear anything, I know it has slowed down and it probably won’t blow up in the fridge.
Storing them in a plastic container like a clean soda bottle is another option. If you can get the grains in there that is. These containers can be squeezed to see how much pressure is building up. If it is getting hard, just open it a little bit let some pressure out.
With either kefir you can add any flavor you want, fruit, spices, and herbs, whatever. I would recommend any flavors, juice, fruit, etc., be added after the primary fermentation as I have found some things can hurt the SCOBY. Also, if anything is added after primary fermentation has sugar in it, caution should be taken. This is because it will add more sugar and the fermentation will continue in activity, and may even increase. This can be dangerous if the kefir is put in closed container, especially something like glass.
Equipment needed is very simple and is listed below.
Instructions:
Instructions:
Kefir of both kinds are fun and easy to make with all kinds of flavor options being added to it. With fermentation being as short as overnight to 3-4 days it is perfect for that day you get the brewing bug in the middle of the week and want something for the weekend.


.png)
.png)
(1).png)
.png)