Sour Beer
10/18/2020
By Vito Delucchi
Looking to learn More! about Sour Beers and make one yourself? In this article our own award winning home & commercial brewmaster Vito talks about what sour beer is, the differences between mixed fermentation and kettle sours. He also shares his blending process, tips to making both mixed ferm & kettle sours as well as recipes.
Article Quick Links
There is both a long and a short answer to that question. Let’s start with the short answer, it’s a beer that is made intentionally tart in taste. The long answer, in my opinion, starts in the Senne River Valley area of Belgium. This region produced Lambic, which is what sparked my love of sour beer. In this area of Belgium, local breweries historically cooled their wort in the evening during the colder seasons in a large and awe-inspiring vessel called a Coolship (koelschip)! Rather than pitching yeast into the wort, the ambient local microflora would fall onto the wide surface area of the coolship and provide all the mixed cultures for fermentation. All though Mixed Fermentation undoubtedly predates the Lambic beer renaissance of the Senne River Valley, that’s where a majority of our classic Sour Beer examples originate. Not to take away from the German-born Berliner Weisse, but for me, any discussion around sour beer should start in Belgium.
Regional beer styles aside, what makes a beer intentionally sour? That ambient micro flora those Belgian brewers wrangled contained wild bacteria cultures of Lactobacillus, Pediococcus and Brettanomyces. Primarily, Lactobacillus and Pediococcus are to thank for that mouth puckering acidity. Brettanomyces does add some acidity, but it primarily contributes other flavors and aromas associated with mixed fermentation beers, more so than pure sourness. Left to age for months, and sometimes years, these mixed fermentation beers become the grand cru (pun intended) of the sour beer world. One thing to note about these beer styles is that they have very little hop profile. As you probably know, hops have an anti-bacterial property, and if the beer you plan on souring is above 7 or 8 IBUs, it will greatly inhibit the chance of souring, even with a healthy mixed ferm pitch. Luckily, the hops those Belgian brewers were using are of the Nobel variety and low on Alpha acids. They also tended to store them for a while, further reducing their alpha acids and slightly oxidizing them. Bottom line, no matter what hops you use, keep the IBUs low, ideally below 10.
We now know making an intentionally sour beer requires the addition of a bacteria like Lactobacillus. We also know the traditional way of making them is by using mixed cultures and giving them time to develop their amazingly tart aroma and taste characteristics. But there is another (much quicker) way to produce sour beer by utilizing Lactobacillus prior to fermentation. Now, this is where I need to give some credit to Germany and the aforementioned Berliner Weisse. These beers got their acidity from the naturally present Lactobacillus found on barley. If a mash is kept below the Lactobacillus denaturing point (120°F), and given enough time, the lacto will begin to produce lactic acid. This process is called a sour mash and was a popular method for producing quick turn sour beer prior to brewers figuring out the method of kettle souring. Although these methods can quickly produce a sour beer, they are a little one dimensional due to only having lactic acid. Hence the popularity of adding fruit, or as they do in Germany, flavored syrups.
To me, producing mixed fermentation beer is one of the most fascinating and enjoyable processes in all of brewing. Depending on your method, it can truly blend art and science to create a harmonious masterpiece. My first mixed fermentation beer was a simple one and if you’re interested in making one yourself, getting started sooner than later is the way to go. Reason being, most mixed fermentation beers take a minimum of 6 months to a year before they even start to become ready to enjoy. Ideally, you want to get them on a schedule so that you’re refilling your vessels for next year as soon as you bottle the previous year’s batches. The reason I say batches “plural” is that the art of mixed fermentation beer lies in the blending. Sure, you can pitch a mixed culture into a single batch of beer and enjoy it once it’s done souring. But having multiple batches with varying cultures not only allows you to become familiar with different strains of bacteria, it allows you to blend them together and come up with something greater than the individuals alone. Or maybe one of them is just so good it should stand on its own, and the others get blended. Either way, I highly recommend getting a few going now if you like mixed fermentation sour beer.
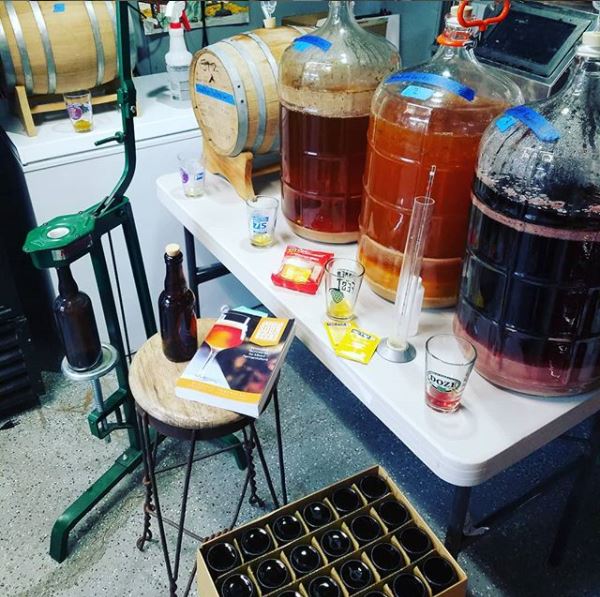
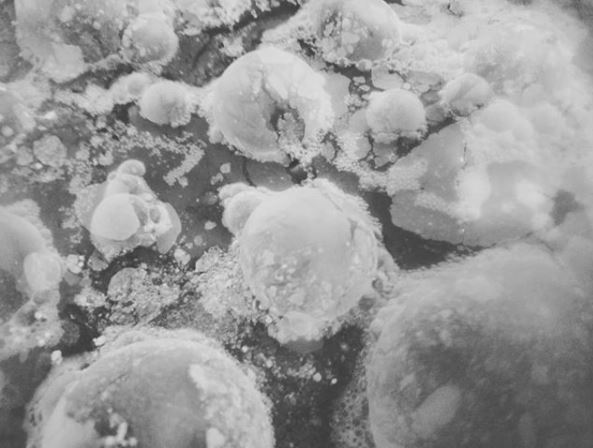
I will give you my mixed ferm base recipe below, but I do want to go into my blending process and some tips on making them in general. On my homebrew system, I am able to produce 20 gallons of wort. Each year, I typically brew one or sometimes two 20-gallon batches worth of wort. I then split them into 5-gallon glass carboys and inoculate them with varying cultures. I recommend starting with a Roselare blend, or something similar like GigaYeast’s Sour Cherry Funk. Then for the others, I will typically mix some brett and lacto strains like Brettanomyces Lambicus and Lactobacillus Delbrueckii with a Saison strain. I also have some 6-gallon Oak Barrels that are part of the blending process, but let’s not get ahead of ourselves. After I have 4 or more carboys filled with the various mixed ferms for the year, I stash them away in a dark and temp stable area of my house like a guest bedroom closet. Also, worth noting, I always use S-shaped airlocks as they are less prone to evaporation. Regardless of what you use, check them periodically to make sure they are properly filled. After a while, you will notice a white, almost soap-like cover will begin to develop. This is called a pellicle. They actually become very beautiful (well at least I think so) after a while and look like dome bases on a lunar surface, but I digress. By this point you’re probably over 6 months in, if not longer. Let that pellicle form and resist the urge to pull a sample. Don’t worry, that day will come soon enough. Patience is a virtue.
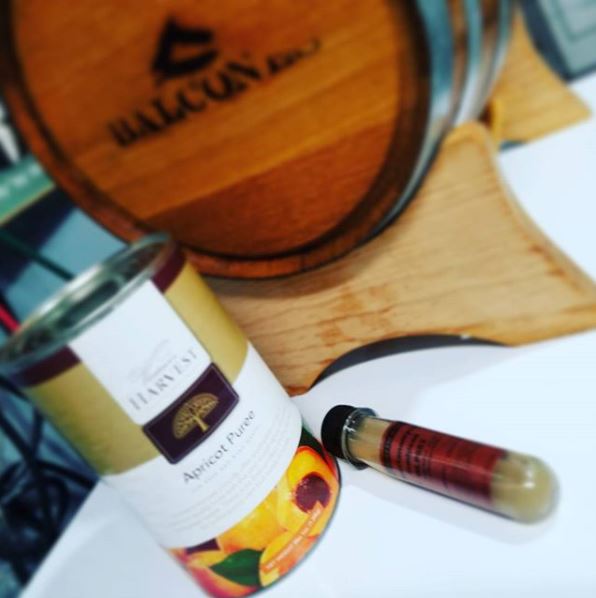
I typically brew my sour batch in December, so around late October to early November (8 to 9 months later) I will take my first sample. I like to invite over a few friends who appreciate and know sour beer to help with tasting notes. We will typically rank them in order of our favorites and write down some notes on aroma, taste, etc. I then use this information to come up with my blends and pick my lambic base for the year. The one that shines the most in aroma and taste becomes the lambic base and I will bottle that straight unblended. I normally take about 30% of that carboy and bottle it. The rest will get blended into a Gueuze that will include some of the young lambics and some from those aforementioned barrels. The barrels themselves originally got filled from leftover lambic after blending from the previous years. I will do the same thing year after year topping the barrels off each year. After 3 or 4 years, the barrels will typically develop too much acidity and I will retire that one and pick up a fresh barrel. So, the Gueuze blend will have parts of young lambic and parts from the 2-, 3- and even 4-year-old barrels as well. I will then make one or two fruit versions by adding either fresh fruit I picked up during the summer and froze or by using canned fruit purees. I personally love Raspberry (Framboise) and Apricots (Fou'Foun FTW!) but Cherry is another classic style (Kriek) and a great option for flavoring sours. I do all my blending in buckets with measuring lines so I can measure percentages of each batch easily. Definitely worth noting, all of my sour beer equipment i.e. buckets, tubing, etc., I keep separate from my clean beer equipment and I highly recommend that you do the same. Anyway, I then bottle out of the bucket and add a dosage of priming sugar and champagne yeast depending on the style, i.e., no yeast added for Lambic base, but the Gueuze and Fruit blends will get it. If all goes according to plan, I have my glass carboys emptied and my barrels full in time to brew up next year’s mixed ferms. Then those bottles are ready to start enjoying and passing out as gifts for the holidays.
 |
Have any feedback on this article? We want to hear from you! Click here, to contact us with any feedback. Did you enjoy reading this article? Interested in writing one? Click here, to learn More! About becoming a contributor. Or simply email us at articles@morebeer.com |
5.5 gallons
Original Gravity: 1.054
IBU: 6
SRM: 3.6
ABV: 5.6%
Ingredients:
7 lbs. Pilsner Malt
4 lbs. Wheat Malt
0.5 oz. Saaz hops (60 min)
1 pack Wyeast 3763 Roeselare Belgian Sour Blend
Step by step
Mash the grains for 60 minutes with 4 gallons of water at 168 F, to reach a mash temperature of 155 F, we want to mash on the higher temp side to leave long chain sugars for the bacteria to munch on. Sparge with 6 gallons water at 168 F to collect 8 gallons. Boil for 60 minutes, adding ingredients as indicated. At the end of the boil there should be 5.5 gallons of wort. Ferment at 67 F for 9-12 months.
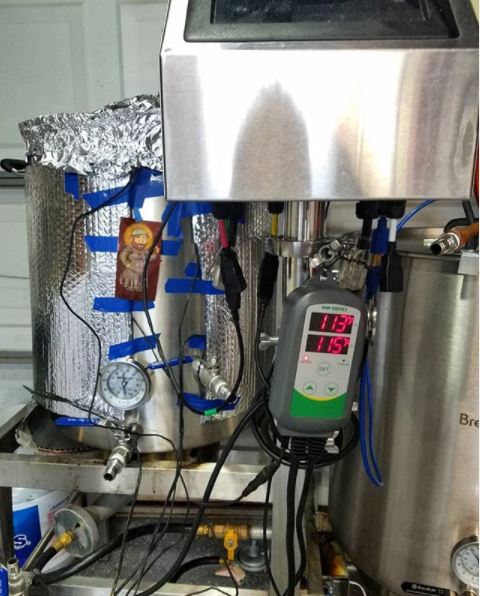
Kettle souring is another way to make sour beer and its upside is it can be done very quickly. Another upside is you don’t need to maintain different bottling and packaging equipment since you will be boiling the wort and killing off any bacteria prior to fermentation. It also splits your brew day up over a two- or three-day timeframe which makes it feel like less work, but it’s actually more. The first half of a kettle sour brew day is pretty typical, mash, collect your wort, etc. I then like to boil my wort for 10 to 15 minutes. This accomplishes two things; it drives out the oxygen that’s in solution and it sanitizes the wort. Let’s start with the oxygen, Lactobacillus (the bacteria used to sour) is anaerobic, meaning it does not need oxygen to reproduce like normal brewing yeast. However, bacteria like Acetobacter (think Vinegar) does need oxygen. So, by pre-boiling the wort we are creating a clean and less favorable environment for other bacteria and setting up our Lacto to be the dominant flavor contributor. The challenge that comes from this beneficial step is you need to cool the wort down before pitching your lacto culture, as Lactobacillus starts to denature around 120°F. At home I do this with an immersion chiller, it’s by far the easiest way as you can sanitize it during your boil and easily rinse it off when you’re done. At the brewery, however, I don’t have that luxury, so I recirculate the wort through my plate chiller and back into itself via the whirlpool port. This takes a while since your putting cooled wort back into the hot thermal mass. I found bubbling CO2 through the bottom of the boil kettle helps speed this process up, as it prevents channeling and helps mix the wort as it’s cooled. It also has the benefit of pushing any oxygen out of the headspace of the kettle, which is another step in my process. Once the wort is chilled to my ideal Lacto pitching temp (90-100°F), I will add my lacto culture and then purge and close everything up the best I can. This means using plastic wrap and tinfoil around the kettle lid, etc., to keep the kettle closed off. While I am doing that, I will continue to push CO2 through the bottom of the kettle, essentially creating a nice blanket of CO2 that I am sealing the wort inside of. I personally believe this step is key to creating a clean kettle sour fermentation. So now let’s talk about Lacto cultures, when I first started doing quick sours, I would do sour mashes and use unmilled Pilsner malt to inoculate my mash. I don’t recommend this for kettle sours. Sure, that malt has natural lacto on it, but it probably has some other bacteria as well. One thing I have done that worked well both at home and commercially is use natural yogurt to inoculate my batch. When I have done this method, I will use organic yogurt from a local dairy farm. In their own words, their yogurt is “Crafted with pure, simple ingredients, and minimally processed. No gums, thickeners, stabilizers, artificial ingredients, or coloring agents are ever used in our yogurt.” The listed ingredients reflect this, it’s just pasteurized organic milk and they even list the lacto cultures “LIVING YOGURT CULTURES: A. ACIDOPHILUS, L. BULGARICUS, S. THERMOPHILUS AND BIFIDOBACTERIUM LACTIS” I also have friends who have used Good Belly with great success, which is more readily available. Definitely worth noting, I personally have found that when using yogurt cultures, it comes through in the taste and aroma as opposed to purchasing isolated lacto strains from brewing supply stores like MoreBeer! If you’re looking for the cleanest possible lacto profile, get a pitch from one of the major labs. Either way, once you pitch your bacteria you should have it all buttoned up and purged of oxygen. But it also needs to be kept warm, ideally keep it in that 90-100°F range. At home I do this with some FermWrap heaters and a temp probe inside the thermowell on my kettle connected to a temp controller. I found even when it’s 70 to 80 degrees (here in CA) during the summer it runs the entire time I am souring the wort. So take your ambient temperature and what you need to do to keep that Lacto working into consideration. The lower the temp the longer the souring process will take essentially.
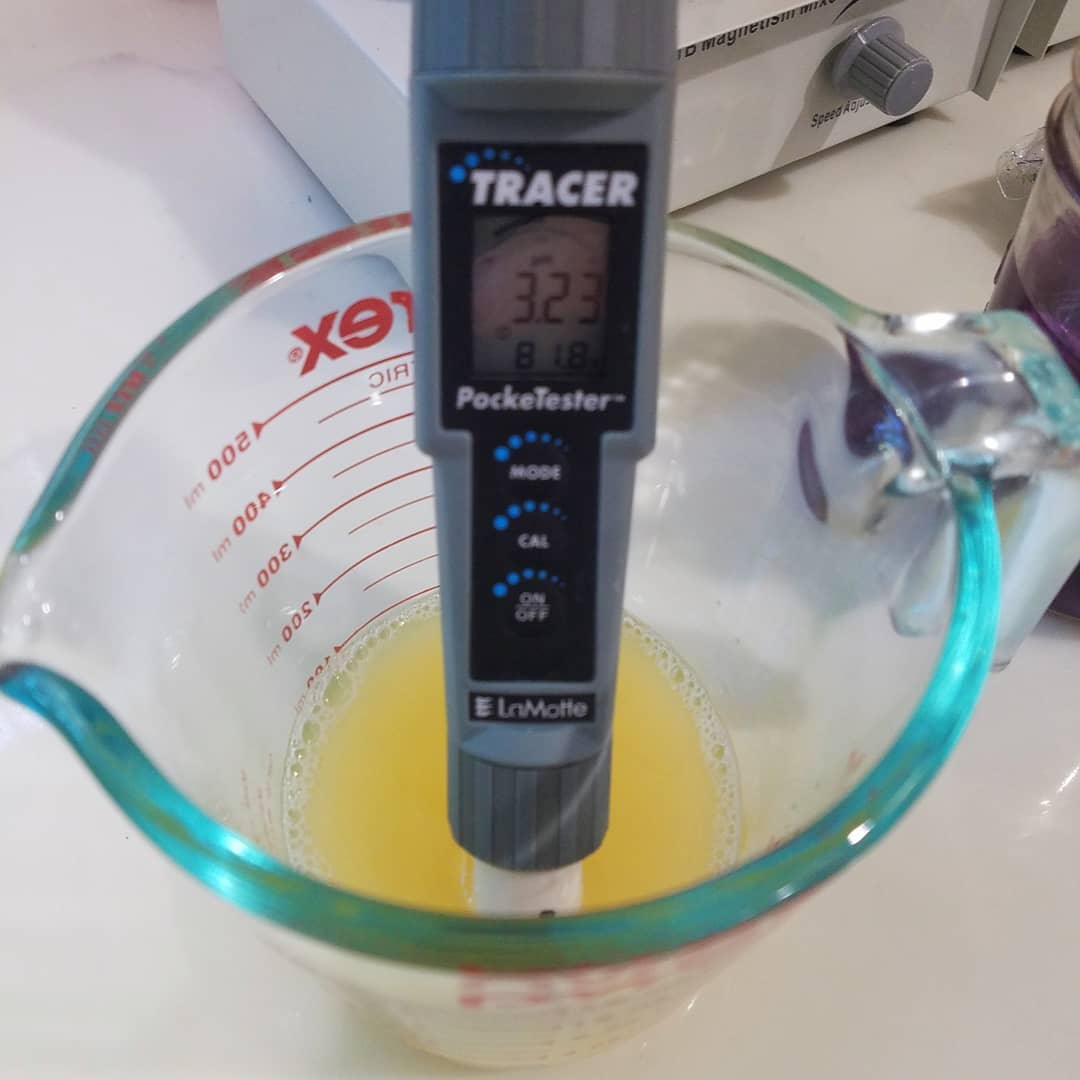
Let’s talk about the souring process. What does that mean? With kettle sours, we are talking a pH reading, I personally like mine around 3.5 to 3.6 pH range, but some people like them even tarter (is that even a word?) like 3.2 to 3.3 pH. You can easily measure this with a pH meter and I would recommend getting one if you plan to kettle sour beers. You can also use pH strips or even try and do it off taste. But when doing it off taste you have to remember the sugars have yet to be fermented so the wort will be very sweet and harder to gauge acidity level on. Assuming you have a healthy lacto pitch, your wort should reach 3.5 in under 24 hours at the ideal temp. Once you hit your desired pH level, you unseal the kettle, take off any heaters etc., and proceed to boil like a normal beer. If you plan to brew multiple kettle sours, or just want to share your Lacto pitch, you can pull off some of the wort before you heat it up and use it to inoculate another batch. It will even keep in the fridge for a few weeks. I do this at the brewery since we’re brewing a kettle sour every few weeks. I will pull off a bbl or two and use it to inoculate the next batch. As long as you’re feeding it (using it) every few weeks, it stays perfectly healthy. The other nice thing about a kettle sour versus a mixed ferm is you can pump them with hops if you want since the lacto fermentation is done before the hop additions. So, no need to adhere to the 10 or lower IBU. Sour IPA? Sure thing, if that floats your boat…go for it!
5.5 gallons
Original Gravity: 1.044
IBU: 6.7
SRM: 3.4
ABV: 4.6%
Ingredients:
5 lbs. Pilsner Malt
4 lbs. Wheat Malt
0.5 oz. Saaz hops (60 min)
1 pack Omega OYL605 Lactobacillus Blend
1 pack White Labs WLP001 California Ale
Step by step
Mash the grains for 60 minutes with 3 gallons of water at 161 F, to reach a mash temperature of 150 F, Sparge with 8.5 gallons water at 168 F to collect 8 gallons. Boil for 10 minutes and chill to 95 F. Add Lactobacilius Blend to kettle, purge / blanket with cO2 and seal up the kettle with plastic wrap and tin foil. Hook up heaters as needed to keep the kettle in 90-100F range. Test pH after 12-24 hours. Once desired pH is reached 3.2 to 3.6 range unhook everything and proceed to boil.Boil for 90 minutes, adding ingredients as indicated. At the end of the boil there should be 5.5 gallons of wort. Ferment at 66 F for two weeks. I highly recommend making a yeast starter and using yeast nutrient as well. Due to the low pH of the wort it's a harsh environment for the yeast, so having a large cell count and nutrients will help.

Related Products
All contents copyright 2024 by MoreFlavor Inc. All rights reserved. No part of this document or the related files may be reproduced or transmitted in any form, by any means (electronic, photocopying, recording, or otherwise) without the prior written permission of the publisher.
.jpg)


.png)
.png)
(1).png)
.png)