How to Craft 3 New England IPA’s at Once!
05/06/2022
By Andrew Sanford
Several years ago my son and I took a tour on the Portland Maine brew bus, stopping at several breweries and sampling their wares. One juicy, delicious IPA stood out – Bissel Brothers Substance. It was our first experience of the New England IPA style, and both of us have been hooked ever since. Apparently we were not alone in our appreciation of the beer. Bissel has rapidly grown to be a major Maine craft brewery, and the NEIPA style has taken the world by storm!
Ever since, I’ve been attempting to perfect my own NEIPA recipe and technique. I think the beer I brew has continued to get better. A big part of that improvement has been my adoption of larger batch brewing, splitting the batch and varying one condition at a time. I’ve tried different yeasts, adjusting the hop schedule, and sampling various hop varieties. At the end of the brew day, I have three kegs of different beer. I choose my favorite, and adapt the next brew session based on what I’ve learned. The recipe and process below represents my current favorite procedure.
The Grain Bill and Yeast for 15 gallons finished NEIPA
The above grain bill with my brew-in-a-bag procedure described below results in 15 gallons of wort with a starting specific gravity of about 1058. After fermentation, you can expect the finished beer to have about 6.3% ABV.
The NEIPA Hops – Dry Hopping the Split Batches with Different Hops Yielding Different Beers
Hop preference is personal. I’ve observed that many of the commercial NEIPA’s I most enjoy have
Citra and
Mosaic in them. Hence I’ve settled on Citra and Mosaic as my base hopping schedule.
Thirty years ago, when I began home brewing, conventional wisdom regarding hops was that late additions and dry hopping in particular only affected the finished beer’s aroma. Based on my experimentation, this is utterly and completely false. Lately, the key factor I have been altering between my three split batches on brew day is to simply dry hop them with different hop varieties. In my experience, the difference between the finished, served beer is remarkable.
The Secret Sauce Hop Schedule
I start my large, 18 gallon batch (which boils down to about 15 gallons) with identical hops. The first two hop additions yield about 33 IBU’s of bitterness, which to me tastes about right. The hop stand undoubtedly adds more IBU’s. I’ve found that about 3 ounces of a high alpha acid hop during the hop stand yields a well-balanced beer to my palate!
-
In 17 gallons of wort (the full batch), boil ¾ ounce of Mosaic Hop Pellets for 60 minutes
-
Then boil 2-1/2 ounces of Mosaic Hop Pellets for 20 minutes
-
Turn off the heat and add 1 ounce Citra and 2 ounces Mosaic hops. Steep for 45 minutes
-
Cool with an immersion cooling coil
-
SPLIT the cooled wort into three 5 gallon fermenters. Ferment, then dry hop with:
-
Fermenter 1 : “Down Under” NEIPA. – Dry hop with 1 ounce Topaz, 2 ounces Vic Secret
-
Fermenter 2 : “Choker” NEIPA– Dry hop with 3 ounces Mosaic
-
Fermenter 3 – “Tropical” NEIPA - Dry hop with 2 ounces Sabro, 1 ounce Mosaic
The ONLY difference between the three beers is the Dry hops. I think you will be amazed by how different the finished beers taste and smell, and be pleased by all three beers
My Full Brewing Procedure
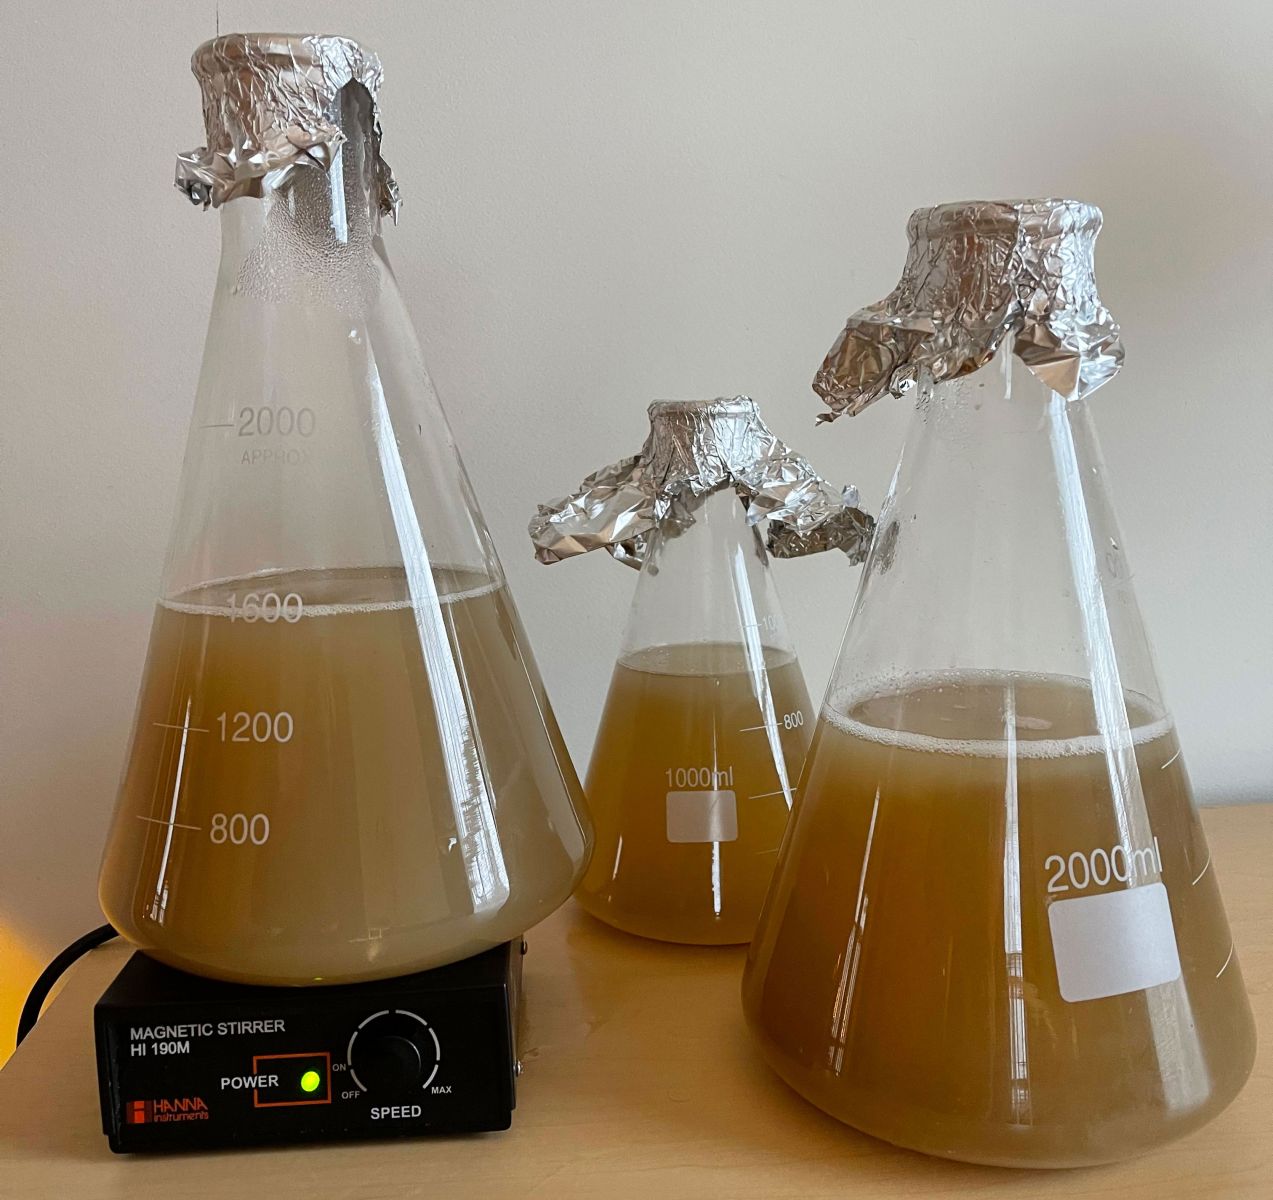
Step 1: Two days before brew day, I prepare three one-liter
yeast starters and split the liquid yeast among the 3 beakers. Let the starter cultures ferment and generate more yeast!
Step 2: On brew day, crack 30 pounds of 2 row malted barley in my
grain mill. Crack an additional pound of CaraPils malt. Set aside 3 pounds of flaked oats.
Step 3: Heat 18 gallons of water to 159 degrees Fahrenheit in my 20 gallon
brew pot I have very soft water, so I adjust my water chemistry using gypsum, calcium chloride, Epsom salts and baking soda to obtain a chloride oriented NEIPA water. Various brewing water calculators are available online for you to do the same.
Step 4: Turn off the heat and insert a brewing bag into the pot and 159 degree water. Dump the cracked malted barley and flaked oats into the brewing bag. Stir the mash and take a temperature reading. I find that my starting mash temperature is typically around 157 degrees at this point. Cover the brew pot and wrap with a sleeping bag to maintain temperature. Mash for an hour. In my cold Maine garage, the final mash temperature is often around 150-153 degrees after the hour mash.
Step 5: Raise the brew bag out of the pot (
I use a pulley), leaving the hot wort ready to be boiled in the pot. Because my brew pot is only 20 gallons capacity, I often top off the hot wort with a couple more gallons of water to ensure my final yield is 15 gallons (the grain absorbs some of the initial water).
Step 6: Turn on the
propane burner and heat the wort to a boil. I let the suspended grain in the bag drip into the pot of wort as it reaches boiling temperature. I also immerse my cleaned copper coil wort chiller in the boiling wort to sanitize it, and simply leave it in place during the boil.
Step 7: Add ¾ ounce Mosaic hops as the wort reaches a boil. I use a mesh hop spider to keep the hops contained.
Step 8: After boiling the first hop addition for 40 minutes, add the second 2-1/2 ounce Mosaic hop charge into the hop spider. Boil another 20 minutes. Total boil time is an hour.
Step 9: Turn off the burner. Begin circulating cold water through the
wort chiller until the wort temperature reaches 185 degrees. Add the final hop charge of 1 ounce Citra and 2 ounces Mosaic hops to the 185 degree wort (the hop stand). Turn off the cooling water and let steep for 45 minutes.
Step 10: Turn the cooling water back on and cool the wort to 70 degrees.
Step 11: Split the cooled wort into 3 5-gallon
fermenters. Pitch one yeast starter into each fermenter.
Step 12: Ferment at room temperature 3-4 days. During fermentation, I use the CO2 generated to purge my sanitized kegs of oxygen.
Step 13: After 3-4 days, when the fermentation slows down, I add the unique dry hop charges to each fermenter using multiple, small boiled muslin hop bags. I leave plenty of space in each hop bag for expansion since the hops expand significantly when they get wet, and I want all of that hop goodness to infuse into the beer!
-
Fermenter 1 : “Down Under” NEIPA. – Dry hop with 1 ounce Topaz, 2 ounces Vic Secret
-
Fermenter 2 : “Choker” NEIPA– Dry hop with 3 ounces Mosaic
-
Fermenter 3 – “Tropical” NEIPA - Dry hop with 2 ounces Sabro, 1 ounce Mosaic
I like to add the dry hops prior to fermentation being fully completed to allow any oxygen introduced by adding the hops to be scrubbed out by the remaining fermentation gases. Some argue that “bio transformation” of the hops also occurs if you add them during fermentation. I’ve found the procedure yields a tasting beer, regardless of the reason. Let the fermentation complete as indicated by no more airlock bubbling. Typically, fermentation is totally done after 6-7 days.
Step 14: Use compressed CO2 to close system transfer from each fermenter into a CO2 purged key. The NEIPA style is notoriously sensitive to oxygen exposure. I’ve found this to be empirically true, and take great care to avoid oxygen exposure after fermentation is complete.
Step 15: Force carbonate and serve. I think you will be amazed at how different the three beers taste and smell, solely because of the dry hop differences.
Final Thoughts
Time is precious, and I love that my new brew-in-a-bag 15 gallon recipes yield three kegs of finished NEIPA instead of just one. I also love obtaining 3 different tasting brews with minimal effort, just by altering the dry hop varieties. I continue to experiment with different dry hops, and sometimes different hops in the boil, to change things up and avoid boredom.
Finally, I’d like to share my learnings on what I believe matters regarding the quality of the final NEIPA, based on my experimenting:
-
The yeast. Discovering the difference the Burlington yeast makes was a game changer in terms of getting close to the NEIPA style
-
Dialing back the IBU’s. Many of my first attempts were simply too bitter. Moving toward late hop additions and hop stands resulted in juicy beer.
-
Moving to kegging to eliminate oxygen exposure. My personal experience is that using a bottling bucket with conditioning sugar or malt and a siphon results in lousy NEIPA. I attribute that to oxygen exposure, which is nearly impossible to avoid when bottling in the home brewery. Moving to CO2 purged kegs and closed system transfers increased my quality dramatically. I think some styles are less sensitive to oxygen, but if you like NEIPA, I think kegging is required.
-
The hops. Simply dry hopping with different varieties leads to dramatically different tasting and smelling beers.
Related Products
All contents copyright 2024 by MoreFlavor Inc. All rights reserved. No part of this document or the related files may be reproduced or transmitted in any form, by any means (electronic, photocopying, recording, or otherwise) without the prior written permission of the publisher.


.png)
.png)
(1).png)
.png)