How You Brew Anything is How You Brew Everything!
04/24/2022
By Charles Schafer
.jpg)
You might tell yourself things like “I’ll just throw this in instead, it’s basically the same thing, right?” or “Oops, forgot to clean that. Well, it looks good enough. It should be fine.” But in my experience “good enough” doesn’t usually end in a great beer. Maybe it will end up an okay one, but definitely not what I was hoping for. I know how homebrewers think, because I am one, and I’ve done this myself. Either I didn’t plan well the days before brew day, or I have too many other things going on, or I think “after all, this is only a hobby…”
But if I’m being honest with myself, homebrewing isn’t just a hobby to me. It’s a passion. Otherwise, why would I give up four to six hours on the weekend, plus all the cleaning and sanitizing and prep-work I do the week leading up to brew day, just to brew up some beer that I could otherwise “just buy at the store” as some of my friends like to say. Because, there’s nothing like tasting your own homebrew, especially when it comes out of the keg or bottle tasting just as good (if not better!) than what you can get off the shelf. And your parents, spouse, or the buddy from next door’s eyes light up and they ask “You made that?!”
That’s why I try to brew by the motto “How You Brew Anything is How You Brew Everything.” It reminds me to make each beer count, because the time and effort I put into each one is time lost doing other things. It reminds me to treat each brew day as a special event, requiring my full time and attention.
To avoid being caught off guard by surprises, I like to create a checklist to remind myself all the steps I tend to forget about to have a successful (and less stressful) brew day.
.jpg)
My Homebrewing Checklists
Prep Work (week leading up to brew day):
-
Make sure the brewing equipment is clean. This includes tubing, pumps, kettles, mash tun, chilling equipment, and the fermentation vessel. Can be done during the week.
-
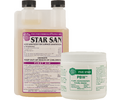
Do I have sanitizer solution to sanitize all the equipment on brew day? Prepare a sanitizer solution in a spray bottle for an easy way to sanitize equipment.
-
Do I have all the ingredients I need? Check your yeast packet “best by” dates (and have some extra on hand if you need them), your hop varieties in the freezer, and measure out the amounts of grains or malt extract the day before. If different grains need to be milled differently (or not at all), separate them out. Adding some rice hulls are usually a good idea for making sparging easier. If you don’t have what you need, get it.
-
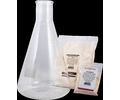
If needed, make a yeast starter the night before. Boil some malt extract in an Erlenmeyer flask, cool to room temperature, pitch your yeast and cap it with some aluminum foil. And use a stir plate if you have one to promote oxygenation and cell growth.
-
Bring all the brewing equipment out of the basement (or wherever you store yours) and get it ready to set up for the following day. Remember to bring your mash paddle, water thermometer, heat-tolerant gloves, chemical-resistant gloves, refractometer, whirlfloc (or other clarifying agent), and sanitizer spray bottle.
-
Bring out a bag to dispose of spent grain when you finish with the mash.
-
Double check the weather (if brewing outside). Plan to set up a tent if you need it.
Brew day:
-
Double check milling size before milling.
-
Take hops you need out of the freezer.
-
Remember to check strike water temps, mash temps.
-
Add FermCap Foam Control at the beginning of the boil to prevent boil-overs.
-
While waiting around, use the time to sanitize equipment and fermenter. Clean up used equipment like the mash tun after the mash step. Bring cleaned used equipment back into storage.
-
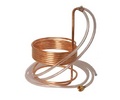
Set up plate chiller system before boiling time is over and run boiling wort through the system with 10 minutes remaining to sanitize before chilling.
-
Make sure to check original gravity before transfer using a refractometer.
-
Oxygenate the wort by splashing during transfer into the fermenter.
Post-Brew Day:
-
Use Barkeep’s Friend or similar to clean all stainless steel equipment.
-
Put hoses and other smaller items in a bucket with PBW.
-
Run water through both ends of the chiller plate to remove wort. Then bake it in the oven to remove any remaining moisture before putting it away in storage
Hopefully this list gives you some ideas that you can use to improve your own brew day process. The real difference in having a beer you want to share with all your friends and family and one that you “might as well make into beer vinegar” is very simple: taking the time and patience to improve your process and plan ahead.
Making sure everything is well
cleaned and sanitized. Ensuring you have a
healthy yeast culture. Getting the
right dark malt for the job or fresh
hops that fit the style or flavor you’re after. Sometimes making the best beer you can make requires better equipment. Like
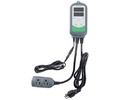
temperature control or that new
plate chiller that will help you save time. So before your next brew day, repeat after me:
“How You Brew Anything is How You Brew Everything” Each beer takes up time and attention, and we need to make that count. And whether that means choosing the right yeast, the right hop profile, or improving your equipment and cleaning practices, MoreBeer has you covered.
Related Products
All contents copyright 2024 by MoreFlavor Inc. All rights reserved. No part of this document or the related files may be reproduced or transmitted in any form, by any means (electronic, photocopying, recording, or otherwise) without the prior written permission of the publisher.


.png)
.png)
(1).png)
.png)