Logo


MoreBeer!
Replacement Rocker Switch for BrewZilla / DigiBoil | 240V | 30A
AG484

Replacement Rocker Switch for BrewZilla / DigiBoil | 240V | 30A

In Stock
Delivers to ( change ) by as part of our Fast & Free Shipping.
Faster Shipping Available. Details.
Returns
60 day no hassle return policy. Details
Description

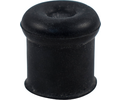
Replacement Rocker Switch for BrewZilla / DigiBoil. Compatible with all DigiBoils and Gen 3.1 or later Robobrew / BrewZillas.

Community Q&A

Start typing your question and we'll check if it was already asked and answered. Learn More
No questions have been asked about this item. Be the first!
Why did you choose this?
MoreFlavor Store
Nice to have an extra
Dawnie on Jan 23, 2023
update old switches
AJ H on Apr 17, 2021
Nice to have an extra
Dawnie on Jan 23, 2023
Originals blew out
Christopher B on Apr 25, 2022
update old switches
AJ H on Apr 17, 2021
Originals blew out
Christopher B on Apr 25, 2022
Reviews

4.3 / 5.0
3 Reviews
5 Stars
4 Stars
3 Stars
2 Stars
1 Star
2
0
1
0
0
Rated 5 out of 5
Correct Switch for a 35L Digiboil 1000w
Replacement takes about 30 minutes. Lay your digiboil on it side and remove the three screws from the bottom. Lay the bottom cover out of the way. The lower half will be able to slide down to give you room to work the old switch out. Make note of the position of the display panel in relation to the spigot before you remove the switch. Also note the wiring on the old switch(I marked the new switch with wire colors.) Look at your new switch, there are two "v" plastic tabs on the top and bottom of the switch, these hold the switch in place. I used a sharp utility knife to cut the bottom one off of the OLD switch while it was still in place. Now, press in on the other tab and work your old switch out. A flat blade screwdriver helps. Inspect the switch opening for any debris, install the new switch, add wires, and carefully slide the lower section back into place. Put the bottom on and, start one of the screws, then the other two screws and work around the bottom, making sure that the lower half fits snug and the insulation it not pinched. Tighten the screws and test the new switch.
April 4, 2025
Rated 5 out of 5
easy to replace as a DIY project
I appreciate how when parts begin to fail on my Brewzilla, repair and replacement is fairly economical and easy.

The 1900w rocker switch stopped lighting up. Fortunately, I just needed to replace the rocker switch, which is fairly easy to do. Just unscrew the bottom, use a pair of pliers to unplug the wires--use the 500 element rocker switch to take note of the wiring so you replace it properly. The hardest part was removing the old switch. I had to break it up with a hammer to get it out. But plugging in the new one is very easy. It was an easy fix and I'm back to brewing! I am uploading photos to show what it looked like when I opened up the bottom, and the blown-out switch. You'll see it's pretty clear that the swtich was blown out.
blown out swtich
side view blown out switch
view of 1900w and 500w rocker switches after removing bottom cover.
March 2, 2024
Rated 3 out of 5
Not the same design as Brewzilla 3.1 switch
This switch doesn't match the rounded switch with the accordion boot that comes standard on the Brewzilla 3.1. I'm not sure what version this matches. It might fit, I haven't checked it. Good to have a couple in the drawer anyway. You know switches don't fail unless you need them to work right now.
July 24, 2020
Purchased
over 4 years ago