A Novice Homebrewer’s Story of Making Cider
12/19/2022
By Tyler Crawford
Several months ago, a friend of mine shared with me an IPA that he had made from an extract kit. I thought it tasted pretty good, and it inspired me to learn to make my own beer. After purchasing a homebrew kit and making several successful batches of brew, I became interested in trying to make hard cider (or just “cider” for those of you across the pond). The idea of having a variety of beverages on tap, and the option of a shorter brew day were appealing. I also reasoned that if I could make good beer, surely I could make good cider. Internet research indicated that the process could be relatively easy, too. I knew that for my initial attempt I didn’t want to bother with boosting gravity or backsweetening the final product. I wanted to learn the basics, then worry about making more complex ciders as I gained experience. Keeping things simple, I knew I only needed apple juice or cider, yeast, and a fermenter.
I decided to purchase cider from my local supermarket. In the produce section, I found two different apple cider offerings: pasteurized and unpasteurized. I opted for the pasteurized cider and ensured there were no added preservatives. Preservatives would preclude fermentation by keeping the yeasty beasties from doing their job. Unpasteurized cider would have too much other wild stuff in it that I didn’t want to bother with. As I placed the jugs of cider in my shopping cart, I remembered I had some unused kveik yeast leftover from a previous brew day. For scientific reasons, I meandered to the juice aisle and grabbed three gallons of apple juice (because it was cheaper) to make an experimental cider alongside my legitimate endeavor.
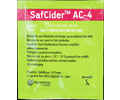
Next, I drove to the local homebrew store to pick up a funnel and yeast. The funnel was necessary so that I could pour the cider into carboys without making a huge mess. Among the selection of yeast, I chose Lalvin 71B - a wine yeast with high attenuation and alcohol tolerance - to make the most out of fermenting store-bought cider.
Since there is nothing to brew when making hard cider, “brew day” began with cleaning and sanitizing the necessary equipment: carboys, funnel, yeast packages, airlocks, etc. Three gallons of juice was poured into one fermenter, oxygenated, pitched with kveik yeast, sealed, and placed out of direct sunlight. I did the same for the pasteurized cider, the only differences were that the 71B yeast was used instead of kveik, and I actually took a gravity reading beforehand. 1.052 if you were wondering. At room temperature, fermentation began within 24 hours. A few days later, I noticed an aroma of sulfur emanating from the airlocks. The smell was much stronger with the kveik batch. It wasn’t pleasant. I recalled someone saying this aroma was normal and would subside in time. I was skeptical, but decided to believe the Internet.
Fermentation took just over a month to complete. Each cider was transferred into its own clean and sanitized keg. During the transfer, I diverted some of the hazy 71B batch into a hydrometer and took a gravity reading of 0.996. My calculation revealed a respectable ABV of 7.35%. The aroma still retained some hints of sulfur, but I was surprised to find the flavor to be on par with some of the commercial dry ciders I have tasted. I imagined this cider would taste much better if aged a little longer, so I placed it off to the side to revisit in the future.
Because of laziness, I did not take any gravity readings for the kveik batch. I was merely curious to find out if apple juice fermented with beer yeast would yield a palatable drink. So much for science, I guess. In my sample glass, I noticed the aroma possessed no detectable trace of sulfur. The flavor was mildly tart while still being faintly reminiscent of apple juice. The final product was clean, but not complex. Anxious to consume this one, I immediately placed the keg into my keezer, connected a CO2 line, and cranked up the regulator pressure to force carbonate.
After this experience, I do think it’s possible for a novice homebrewer to make good cider. If you’re on the fence about it, I say give it a shot! A novice doesn’t need access to bushels of fresh apples and a fruit press. However, cider made from store-bought offerings may lack complexity and mouthfeel depending on choice of juice and yeast used. Speaking of buying cider, I suggest starting with one gallon batches in the spirit of cheaper research and development. Personally, I’m prone to making mistakes during the learning process and would hate to waste a large batch of undrinkable cider. Additionally, I recommend racking cider into a secondary fermenter after several weeks to clean up any sulfury aroma. Getting the cider off of the layer of trub, or lees, in the bottom of the fermenter should help scrub out any remaining funky smells. Lastly, I wish I wouldn’t have neglected to take gravity readings. I regret not knowing the final ABV of the science experiment. At the very least, I can appreciate not having to share a story about how I accidentally made vinegar.
Related Products
All contents copyright 2024 by MoreFlavor Inc. All rights reserved. No part of this document or the related files may be reproduced or transmitted in any form, by any means (electronic, photocopying, recording, or otherwise) without the prior written permission of the publisher.


.png)
.png)
(1).png)
.png)