Yeast Culturing Practices for Small-Scale Brewers
01/10/2019
By Karl King (Brewing Techniques)
High-quality yeast cultures and culturing kits are available, but how do you use them? Here’s an overview of one successful method for culturing and maintaining your very own yeast bank at home, highlighting many of the components included with our Intermediate and Advanced Yeast Master Kits.
Not long ago, most small-scale brewers were using packets of dry yeast, and only a few brewers with professional microbiological training were able to culture yeasts for their own use. The introduction of high-quality commercial yeast strains in liquid and on gelled growth media (malt agar) changed the situation dramatically.
The number of yeast strains available to small-scale brewers has grown remarkably in the last 20 years. Further, excellent tools for yeast culturing are now available in
kit form, and they include easy-to-understand instruction manuals written for those without training in microbiological laboratory techniques.
High-quality yeast cultures make it possible to brew beers with lower levels of contamination from wild yeast and bacteria and with the characteristics that uniquely define specific beer styles. Consider the simple example of Dortmunder export lager. The grain bill and hopping schedule for this style are well known and unremarkable.
A North German lager yeast, however, is needed to achieve the flavor characteristic of this style. Fermenting with a
Munich lager strain, for example, will result in a taste profile more like that of Helles than of Dortmunder.
Maintaining your own yeast bank and culturing your own yeast also saves you money compared with having to buy packages each time, and it also facilitates the use of multiple yeasts in the brewing process. Active yeast can be reused if the time between batches is short, but yeast characteristics can degrade with continued use (diacetyl output will increase in lager yeasts, for example). Starting with a fresh culture avoids such problems.
The pioneering
Wyeast product line introduced many brewers to high-quality yeast cultures. The only significant criticism of the product is that one package supplies only a marginal amount of yeast for a 5-gal batch of beer. Pitching the contents of just one package can give an agonizingly long lag time. That problem has been addressed by
kits with instructions for growing a 0.5-L starter from the contents of one package. Kits are not the only way to make a starter, but they make collecting the equipment a lot easier and include descriptions of the basic techniques.
Beyond making a one-step starter, you can also
store yeast on slants and isolate single yeast colonies on plates (also called
petri dishes, though strictly speaking they are petri dishes when empty and plates when they contain solidified wort). The mechanics of setting up slants and plates are well explained in
commercial kits, so this article will not devote much space to those basics. But how are these slants and plates used?
Brewers that I’ve talked with know that yeast strains are available, and they know that the kits supply the tools, but they hesitate to use them because they lack an overall picture of yeast culturing and how it fits into the brewing process. This article presents an overview of how a small-scale brewer can apply the tools and the yeasts with confidence. I describe two example procedures to give practical form to the basic method. The method presented is not the only viable method, nor is it the most professional. Based on considerable experience with consistently excellent results, however, I am confident that any serious brewer can apply this method with success.
Starter Worts
Starter wort can be purchased in dried form, and now condensed wort in a can with
Propper Starter™ , or you can make your own. I prefer 1.020–original gravity wort for starter tubes and 1.040 for pitching solutions, 1.020 wort gives better yeast multiplication, perhaps because it holds more dissolved oxygen than 1.040 starters. The 1.040 solution comes closer to gravity of the wort to be fermented. I believe that yeast pitched into the wort will start faster if it does not have to adjust to a significantly different gravity.
Boilover is a problem when making small batches of wort. I use a BB-size piece of hop pellet to reduce the problem. I have had excellent results using Wander brand dry malt extract for the fermentable base, plus a tiny pinch of yeast nutrient from William’s Brewing (San Leandro, California). This mixture gives good growth and shows almost no tendency to boil over. The water used for mixing is very important. Never use high-carbonate water for these starters because high pH favors bacterial growth. If in doubt about your water, use distilled water. Starter pH should be no higher than 5.3. Start with about 20% more water than the volume you want because some will be lost during the 20-min boil.
One key item generally not supplied with kits is a portable flame source; the flame is momentarily passed over the mouths of containers to ensure that surfaces are sterilized and is used to sterilize the inoculation loop. Cigarette lighters have too small a flame, and gas stoves are not portable. A propane torch from the hardware store works well.
Sanitation is a key requirement for success in yeast culturing, and it is easier than you might think. No heroic measures are necessary. Plan and practice what you are going to do so that sterile containers are open for as short a time as possible. Work on a nonporous surface, remove rings, watches, and so forth, and spray hands with rubbing alcohol. (DO NOT USE ALCOHOL NEAR AN OPEN FLAME; it is extremely flammable!) A small spray bottle for rubbing alcohol is very handy. Garden shops or hardware stores sell such bottles. In addition to the precautions described in the kit literature, a previous article in BrewingTechniques has much useful advice.
Ste-By-Step Instructions
Example 1: A bottle-conditioned ale using yeast from a packet.
To explain the general procedure, let’s use a bottle-conditioned Belgian abbey beer as an example (recipe taken from reference 3). The conditioning yeast will be the same as the primary fermentation yeast. Using the same yeast for both is by no means necessary; extra complexity can be added to a beer if the strain used for bottle conditioning is different from the strain used for primary fermentation, especially if the bottling yeast has a nonneutral flavor.
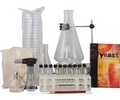
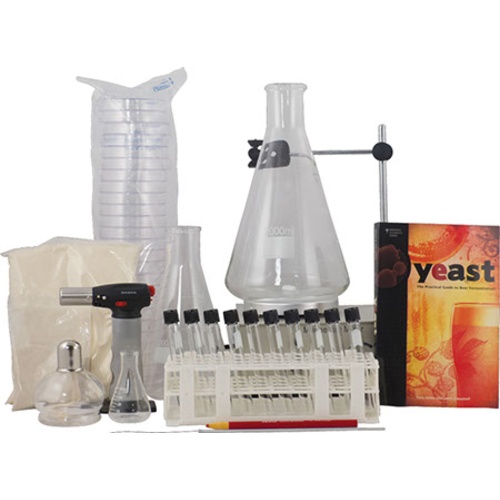
Typical Yeast Culturing Kit Components
Starter tube: A small, capped tube containing 10–15 mL of sterile wort. Used for expanding culture size.
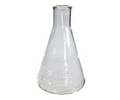
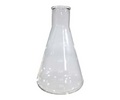
Flask: A laboratory-grade (Erlenmeyer) flask, narrow at the mouth but wide at the bottom, usually ½ or L in size. Used for expanding culture size.
Slant: A small, capped tube containing solidified (gelled) sterile wort. Used for long-term storage of yeast samples. Yeast is often supplied on slants when purchased.
Plate: A short, wide, covered dish to be half filled with solidified wort. Often called a petri dish. Used for isolating yeast colonies and short-term storage.
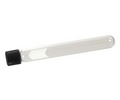
Inoculation loop: A metal rod with a wire extending axially from one end. The end of the wire forms a small loop. Used for transferring small amounts of yeast.
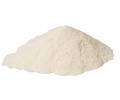
Growth media: Dry malt extract plus nutrients to feed growing yeast. Many specialized media are available, but this combination is easy for craft brewers to obtain, store, and use.
Boil starter solution (see box) for 20 min, cover, and then cool before adding yeast. The small containers of wort are easily cooled by placing them in a cold water bath for a few minutes.
Step 1: The day before you plan to brew, pop a packet of liquid yeast (I use
Wyeast #1214 for this recipe); it generally takes about 24 h to expand. On brewing day, prepare a 400-mL starter solution in
a 1-L flask. It is important to leave a couple of inches of headspace at the top of the flask to accommodate gas transfer (carbon dioxide out, oxygen in). A typical Wyeast packet will supply 40-50 mL of liquid. Increasing the volume with 400 mL of starter, a 10:1 increase, is about as much of an increase as should be attempted. An increase of not more than 6:1 is the professional recommendation. Pitch the yeast mixture into the cooled 400-mL starter, fold over the top of the packet and set aside, upright, for use in step 2, then cap the flask with aluminum foil. Oxygen and agitation are important to maximize yeast growth, and the foil cap allows oxygen to enter. Every few hours, hold the flask by the base and move it in a tight circular pattern to swirl the liquid gently. Store at constant room temperature (68 °F/20 °C). The solution will become hazy with growing yeast. Some yeast will settle to the bottom of the flask, and eventually bubbles of carbon dioxide will rise from the yeast. The yeast should be ready to pitch in 24 h (high kraeusen). Pitch into the primary fermentor and proceed as usual. The yeast should be up on the surface in 10-16 h.
Step 2: Some yeast is usually left behind in the packet. Cut off the top two-thirds of the packet and immediately use the dregs in the bottom to inoculate a plate. Seal the edges of the plate with tape or Parafilm (American National Can, Greenwich, Connecticut). Label the plate with the type of yeast and date. Put the plate in a zipper-type sandwich bag and invert so that the inoculated surface is face down. In 4-5 days, the yeast will have grown about as much as it can. Dots of yeast are usually colonies grown from single yeast cells. Healthy yeast will typically appear creamy white. Anything else signals gross contamination and the plate should be discarded. After the yeast has grown, store the plate in a refrigerator. Plates are not intended for long-term storage, but I have many that are good after six months of refrigeration.
Step 3: Two days before bottling, open the plate and use the inoculation loop to transfer a loop or two of yeast to each of two starter tubes. Flame the loop before starting and between each transfer. Reseal the plate and store. Leave starter tubes at room temperature for 24 h. The caps should be one-quarter-turn loose to permit gas transfer.
Step 4: Make a 200-mL starter solution in a
500-mL flask. Pitch the yeast from the two starter tubes into the 200 mL of starter solution and cover with aluminum foil. In 24 h the yeast will be ready to pitch for bottle conditioning.
Step 5: If the yeast on the plate is not contaminated (if it looks healthy as described above), a colony can be transferred to a blank slant for long-term storage in a refrigerator. Tape the junction at the cap or store in a plastic bag. Yeast on a slant will remain viable for 6-15 months, depending on the strain. Label the slant with yeast type and inoculation date so that you know when it is about to expire.
Example 2: A Weissbier using yeast from a slant.
Now let’s use the example of growing yeast from a commercial slant to make a Hefeweizen. In my recipe I use Brewers Resource CL-920, German Wheat, for primary fermentation because it produces the phenolics appropriate to this style. For the conditioning yeast, I use a neutral ale strain, Brewer’s Resource CL-10, American Microbrewery Ale #1. If you want a yeast that stays plastered to the bottom of the bottle, Brewers Resource strain CL-300, Belgian Ale #1, works well.
Step 6: Transfer a loop of yeast from the slant to a 10-15 mL starter tube. If this is the first time the source slant has been opened, immediately transfer a loop of yeast from that slant to a fresh slant; this step maximizes the possibility of propagating the yeast without contamination. Cap and label the starter tube as usual, wait 4-5 days, then store in the refrigerator.
Step 7: 24 h after step 6, make a 100-mL starter in a 250- or 500-mL flask. Pitch the yeast from the starter tube.
Step 8: Make a 400-mL starter in a 1-L flask and pitch the 100 mL of yeast, which should be at high kraeusen after 24 h.
Step 9: As an alternative to using a 100-mL starter, you could inoculate three or four starter tubes and use those to pitch into the 400-mL starter. This method works well when you are pulling yeast from a plate, which usually has plenty on its surface. Be aware that using three or four starter tubes also increases the probability of contaminating your pitching yeast by three or four times. Hold off on using this method until you are sure of your ability to manipulate yeast without introducing contamination.
Step 10: Each starter tube usually has a few drops of yeast left over after pitching. Those few drops can be used to inoculate a plate. Plating this yeast not only gives you another plate of the yeast, but is also a quality control check on your starters.
Step 11: If you find contamination in your starters, you can inoculate a commercially prepared plate directly from a slant. If the yeast grows properly and without visible contamination, it is almost surely a sign that your starters or techniques are faulty.
Yeast Theory and its Application to Brewing
Yeast is what’s known as a facultative anaerobe, which means that it grows both under aerobic and anaerobic conditions. Maximal yeast growth occurs under aerobic conditions or in the presence of oxygen. Other important factors influencing yeast growth are the pH, temperature, and growth medium. Actively growing yeast metabolize the sugar in wort at a much faster rate than nongrowing yeast. The purpose of a yeast starter is to accelerate the fermentation of wort.
Yeast growth can be divided into five stages.
-
Lag phase occurs during the first few hours after inoculation. Although no signs of fermentation or growth are apparent, the yeast are busy becoming acclimated to their new environment. All the enzymes and other metabolic machinery necessary to ferment wort into beer are being synthesized. All the oxygen you introduced into the cooled wort is taken up by the yeast within the first 20 min and is being stored (as sterols and unsaturated fatty acids) for later use.
-
During the accelerating growth phase, yeast cells start to divide rapidly.
-
The actual number of yeast cells increases during the logarithmic phase. During this time the number of yeast cells may increase as much as 1000-fold (or 3.0 logs) within 24 h.
-
As the oxygen and nutrients are depleted, the yeast enter a phase of decelerating growth (approximately 12 h) and ultimately reach a stationary phase.
-
During the stationary phase, yeast growth ceases.
-
Despite the rapid rate of yeast growth, a relatively large yeast starter or slurry of yeast is required for optimal beer production. Siebel Institute recommends one-sixth of the batch-size, one-tenth if you continuously aerate or agitate your starter. The scientific basis for this is currently unknown.
Use of lower pitching rates such as those typically used by home brewers — to of the batch size — yield slightly higher terminal gravities because of an alteration in the metabolism of sugars in wort. Generally the order of sugar consumption is glucose (10% wort sugar), sucrose (2% wort sugar), maltose (40% sugar), then maltotriose (10% sugar). When underpitched, all of the later fermented sugars are not metabolized. The end result is a sweeter beer with terminal gravities above 1.010. Underpitching along with underaeration of the wort (oxygen levels should be about 8 ppm) can yield gravities above 1.015.
As you increase the overall amount of yeast growth (such as occurs during underpitching), ester formation supposedly increases (according to the Siebel Institute). Theoretically, then, optimal fermentation does not involve significant yeast growth but rather more yeast metabolism of the wort and fermentation to alcohol. Optimal pitching rates should produce a balance between yeast growth and metabolism.
The only practical way for home brewers to achieve these types of pitching rates is by repitching their yeasts. Otherwise you would be pitching a 1 -gal starter (or its sediment) into a 5-gal batch! I recommend a compromise that is practical and routinely yields good results. Start with about 10 mL of wort, step it up at least once, and use 0.5-1 qt of starter/5 gal of wort. This is to of the total wort volume. Each of these steps is about 1-1.5 log dilutions and, according to the growth curves, should take less than 24 h to reach maximum growth. In general, strong ales and lagers require higher pitching rates (at least 1 qt/5 gal). Also, beware that using the standard starter conditions (1.040 O.G. hopped wort grown at room temperature) in these styles of beer may “shock” the yeast and increase the overall lag time. In this case, you may want to adjust your starter so that it more closely resembles the wort it is going to be pitched into.
You may then culture the conditioning yeast from a slant, using steps 3 and 4, or 6, 10, 3 and 4.
Homemade Stater Tubes, Plates, and Slants
If you culture yeast frequently, you will probably want to prepare your own starter tubes. Starter tubes are fairly easy to prepare, but slants and plates are more challenging. Capped glass tubes for starters and slants are available from scientific supply houses. You may be able to reuse empties from prepared commercial starter tubes.
After boiling starter wort for 10 min, let it cool and decant the clear wort. Wort can be injected into tubes with a clean plastic syringe. Steam the tubes in a pot of boiling water for 20 min. Cool, and make sure the caps are on tight before storage. Some sediment in the sterilized, cooled tubes is normal. Place these blanks in a sandwich bag and refrigerate. The starter solutions should remain clear over time. Any haziness or turbidity throughout the solution is a sign of contamination.
The wort can also be thickened with agar for use with slants and plates (2–3% [w/w] is common, but the ratio can vary widely with brand). Wide-bore syringes are useful for injecting the more viscous wort-agar mix into tubes. Slants must be steamed and then cooled at an angle to generate the necessary surface configuration. Store the same as the starter tubes.
If you have never worked with these items before, it would be good to start with the commercially prepared versions so that you have fewer variables to contend with.
Practice Makes Perfect
It may take a few tries to get comfortable with the culturing procedures, but once you do, you will be able to make full use of the yeast strains that are now available.
Related Products
All contents copyright 2024 by MoreFlavor Inc. All rights reserved. No part of this document or the related files may be reproduced or transmitted in any form, by any means (electronic, photocopying, recording, or otherwise) without the prior written permission of the publisher.


.png)
.png)
(1).png)
.png)