If you prefer to make your own beer directly from malted grain instead of using a premade malt extract, you need the right supplies to ensure that everything turns out as intended. Although all grain brewing requires a bit more time and effort than brewing with a malt extract, it is well worth it because you are able to customize the entire recipe and control the grain bill.
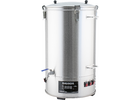
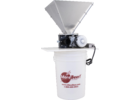
MoreBeer!’s all-grain brewing supplies cover every part of the brewing process, which includes milling, mashing, sparging and boiling. The Braumeister Electric All-Grain Brewing System is a high-quality system that includes all of the equipment required to brew beer from scratch, and we also offer top-of-the-line systems from Blichmann and other name brands. Shop full all-grain brewing systems or individual corresponding parts, all available at MoreBeer!
Looking for a complete list of equipment needed to move to All-Grain Brewing? Click here, to read our article on the subject!
No one doubts that great beer can be made from the wide range of malt extracts available today. Yet many extract brewers still talk about all-grain brewing as if it were something to aspire to. Why?
Brewers have many reasons to brew “from scratch.” One of the biggest is the increased control you can gain over the ingredients and processes used in wort production. Malt extract manufacturers usually do not disclose the ingredients or mashing parameters of their products, so their customers do not really know what they are getting.
Brewers also realize monetary savings when brewing all-grain. The small investment necessary to build a brewhouse is quickly recovered by substantial savings on ingredients. Quality malt extract is difficult to make, a fact that is reflected in its price.
Some brewers are impelled to brew all-grain for less tangible reasons. New all-grain brewers quickly gain a deep understanding of their product and are rewarded with a tremendous feeling of accomplishment every time they serve a pint. The time spent brewing is damn fun, too, which is good for the soul!
Some extract brewers have a long list of reasons for not trying to brew all-grain. Some people are concerned that the process will be complicated. The truth is that you don’t need a chemistry degree to mash—you need to learn a few basic concepts. Mashing principles have been covered quite a bit in the past. Some cite the initial expense of purchasing all-grain brewing equipment as a major hurdle. This worry, however, can easily be laid to rest. As this article shows, an advanced extract brewery can be converted into an all-grain brewhouse for very little additional expense.
Other brewers complain that they lack the space required for building an all-grain brewery. This myth is also easily dispelled. Many of my homebrew clubmates live in New York City, where space is certainly a luxury — yet they are still able to practice all-grain brewing.
The biggest hurdle for some people to overcome when advancing to all-grain brewing is the increased time requirement. It does take substantially longer to brew an all-grain beer than an extract beer. Many all-grain home brewers agree, though, that the time spent brewing is fun time and definitely worth the extra effort.
In this two-part series, you will see just how easy it is to assemble an all-grain brewery. This first installment details the essentials of designing and building your own all-grain mash system. If you already have an advanced extract brewery, you’ll only need to add a couple of inexpensive pieces of equipment to complete your brewhouse. Part II will discuss some optional equipment upgrades and common problems encountered in all-grain brewing, with an eye to expanding production capabilities.
To view our selection of all-grain brewing equipment, click here!
Here is a quick run-through of the basic equipment needed to accomplish each step of the process and the purpose each serves. You will quickly notice that although large breweries typically have separate vessels devoted to each task, home brewers can and do double up on their equipment.
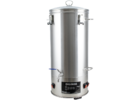
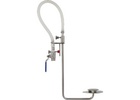
Mash tun: This is the vessel that holds the grain and water during the mash. The main requirements are that it be large enough to hold the amount of grain you would like to use (a 5-gallon batch of 1.050 beer requires about 5 gallons of mash/lauter tun volume) and that it be able to withstand and maintain temperatures up to 175 °F (80 °C). Larger brew lengths, or higher gravities, require larger equipment. Don’t invest a lot of time or money in a system that you may quickly outgrow.
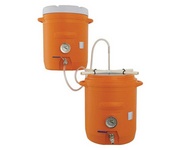
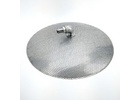
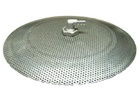
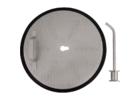
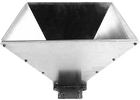
Lauter tun: This is the vessel that holds the grain during the sparge after the mash is complete. This vessel must also be able to withstand temperatures up to 175 °F (80 °C), and it should be tall enough that the grain bed will be about 12 inches deep (±4 inches). Many brewers (including most brewpubs) use their mash tun to lauter, but any vessel used as a lauter tun requires some sort of device at the bottom to prevent the grains from clogging the outlet. This device can be in the form of a false bottom or slotted manifold and can be either purchased or constructed.
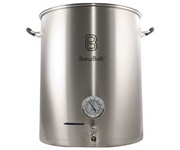
Boiling kettle: This is simply a vessel that can hold up to 20% more boiling wort than you will be casting out of it. So, for a 5-gallon batch, that means a 6-gallon vessel. If you are already doing “full-batch boils” as an extract brewer (as opposed to diluting with water at fermentation), your current pot will work. If a separate lauter tun is used, the kettle may also double as a mash tun. Your boiling kettle can be as simple as an enamelware pot or as expensive as a stainless steel vessel with a spigot. Again, your choice will be dictated by your budget, mechanical ability, and desires. Whereas the shape of the other vessels is not terribly important, the boiling kettle should be cylindrical; the kettle can then be used as a whirlpool for settling the hot break and pelletized hop debris.
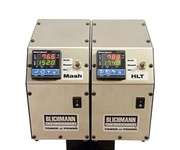
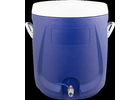
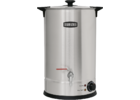
Hot liquor tank: A fancy name for a big pot that can withstand temperatures of 175 °F (80 °C) to heat water for sparging. The size of the pot depends on your brew length. A 5-galIon batch will require about 5 gallons of sparge water (it’s always better to have too much). You could use several small pots for this, or heat all of the water in your boiling kettle and transfer it to an insulated plastic bucket when you need to free up the kettle.
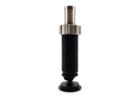
Click here to browse our selection of brew kettles, burners and accessories!
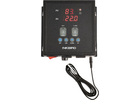
Heat source: A natural gas–fueled kitchen stove will work well with batch sizes up to 10 gallons. (I do 15 gallons on my stove, but I’m pushing it.) It helps if the burners are spaced so that your boil kettle will fit over two of them. This greatly speeds the heating cycle. Advanced heating options will be discussed in the next installment. Electric heat sources can be considered for an all-grain brewery, but they usually lack the power to boil batches larger than 5 gallons. An electric stove is also not desirable for mashing because of the difficulty in achieving accurate temperature increases.
Means of transfer: Whatever system you choose, you need some means of transfer for all the hot liquids. Depending on how many vessels you are working with, you will need to get wort from the mash tun to the lauter tun or kettle, then on to your fermentor — that’s why many brewers have devised ingenious two- or three-tier systems that take advantage of gravity.
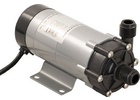
Limitless possibilities: Of course, you can accessorize your brewery with all sorts of optional equipment, such as mills, pumps, lauter grants, and sparge arms. The list is as deep as your pocket! Brewhouse add-ons will be addressed in the next installment.
All the equipment described above can be arranged into a functional brewery in many different ways. The specific design choices you make will depend on your needs. It is important that you consider five major factors:
It is unwise to spend a lot of time and money assembling a 5-gallon system, because once you realize that it is just as easy to brew large batches, you may want to upgrade. The best option for the beginner is to assemble your first all-grain system from inexpensive or readily available parts.
Keep your design considerations in mind while reading about the different systems you can build. Remember, each system can be personalized to fit your needs, so let your imagination loose!
Combined mash/lauter tun and kettle: The simplest system is the type used at many brewpubs throughout the United States — a two-vessel system consisting of a combi-tun (a vessel used to both mash and lauter the grains) and a boiling kettle. This system can be ideal when space is a problem because it requires only two vessels to clean and store. It also helps to minimize excessive handling of the hot mash, thus reducing the chances of oxidation (hot-side aeration [HSA]) and personal endangerment. Burns are never fun.
This system does, however, make precise control over mash temperature difficult because the vessel cannot be directly heated (the false bottom impedes uniform heating). You may need to enlist some smaller kitchen pots into service during the mash to control temperature by adding water. You would be able to do decoctions and cereal mash–cooking in these extra pots, too.
Separate mash and lauter tuns: Another common system requires separate mash and lautering vessels. Larger breweries often have systems of this nature so they can “stack” their batches and brew 8–12 times each day. After the mash is completely saccharified, it is pumped over to the lauter tun, freeing the mash tun for the next batch.
At home, this type of system can readily be duplicated without adding additional equipment — simply use your boil kettle as a mash tun. After the mash, transfer the grains and wort to the lauter tun. While the grain bed settles, you can wash out the mash tun so that it is ready for use as a boiling kettle after the sparge. This is how my own home system is designed.
Using the boiling kettle as the mash tun offers the benefit of directly heating the mash on your stove. Consequently, you attain control over the mash temperature without resorting to boiling-water infusions or decoctions. With the addition of an ordinary, kitchen-sized pot, you can expand your mashing to include decoctions and cereal cooking if you desire, and you still only have two large brewing vessels to store.
The disadvantage to this system is that the hot mash must be handled in some way to get it from the mash tun to the lauter tun. When brewing 5-gallon batches, it is only a minor inconvenience to use a Pyrex measuring cup to carefully transfer the mash. Larger batches may require more imaginative solutions (large diameter valves, for example, or some other means of dumping the grain from one vessel to the other).
While pondering your system options, keep in mind the types of materials you would like to work with. Brewing system components can be made from plastic, stainless steel, and other metals. The only limitations are your performance requirements and your budget.
Plastic: The least expensive lauter tun material is plastic. Two white, food-grade, plastic buckets are relatively easy to find and work with. Simply perforate the bottom of one bucket with hundreds of ⅛-in. holes (like a colander). Drill a single, 1-in. hole into the side of the other bucket, near the bottom. A plastic spigot (available at any decent homebrew shop) can be screwed into the hole. The bucket with the perforated bottom is placed inside the bucket with the spigot, and a lauter tun is born!
This arrangement, dubbed “Zapap” by Charlie Papazian in The New Complete Joy of Home Brewing, is simple, cheap, and effective. The design can be easily improved by wrapping some insulating material around the outer bucket. Together with an insulated lid, this lauter tun will preserve the temperature of the grains quite well. My first all-grain system used this type of lauter tun, and I made many excellent beers with it. Simple and cheap does not always mean inferior!
This vessel can also be used as a separate lauter tun or a combi-tun, thus adding flexibility to your system and cutting down on wort-handling time when doing simple, single-step infusion mashes. Of course, the major disadvantage to this system is that you cannot use direct flame on it if you undershoot your target temperature.
Picnic cooler. Another device that is readily converted to a lauter tun or combi-tun is a picnic cooler. With much the same performance characteristics of the plastic bucket system, picnic coolers have the advantage of size; they are generally big enough to brew 10-gallon batches. In comparison, plastic buckets are generally good only for 5- or 6-gallon batches. It takes just as long to brew 10 gallons of beer as it does 5, so why not have that extra capacity? The picnic cooler’s insulation also helps hold mash temperatures well.
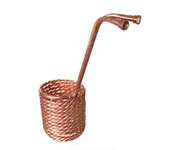
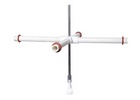
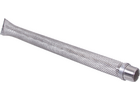
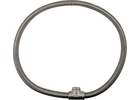
It does take a bit more mechanical ability to convert a picnic cooler into a brewing vessel than it does to make a Zapap. Picnic cooler tuns most often use some sort of manifold as a false bottom, constructed by cutting slots into pipes (copper works well) and soldering them together in the desired configuration. (See John Palmer’s article in “Further Reading” for more information on using a picnic cooler as a mash/lauter tun and for details on constructing manifolds.)
Metal/enamel: Metal vessels are very versatile; they can be used as boil kettles or made into lauter tuns or combi-tuns by adding either a perforated false bottom or a copper manifold. Although this kind of setup is much more elaborate than the Zapap system, metal vessels can be fabricated in almost any size (up to 500 bbl), are durable, and can be directly fired.
Enamelware. A simple 7-gallon enamelware pot can be purchased from most department stores for under $ 50. When the boil is done, you can chill the wort in the pot by using an immersion chiller or by siphoning it through a counterflow heat exchanger. With proper care, your enamelware pot can serve several purposes for many years before you put the inevitable, irreparable nick in it (the pot is useless for brewing once the steel is exposed because it can impart a metallic taste to the wort).
Stainless steel. Large stainless steel pots are more desirable than enamel for use as boiling kettles because of their durability. They can be purchased at restaurant-supply stores, but beware of “sticker shock” when you begin shopping. A stainless steel pot should last forever (barring nuclear attack or bizarre jackhammer accidents), so it is worth considering the extra cost.
Another advantage of stainless steel is that a competent welder can affix a threaded stainless nipple to the pot, allowing for the attachment of a ball valve. I recommend having this done; the ball valve facilitates the use of a counterflow heat exchanger (see below) and makes whirlpooling and wort transfer a joy.
Converted kegs. Sankey-type brewery kegs can be purchased, used, and converted into brew kettles. This can be less expensive than purchasing and modifying a stainless steel pot from a kitchen supply store. A “half keg” will hold 15.5 gallons of wort when filled to the brim. One danger of using a converted keg as a kettle is that the bottom rim does not contact any liquid and therefore becomes incredibly hot while a flame is on beneath it. Brief contact with it will cause a very severe burn. (See Martin Manning’s BT article in “Further Reading” for details on modifying kegs for use as brewing vessels.)
Aluminum. Finally, you might consider an aluminum boiling kettle. Aluminum is rarely considered as a brewery material, which is a shame. Aluminum is cheaper than stainless steel and also conducts heat better. Commercial breweries do not use aluminum because of its incompatibility with “clean-in-place” (CIP) chemicals such as sodium hydroxide (caustic soda). Aluminum is an option for home brewers, however, because they can scrub rather than resort to reactive chemicals. With proper care, aluminum pots should last quite a long time. They can be found in many sizes at restaurant supply stores.
|
All-Grain Glossary |
|
Brew length: The amount of beer being made. Combi-tun: A vessel that is used to both mash and lauter the grains. Counterflow chiller: A type of heat exchanger in which hot wort and coolant flow in opposite directions through separate lines that are in intimate contact with each other. Decoction: A portion of the mash that is drawn off from the main mash, heated to boiling, then returned to the main mash to effect a temperature increase. False bottom: A perforated plate that sits above the actual bottom of the lauter tun. Its purpose is to hold the grain bed in place so that the outlet pipes do not clog during lautering. The grain bed itself, not the false bottom, serves to clarify the wort. Hot-side aeration (HSA): Introduction of air into hot wort. Note that even though air does not actually dissolve well in hot wort, oxidation of the wort is greatly accelerated by high temperature. HSA can lead to flavor problems in the finished beer and a decreased shelf life. Immersion chiller: A type of heat exchanger that is immersed in the hot wort while coolant flows through it, removing heat from the wort. Infusion: A quantity of very hot (or boiling) water that is added to the mash to effect a temperature increase. Single-infusion mashing brings the temperature to a desired point with one addition of heated water. Lauter: The process of rinsing the grain bed with hot water to extract the sugars from it. Often used interchangeably with sparge. Mash: As a noun, it is the mixture of crushed malts (and any cereal adjuncts) and water. As a verb, it is the act of heating the crushed grains and water to specific temperatures to allow enzymatic reactions to occur. The reactions break the starches down into fermentable sugars. Manifold: Similar in function to a false bottom, but constructed of slotted tubing. Recirculation: The process of collecting the first runnings from the lauter tun and filtering them through the grain bed so that they are clarified. This is often referred to as the vorlauf. Saccharification: The enzymatic reaction converting starch into sugar. This occurs during mashing. Sparge: See lauter. Step mashing: A mash schedule with two or more rests at temperatures that optimize conditions for different enzymes. Allows for more control over the characteristics of the finished beer than a mash with one temperature rest. Vorlauf: See recirculation. |
Several other items will help you achieve the brewing control you desire. You may or may not have these items on hand already from brewing with extract, but they are highly recommended.
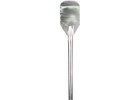
Temperature probe: You’ll need to decide what type of mashing you wish to perform: mashing at a single temperature is the most basic; holding the mash temperature at various levels (step mashing) provides another means of control; and decoction mashing (boiling portions of the mash separately) provides a means of raising the temperature of the mash and can also provide other benefits to the taste of the beer. If you want to get really fancy and do step mashes, you will need to consider how you will adjust and maintain the temperature of the mash. Think it over before you purchase any equipment.
No matter which mashing technique you choose, monitoring the temperature is very important. Even 5 °F difference in your mash temperature can make for a very different beer, and control is the whole point of all-grain brewing — so buy a good thermometer.
Wort chiller/heat exchanger: Just as with extract brewing, you need some way to cool your wort for fermentation. If you’ve gotten to the point of desiring more control by way of all-grain brewing, I highly recommend that you invest in some sort of heat exchanger, also known as a wort chiller. For a small investment, you will save time and make better beer. That’s a tough combination to beat!
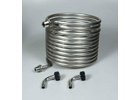
Immersion chiller. The simplest heat-exchanger design is called an “immersion chiller.” It is nothing more than 25 feet of coiled copper tubing with a length of garden hose clamped on each end. One end of the garden hose is attached to a faucet; the other is secured near a drain. The clean copper coil is immersed in the wort during the last 10 minutes of the boil to ensure sanitization. Once the kettle is removed from the heat, turn on the cold water tap and let the water run through the copper tubing, causing the temperature of the wort to drop rapidly.
Counterflow chiller. The other popular heat-exchanger design is the counterflow chiller, which is slightly more complex than an immersion chiller. It consists of a pipe within a larger pipe; the wort flows through the smaller inner pipe, while the coolant (usually cold water) flows in the opposite direction through the larger pipe. In this way, a large temperature difference is maintained between the coolant and the wort, and cooling occurs very rapidly.
The immersion chiller has two major advantages over the counterflow chiller: it is simple, and it cools the entire volume of wort uniformly. With the counterflow chiller, late hop additions may be evaporated off in the steaming wort that awaits its trip through the chiller.
Counterflow chillers out-perform immersion chillers in some ways, though; they cool the wort more rapidly, which allows for maximum cold-break formation and control of dimethyl sulfide (DMS) levels, which can lead to off-flavors. Theoretically, they are also more sanitary because the cooled, microbiologically vulnerable wort is safely sealed in a closed system.
If you have been brewing without a wort chiller, you do not know how good life can be. A counterflow- or immersion-heat exchanger is important to all breweries, regardless of how the wort is produced.
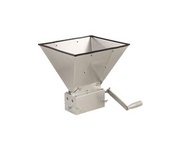
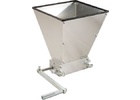
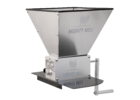
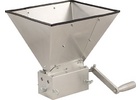
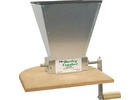
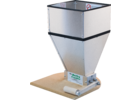
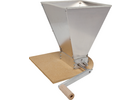
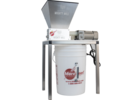
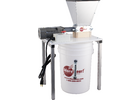
Mills: You can purchase crushed malt from virtually any home brew shop, but at some point you will want your own mill. Owning a mill will actually save you money; you can buy malt in larger quantities and crush it as you need it. More details about mills will appear in the next installment of this article.
Other items: There are a few more things you should have in your all-grain brewery. They are not absolutely essential, but they are highly recommended.
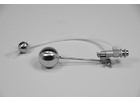
pH paper. I prefer ColorpHast strips, which read from pH 4.0–7.0. They are easy to use and read, and are fairly accurate. The pH of the mash has to be in a certain range for the enzymes to work properly. Luckily, the grain itself will often bring the mash pH into the proper range.
Iodine solution. Tincture of iodine, available at most pharmacies, is useful for determining the degree of saccharification in the mash. A small sample of the thin mash is removed from the tun and placed on a white plate (don’t put the iodine in the mash tun — it is poisonous!) Once it has cooled to room temperature, a couple of drops of tincture of iodine are put on it. A deep black-blue color indicates the presence of starch, whereas a deep red color indicates that unacceptably large dextrins remain (“iodine positive”). If there is no color change, saccharification is complete (“iodine normal” or “iodine negative”).
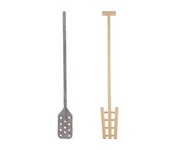
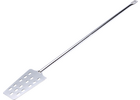
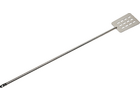
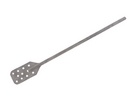
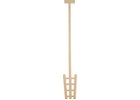
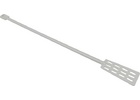
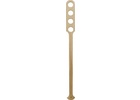
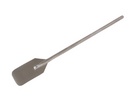
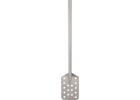
Mash paddle. An ordinary wooden spoon is useless for stirring much more than 10 lb of grain. A simple wooden paddle can be cut from a single piece of hardwood, greatly facilitating mash mixing. Do not use plywood to make a mash paddle; the adhesives used in its manufacture are not food-grade, and the pine wood will flavor the wort in an undesirable way.
With the tips offered in this article, you can assemble your new, all-grain brewing system during the next two months. In the next installment, you will learn the fundamentals of putting your new toys to use. You will also learn some of the most common problems in all-grain brewing and how to fix them should you forget to avoid them!


.png)
.png)
(1).png)
.png)