By John Jones
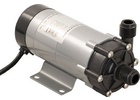
A simple brewing pump can be a brewer’s favorite piece of equipment. Pumps play such an integral role in moving liquid to and from vessels when means of gravity are unfeasible. Being able to push liquid through heat exchangers with flow control, whether that’s during mash or post boil, or even to control the amount of sparge water post mashing, or using them for clean-in-place (CIP) purposes, pumps are arguably one of the most crucial tools in a brewer’s arsenal that can impact brew day. However, they can also be a brewer’s most troublesome tool. Sweet wort is incredibly sticky, the thickness of trub, grain husk, and hop matter combined, can greatly increase your chances of clogs and having to troubleshoot your pump. However, one of the greatest pain points of brewing pumps is cavitation.
What Is Cavtation?
Sanitary centrifugal pumps are widely used in brewing and if you’ve ever used one, then you’ve probably heard the shrill sound of the pump screeching and quickly turned it off to get rid of that awful noise. That painful sound is usually attributed to cavitation within the pump, resulting in the stoppage of any liquid flow. What is cavitation exactly? Cavitation by definition is a phenomenon in which rapid changes of pressure in a liquid lead to the formation of small vapor-filled cavities in places where the pressure is relatively low. In brewing terms, cavitation is generally caused when air bubbles are introduced into the pump head and impellers. Centrifugal pumps are highly dependent on maintaining an equilibrium of dynamic pressure inside the unit to create and hold a vacuum. As the brewing process requires increased temperatures that releases vapors, especially during boiling temps and whirlpooling steps, it is inevitable that these gases will be released into the pump. This increases the likelihood that the pump will cavitate.
Reducing Cavitation
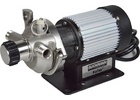
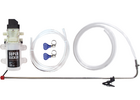
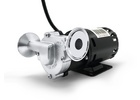
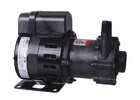
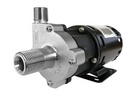
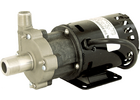
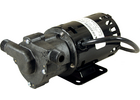
If it’s such a common occurrence, then how do we mitigate it? There are a few ways to reduce your chances of cavitation, and we will discuss a few modifications to your equipment that can help alleviate cavitation once you’ve encountered it. Make sure your clamps are tight and are not pulling any air in and your pump orientation is correct. Before you turn the pump on, prime your pump by closing the output valve and opening the liquid vessel valve to make sure your pump is full of liquid, and there aren’t any pockets of air. If you’re like me and want the top of the line available to homebrewer’s, I’ve had amazing success with Blichmann Engineering - RipTide Brewing Pump. This pump comes in 120V and 230V options, but the main focus points are the integrated air release valve on the pump head that allows you to release air and liquid to prime and purge to eliminate cavitation, as well as a tri-clamp head that is perfect for disassembly and optimal cleaning. If you’ve got a nice pump already, simply add a priming and purging port before your outlet valve. If your pump has a standard ½ inch MPT fitting on the outlet portion of the pump AND you already have an outlet valve, you’ll only need two items for your priming and purging port: Stainless Tee - 1/2 in. FPT and Stainless Ball Valve - 1/2 in. Full Port. Simply add a Tee prior to outlet valve and install the additional valve for priming and purging. If you encounter cavitation, your process flow will be to stop the pump, close the outlet valve, keep the liquid vessel valve open to fill the pump head assembly, turn the pump back on, and open the purge valve on the Tee. After priming and purging the pump, resume routine brewing activities.
Pump issues can be can be a brewer’s nightmare during brew day, but they are absolutely essential if means of gravity aren’t attainable and you plan on using any sort of heat exchanging method such as a HERMS, RIMS, counterflow or plate chiller where you’re pushing liquid and need to control the flow. Pumps are always a good tool to have in your brewing setup, and it is imperative to keep in mind that cavitation is a common pain-point when utilizing them in your brewing process. Therefore, it is important to understand how and why it happens, how to reduce and mitigate these common occurrences, so that your brew day can go off without a hitch!


.png)
.png)
(1).png)
.png)