By Louis K. Bonham
.jpg)
This article inaugurates a new column dedicated to the experimental spirit of specialty brewing. Overseen by the self-described mad scientist of brewing himself, Louis Bonham, The Experimental Brewer column presents a world of small-scale brewing explorations. This first installment starts with some basics by reviewing the tools of a practical brew lab.
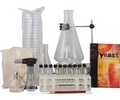
As a foundation for future pieces, this article describes how to construct an inexpensive, small-scale brewing laboratory. Not every brewing experiment or method of analysis requires laboratory instrumentation, but many do. Whether you are a serious home brewer interested in brewing better beer, a craft brewer needing to run regular tests, or an amateur brewing scientist, a small practical laboratory need not be beyond the reach of your imagination or wallet. The accompanying boxes list the equipment requirements and costs for a basic lab as well as options for a more serious setup. I’ve also included tips for the purchase and usage of some of the recommended equipment.
OK, so maybe you’re not interested in becoming the next George Fix, but if you want to get some fairly good hard data about your beer and brewing processes, run basic quality tests, culture yeast on occasion, or maybe even replicate a brewing experiment described in this column, then you’re going to need a proper setting. Or maybe you are a craft brewer who can’t yet convince the boss to spring for a full lab — but you still need to know if something is amiss before several batches of beer go off.
How elaborate should your laboratory be? That depends on your ambition, but the equipment and materials shown in the accompanying box (Setup 1) will enable you to obtain reasonably accurate data and run basic lab tests (including force tests — see the next issue for more details) for a minimal investment. Much of the economy of this setup is derived from the use of presterilized plastic labware and prepared media. Although it may be cheaper in the long run to invest in reusable labware and prepare your own media, using throw-away materials greatly simplifies matters for the occasional lab user or cash-strapped brewer. Brewers who know their way around a microscope can work their way up to a more sophisticated laboratory setup (see Setup 2).
Laboratory thermometer: A good laboratory thermometer is important both for directly measuring critical processes and for periodically checking the accuracy of other thermometers in the brewery. Cynmar Corporation offers a good option: a mercury-filled lab thermometer encased in Teflon. The Teflon coating makes it less likely to break and encapsulates the mercury and glass shards if it does. It is calibrated against NIST standards (±1 °C) and sells for less than $10. Note, however, that a mercury-filled thermometer should be used primarily to calibrate other thermometers; health codes may limit or prohibit their direct use in commercial brewing activities. Other options are available for daily use.
Gram scale: A good gram scale is essential for the accurate measurement of hops, water salts, fining agents, and other materials. If price is paramount, counterbalance scales provide acceptable accuracy at a low price. Precision Weighing Balances, Inc., offers a 500-gram counterbalance scale that is legal for trade, accurate to ±1 gram, practically indestructible, and costs less than $20. If you want to spend a bit more to get a digital scale, inexpensive new units of comparable accuracy can be found for less than $100 from manufacturers such as Ohaus and Acculab (available at many laboratory supply houses) and Cynmar.
Coors plate: Do you perform iodine tests for conversion? Spend $2 on an inexpensive Coors plate, and you’ll get much clearer results. Just put a drop or two of the sample in one of the depressions in the plate, add a drop of iodine, and swirl. If any starch is present, it will react with the iodine and form a “bullseye” that’s very easy to detect (thanks to fellow brewer Andy Thomas for showing me this trick).
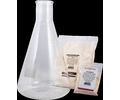
Prepared media: The Brewing-Science Institute sells a variety of user-friendly, sterile, ready-to-use media for $ 0.80 a shot (plus shipping), in any quantity. Besides wort agar plates, they also sell plates of LMDA (differential media for identifying the eight common genera of brewery bacteria), RDMA (easy-to-use test for respiratory deficient petite mutants), LCSM and LWYM (wild yeast detection), tubes of HLP (lacto-bacillus and pediococcus test), HRM (nondifferential test for bacteria) and other useful prepared media. The Brewing-Science Institute also offers an excellent lab manual (Brewer Laboratory Handbook, $10) that contains concise and easy-to-follow descriptions of basic QA/QC and lab procedures. It’s very short but full of practical, clear descriptions of procedures such as yeast strain purification, Gram staining, and catalase/oxidase tests.
Water bath/incubator: While not essential, a water bath/incubator is recommended for growing yeast cultures and performing various quality tests in the 80–85 °F (27–29 °C) range. You can cobble one together for little or nothing. See the box, “How to Build an Inexpensive Homemade Water Bath/Incubator” below for instructions on how to build a simple unit that uses a cheap aquarium heater (less than $10) as the heat source and thermostat.
|
Setup 1 — A Basic Set of Laboratory Equipment and Supplies |
||
|
The suggested vendors are all companies with whom I have either personally done business as a customer or who have been recommended to me. I have no personal or financial stake with any of them. Some of the items (such as the disposable pipettes and 50-mL tubes) may be purchased at a substantial discount from a laboratory supply house if you get a few friends together and purchase the minimum quantity (usually 500). |
||
|
Item |
Suggested Source |
Estimated Price |
|
Homebrew shop |
$10 |
|
|
Finishing hydrometer (0-6 °P) |
Mangel, Scheuermann & Oeters |
$12 |
|
Cynmar |
$10 |
|
|
Precision Weighing Balances |
$20 |
|
|
pH papers (4.6-6.2 range) |
Brewers Resource |
$3.50 |
|
Brewers Resource |
$10 |
|
|
Inoculation loops (nichrome) |
Cynmar |
$1.40/ea. |
|
50-mL plastic tubes (sterile, with cap) |
Williams Brewing |
$12.90/25 |
|
Test tube rack |
Cynmar |
$5 |
|
Disposable transfer pipettes (sterile) |
Advanced Brewers Scientific |
$3.50/25 |
|
Coors plate |
Cynmar |
$2 |
|
Cycloheximide solution (in 30-mL syringe with sterile filter) |
Scientific Service |
$30 |
|
Prepared media (see above) |
Brewing-Science Institute |
$0.80/ea. |
|
Peroxide (3%; catalase reagent) |
Drugstore |
$1 |
|
Oxidase reagent powder* |
Sigma/Aldrich Chemical |
$15 |
|
Yeast starter tubes (“SuperStarter”) |
Brewers Resource |
$4.50/6 |
|
1-gallon wine jug (for growing yeast starter) |
Home |
free |
|
70% ethanol (Everclear) |
Liquor store |
$6 |
|
Spray bottle |
Hardware store |
$2 |
|
Aquarium heater incubator (see above) |
Discount store |
$10 |
|
|
||
If you’re a craft brewer with a budget for a lab, or a truly dedicated home brewer, Setup 2 (see box below) is for you. These items, combined with the equipment described in the basic lab setup (Setup 1), will enable you to get very good data about your procedures as well as handle most yeast culturing and basic QA/QC tests.
Microscope: The heart of any serious small laboratory is a good microscope. In this area, you tend to get what you pay for, and a cheap microscope is rarely worth the trouble. One option is to get a reconditioned laboratory microscope from a reputable dealer. You can often obtain brand-name models (Zeiss, Leica, Nikon, Olympus, or older American Optical or Bausch & Lomb units) for less than the price of a comparable new microscope from a less reputable manufacturer.
|
Setup 2 — Laboratory Equipment and Supplies for the Serious Brewer |
||
|
Item |
Suggested Source |
Estimated Price |
|
Refurbished lab microscope |
Scientific Service |
$300–500 |
|
Microscope kit (hemocytometer, methelene blue solution, slides, cover slips, immersion oil, lens paper) |
Scientific Service |
$150 |
|
Gram stain kit |
Thomas Scientific |
$25 |
|
Homebrew shop |
$125 |
|
|
Precision Weighing Balances |
$120 |
|
|
Cole-Parmer |
$110 |
|
|
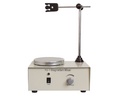
Hot plate |
Discount store |
$15 |
|
Brewers Resource |
$75 |
|
|
Bunsen burner |
Cynmar |
$8 |
|
Screw-top culture tubes |
Cynmar |
$69/72 |
|
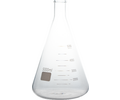
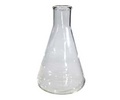
125-mL Erlenmeyer flasks* |
Cynmar |
$18/12 |
|
Cynmar |
$17/6 |
|
|
PLE |
$11 |
|
|
500-mL vacuum flask* |
PLE |
$13 |
|
300-mL filter funnel with membrane filter holder* |
PLE |
$110 |
|
Membrane filters (47 mm, 0.22 micron) |
Thomas Scientific |
$75/200 |
|
Aspirator vacuum pump |
Thomas Scientific |
$ 15 |
|
Disposable petri dishes (100 mm size) |
Cynmar |
$10/100 |
|
2.5-gallon carboy (for yeast starters) |
Homebrew shop |
$10 |
|
Graduated cylinder (plastic, 100 mL) |
Cynmar |
$ 1 |
|
Volumetric flasks (Class A) (10 mL, 50 mL, 10 mL) |
Cynmar |
$8/ea |
|
Pipette pump (Pi-pump II, 25-mL) |
Cynmar |
$12 |
|
Graduated Mohr pipettes (1 mL, 5mL, 10mL, 25 mL) |
Cynmar |
$3/ea |
|
21-quart pressure cooker |
Fungi Perfecti |
$150 |
|
Prepared media |
Brewing-Science Institute |
$25/liter |
|
|
||
Hemocytometer: A device with grids used with a microscope to take a yeast cell count. Methylene blue dye comes in handy to further ensure not only that adequate numbers of yeast exist, but that they are also viable. Brewers Resource sells both; the hemocytometer alone sells for about $130.
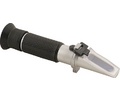
Refractometer: If you have ever used a refractometer while mashing, you know how handy they are. A drop or two of wort is all you need to assay your gravity and the progress of your mash instantly. Highly recommended.
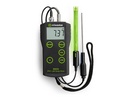
pH meter: If you are going to get a pH meter, I suggest getting either a used bench meter (I found one through a want ad on the internet auction and classified advertising market LabX; see the suppliers box for more details) or a hand-held unit that has automatic temperature compensation capabilities and uses replaceable electrodes (meters cost $100–300, depending on accuracy). The price may seem steep, but although pocket pH meters can be purchased for $50 or less they typically lack temperature compensation or replaceable electrodes. As a result, they tend to have a short life span and give fairly inaccurate readings.
0.01 gram scale and volumetric flasks: These items are useful for a variety of lab tests and for preparing reagent solutions. If you really want to know what your gravity is, be sure to get a Class A 100-mL volumetric flask (they cost as little as $8) and a scale that’s accurate to 0.01 of a gram (triple balance scales of this sort can be found for $125; comparable digital scales start at about $200). These tools may not be as accurate as a pycnometer and a milligram (0.001 gram) balance, but they’re not as expensive either. And besides, who really needs to know their specific gravity to within 0.00001 points?
Filter funnel/vacuum pump: These tools are particularly useful for craft brewers who need to get accurate measurements of low-level contaminants in beer or water. The typical procedure calls for you to filter 100 mL of the liquid to be tested through a special membrane transfer the membrane to a petri dish, and count the colonies that grow.
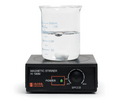
Stir plate: Stir plates are great for growing yeast starters quickly and for running forced fermentation tests. Stir plates are available for less than $75 from numerous sources, or you can build one yourself. Hot plate/stir plate combinations are very useful, but are much more expensive.
At this level, you’re either a very serious craft brewer, an amateur who is truly rabid about his beer (and has lots of disposable income), a master scrounger of used lab equipment, or else you’ve got access to a commercial or university laboratory. What follows is a cursory overview of some of the advanced lab equipment that can be used by small-scale brewers.
Milligram balance: OK, so you do want to know your specific gravity to within 0.00001 points, as well as be able to prepare the reagent solutions needed to run some fairly sophisticated lab analyses. You’ll need a scale accurate to 1 milligram (0.001 g) or better. (To assess gravity to a high accuracy, you’ll also need a pycnometer.) Milligram scales used to cost more than $1,000, but new digital milligram scales can now be found for about $400.
|
How to Build an Inexpensive Homemade Water Bath/Incubator |
|
This is not the most elegant design for an incubator, and temperature control is fairly coarse, but it works. It’s also cheap, compact, and easy to construct. Cut styrofoam as shown in the diagram (it should fit snugly into the container). Mount the aquarium heater on the side of the container (I use the bottom 12 in. of an old Cornelius keg). Fill the container with water to within 4 in. of the rim. Plug in the heater and adjust the control to hold the water at about 86–88 °F (30–31 °C); use a thermometer to confirm the setting. If you are incubating flasks or bottles, just set them in the water bath so that the water level is below the neck of the flask or bottle (you may need to use a donut-shaped weight or place the sample atop something). If you are incubating tubes, install the styrofoam cover at water level and put the tubes in the holes (they should fit snugly). If you are incubating petri dishes or baby food jars, just set them atop the styrofoam. In all cases, cover the top of the container with the towel. Remember that the water in the bath can harbor all sorts of microbes. To guard against this, I suggest cleaning everything thoroughly before each use and adding sanitizer to the bath water (I use 1/4 tsp of StarSan for each gallon of water). |
UV/Vis spectrophotometer: Want to know your beer’s actual (not estimated) IBU levels? How about the alpha- and beta-acid levels of your homegrown or aged hops? Beer color to two decimal places? Protein, FAN, diacetyl, and total polyphenol levels? For these things, you’ll need a spectrophotometer that covers the visible and ultraviolet ranges, plus an array of reagents and miscellaneous labware (and a copy of the ASBC Methods of Analysis). You may also need a bit of instruction in its use. These instruments typically start at about $5,000, but good used units can be obtained from reputable dealers for about $1,500 and occasionally at surplus auctions for much less. I got mine at a surplus auction for the princely sum of $10.
Laminar flow hood: Although Dr. Fix recommends using a glove box for various sterile techniques, most microbiologists use a laminar flow hood. This device creates a sterile environment by directing a constant flow of sterile air over your work surface. The sterile air is produced by a HEPA (high-efficiency particulate air) filter. Small units can be constructed for less than $100, but you’ll want to test them periodically with plates of wort agar, universal beer agar, or tryptic soy agar to make sure that the HEPA filter in the laminar-flow hood is doing its job and not just blowing germs onto your work.
Note: Laminar flow hoods and glove boxes are a nice addition to a small brewing laboratory, but don’t think that they are absolutely essential. Some microbiology experts, including Paul Farnsworth of Scientific Service, argue that they really aren’t necessary if you do your sterile work in a draft-free environment, wash your hands, spray your work surface with a disinfectant, and do your critical work in the hot air plume of a bunsen burner or a propane torch.
Pressure cooker: These are used to completely sterilize certain types of equipment and media. While small (2–4 quart) pressure cookers can be had fairly inexpensively, they are usually too small to handle flasks or jars of media. Fungi Perfecti has a selection of large (21–41 quart), industrial-strength pressure cookers and pressure sterilizers (similar to a pressure cooker, but with a pressure gauge and adjustable valve) at very good prices, starting at about $150.
Carbon dioxide volume meter: These units measure the carbonation levels in beer kegs or tanks. Some experts believe that after a microscope and pH meter this is probably the most important piece of lab equipment for any commercial brewery. The unit manufactured by Zahm & Nagel is the most common.
Air tester: These units allow you to quickly determine both the carbon dioxide and air levels in bottled beer. This gadget is absolutely essential if you’re running a bottling line or lay awake at night worrying about the shelf life of your competition beer. Again, Zahm & Nagel sells a popular air tester.
Dissolved oxygen (DO) meter: If product consistency is of critical importance, you’ll need to pay close attention not only to your pitching rates and the health of your yeast, but also to how much oxygen is available to the yeast at pitching. A DO meter allows you to measure dissolved oxygen and adjust your aeration to keep levels consistent from batch to batch. Cheap pocket DO meters are available; like pH meters, however, they are rarely as reliable or accurate as a good bench-type meter with a replaceable probe.
Centrifuge: New lab centrifuges can be very expensive, but good used ones can be found at surplus auctions for almost nothing or can even be fabricated from an old blender. With a centrifuge, you can easily extract all sorts of contaminants and other compounds from a sample of beer. Knowing how to identify what you’ve extracted, however, is far from easy. If you’re into this, get yourself a centrifuge, a copy of Paul R. Glenister’s Beer Deposits: A Laboratory Guide and Pictorial Atlas, a good microscope, various stains, and start practicing.
All contents copyright 2024 by MoreFlavor Inc. All rights reserved. No part of this document or the related files may be reproduced or transmitted in any form, by any means (electronic, photocopying, recording, or otherwise) without the prior written permission of the publisher.


.png)
.png)
(1).png)
.png)