You can put together the best homebrew recipe in the world, but if your yeast aren’t happy, you’re not going to be happy with the results. The microscopic fungi that turn sugary wort into delicious beer need a healthy, happy work environment to do their thing, just like we all do, and that means it’s up to the brewer to make the brewing process a stress-free workplace for our tiny friends. One of the best ways to do this is to ensure that your yeast are fully healthy and that there are enough yeast cells to do the job. Creating a yeast starter before your brew day is the best way to do that.
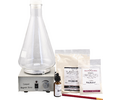
To ferment an average strength ale, you need nearly a quarter of a trillion healthy yeast cells. No matter what yeast strain you plan on using, a starter is highly recommended, and if you’re brewing a higher gravity ale or a lager, it’s all but required. We recently tested our own 2000 ml Yeast Starter Kit to go through the process step-by-step.
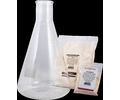
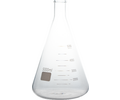
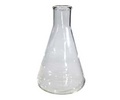
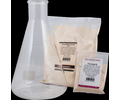
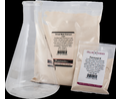
The yeast starter kit comes with a 2000 ml Erlenmeyer flask, a packet of dried malt extract (DME), and a packet of Fermaid K yeast nutrient. Our instructions are rather simple and easy to follow. It’s a good idea to start by sanitizing your equipment with Star San or other neutral sanitizer, though you’ll be boiling your starter, so it’s not completely necessary (just good practice!)
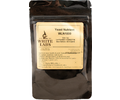
The first step is to mix the DME and Fermaid K with 1800 ml water in the Erlenmeyer flask. Unless you’re very careful, we recommend using a kitchen funnel to get everything into the narrow neck of the flask. Add your dry ingredients first so they don’t stick to the neck once it’s wet. Mix them with a long, narrow stirrer, and boil for 15 minutes.
The flask is designed to withstand direct heat, so if you have a gas stove, put your flask directly on the burner on a low flame. If you have an electric stove, you’ll have to put the flask in a pot of water to boil. It will take a little longer to boil this way, but it’s a much safer option, since the heat fluctuations of an electric element can potentially compromise the flask. Monitor the mixture carefully to prevent boil overs, which can erupt from the narrowing neck of the flask quickly. Remove from heat if it begins to foam up, blow on the foam to knock it down, and reduce heat when you return the flask to the surface. Please note: The flask will be extremely hot, so if you must remove it from the heat, make sure you have kitchen mitts readily available! DO NOT TOUCH with your bare hands!
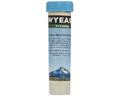
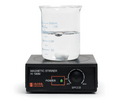
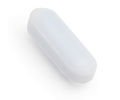
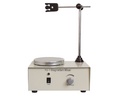
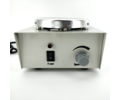
After boiling for 15 minutes, place your flask in an ice bath and allow it to cool down to room temperature. Once it’s at room temperature, add your yeast. Cover the neck of the flask with sanitized aluminum foil securely, and set aside for a day or two. You’ll want to periodically stir the mixture by either swirling it around, or stirring it with a kitchen utensil (make sure whatever you use is sanitized). We would recommend using a stir plate for this however, so if you have a stir plate, use that. You want your yeast to have plenty of oxygen, which will allow it to build strong cell walls in preparation for its eventual task of fermenting your wort. You should see activity pretty quickly. While we recommend making your starter 1-2 days before pitching it, even making it the night before your brew day is better than nothing. So once your wort is in the fermenter and is at pitching temp, you’re ready to add your starter and start your fermentation with happy, healthy yeast!
This yeast starter kit is a simple way to ensure you have strong enough and plentiful enough yeast to have a healthy and complete fermentation. We also carry 1000 ml and 500 ml starters for smaller batches.
All contents copyright 2024 by MoreFlavor Inc. All rights reserved. No part of this document or the related files may be reproduced or transmitted in any form, by any means (electronic, photocopying, recording, or otherwise) without the prior written permission of the publisher.


.png)
.png)
(1).png)
.png)