by Martin P. Manning (Brewing Techniques)

A well-modified half-barrel keg should be easy to make, easy to use and care for, and avoid the common pitfalls encountered in many designs. This article presents step-by-step instructions for making a system that has proven successful in all of these areas
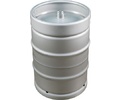
Without a doubt, the first choice for a brewing vessel in an advanced amateur system is a modified half-barrel keg, such as the ones that the large commercial brewers use to distribute their beer. They are constructed of high-quality stainless steel and are perfectly sized for brewing batches of 5–12 gal. They are readily available, and even when purchased new are much less expensive than a stainless steel stock pot of similar capacity, which is virtually the only off-the-shelf alternative.
In my opinion, the most desirable kegs are the cylindrical (straight-sided), single-valve (Sankey) type. They have larger top and bottom areas than the barrel-shaped variety and therefore provide easier access from the top and a larger area at the bottom for the heated surface (assuming that you plan to use an open flame at the bottom for a heat source). Also, with cylindrical kegs it is easier to make volume measurements.
Click here to browse our selection of sanke kegs, sanke taps, and sanke accessories!
I have seen numerous schemes for converting half-barrels to kettles, each one a little different from the last. Before constructing my own, I gave some careful consideration to the design requirements, and I have yet to see a solution that I like better.
Access: To gain access to the inside, you have a choice of two options: cutting off the entire top, taking the keg’s handles with it, or cutting a hole in the domed top. I strongly recommend the latter, unless the upper rim has been so damaged that making a 12-in. round hole in the top is impossible or unless you are height-limited when the keg is positioned on the heat source. You will need handles of some kind, so you might as well use the ones that come with the keg. I would not bother to cut the top rim down between the handles either, unless not doing so limits access because of a height restriction.
You can cut the top out using a reciprocating saw and a bimetal, 18-TPI (teeth/in.) blade. Get a variable-speed saw, and run it at minimum speed, cooling the blade frequently with spray lubricant as you go. Otherwise, you’ll go through a lot of blades. Plasma cutting is also acceptable. If you use plasma, put enough water in the keg to cover the bottom before cutting. This will protect it from the hot discharge from the cutting process. Whichever method you use, you can smooth any rough edges around the opening using a sanding drum mounted on an electric drill.
With a round hole in the top, the usable volume is maximized and you can use a commercially made cover, which can be purchased from a restaurant supply dealer. I happened to have a 12-in. cover from an inexpensive stainless pot. I use it to minimize heat loss when heating water, to increase the vigor of the boil when brewing large batches, and just to keep dust out when the kettle is not in use.
Drain system: The drain system should provide easy disassembly and cleaning and require a minimum of tools and time. It is also important not to create areas where small volumes of wort are surrounded by heated surfaces. Excessive caramelization or even scorching and subsequent cleaning problems can result. Some kind of strainer or false bottom should be included to prevent hops and trub from entering the plumbing downstream. The strainer should be situated such that the volume under it is minimized. Such an arrangement will ensure that the wort beneath it, which contacts the heated surface, is exchanged quickly. Finally, given that a valve of some sort will be close to the kettle, it should be protected from the heat source, both for operator safety and to prevent wort from accumulating inside and caramelizing or burning.
The drain system in my kettle, shown in Figure 1, uses an internal siphon tube drawing from below a small (8-in. diameter) false bottom. The outlet fitting is located on the side of the keg above the domed bottom, which requires only a simple weld to attach a threaded coupling. I have seen kettles with a notch cut in the lower rim, and a drain tube welded into the domed bottom of the keg in an effort to keep from leaving too much wort behind. Not only is this a more difficult construction, but hot gases rushing up through the notch will cause excessive heating of the drain tube and valve. The siphon tube arrangement allows the kettle to drain completely, even though the valve and coupling are located well away from the heat source. The stainless ball valve on my kettle is connected to the welded-in coupling with a 2-in.-long stainless pipe nipple, and it remains cool enough to touch even after a long boil.
To install the ⅜-in. NPT (national pipe thread) coupling, I made a suitably-sized hole in the side of the keg, just above the bottom weld, using a bi-metal hole saw in an electric drill. Be sure to position the coupling such that it is not directly over one of the several drainage holes that are in the lower rim; hot gases escaping from below will increase heating of the coupling and valve. I made a jig to position the center line of the coupling such that it passes through and is perpendicular to the center line of the keg, and the coupling was welded in place from both sides. The interior weld was then ground smooth to facilitate cleaning.
Most people will take the keg to a welding shop to have the coupling welded in place, and the welder can likely take care of the entire installation. However, you can save a few dollars if you get everything ready ahead of time, paying only for the welding and finishing.
Stainless steels are tricky to weld, so it helps to find someone who is accustomed to working with them. Improperly made welds can crack and leak and present corrosion problems. The preferred method of welding is TIG (tungsten electrode, inert gas) using a 95% argon–5% carbon dioxide gas mixture, and 308L or 316 wire.
Even when done properly, the welded area is more vulnerable to corrosion than the surrounding metal. Because of the heat involved, the keg material, usually 304 stainless steel, will unavoidably become sensitized to stress corrosion cracking in the immediate area of the weld. After each use of welded equipment, clean and rinse it thoroughly and allow it to air dry before storage.
Inside the kettle, a stainless steel Swagelok fitting adapts the ⅜-in. NPT threading of the welded-in coupling to a ⅜-in. o.d. stainless tube, which makes a right-angle bend and pierces the false bottom at its center. A stainless steel collar, which is located on the siphon tube with a set screw, presses against the false bottom. The stainless siphon tube is stiff enough to hold the false bottom tightly against the domed bottom of the keg, leaving only a small volume of wort beneath it. The false bottom, while large enough to provide adequate flow area, is stiff enough to require no support other than at its edge where it contacts the keg bottom. Best of all, when the siphon tube is released from the Swagelok fitting by loosening a single nut, both the tube and the false bottom are released for easy cleaning of these parts and the kettle bottom.
To construct the false bottom, select one of the perforations in the sheet stock as the center and use a compass to describe an 8-in.-diameter circle. Use a reciprocating saw or aircraft-type shears to cut out the circle, then rotate it against a grinding wheel or sanding disk to smooth the edge. Finally, enlarge the chosen center hole to ⅜ in.
The first time you assemble the drain system, you will have to position the siphon tube such that its inlet is over the center of the keg bottom, then swage the two-piece ferrule included with the tube fitting (permanently) in place. I have found the following sequence of operations works well when doing this: First, I make the right angle bend in the siphon tube, leaving a bit more length on each end than needed. Next I install the Swagelock fitting into the welded-in coupling and tighten. Without the false bottom in place, I slide the siphon tube into the Swagelock fitting, complete with the nut and ferrule assembled finger-tight. After measuring the distance from the horizontal part of the tube to the bottom on the keg, I remove the siphon tube and cut the vertical part off such that it will clear the keg bottom by about ⅛ in. Then I slide the tube back into position, this time with the inlet centered over the keg bottom, and seat the ferrule by turning the nut one full turn beyond the point at which it becomes finger-tight. Finally, I cut off the horizontal portion of the siphon tube so that it extends only ⅜–½ in. beyond the ferrule. If it is too long, it will be difficult to install or remove this assembly without releasing the collar.
Use of a bored-through fitting (indicated by the suffix BT in the part number) allows the tube to pass completely through, making it unnecessary to have the horizontal part cut to its exact length before swaging the ferrule in place. The bored-through fitting also offers a bit larger flow area than the standard fitting type.
To locate the collar on the vertical portion of the siphon tube, assemble all components and tighten the nut on the Swagelock fitting. Let the collar rest on the false bottom, then slide it down another ⅜ in. or so, depressing the center of the false bottom, before locking it in place.
Half-barrels can be purchased new (Spartanberg Steel Products, Spartanberg, South Carolina; Thielmann Container Systems, Alexandria, Virginia) or reconditioned (Sabco Industries, Toledo, Ohio; Tosca Ltd., Green Bay, Wisconsin). They also show up at salvage dealers from time to time. Stainless steel fittings and tubing can be found by looking in your local yellow pages under “tube fittings.” The Swagelok brand is very popular, and will likely appear as a subheading. False bottom material (perforated stainless steel) can be found at fabricators who do work for the brewing industry. One source is Brewers Warehouse (Seattle, Washington). The stainless steel collar that secures the false bottom in my kettle was specially machined. A good alternative is to use a 7/16-in. stainless steel nut, which can be found at hardware stores. Drill out the center to ⅜ in. so that it will fit over the siphon tube, and then drill and tap through the side to install a small set screw.
All contents copyright 2024 by MoreFlavor Inc. All rights reserved. No part of this document or the related files may be reproduced or transmitted in any form, by any means (electronic, photocopying, recording, or otherwise) without the prior written permission of the publisher.


.png)
.png)
(1).png)
.png)