Making a yeast starter is one of the easiest ways you can increase the quality of your homebrew. In this article we will cover how to make an 1L yeast starter using canned wort and also DME (Dried Malt Extract) as well go over some Yeast Wrangling Notes; Like when and why to decant. Conversely, if your using Cellar Science Dry Yeast you can direct pitch. Due to the high sterol and nutrient levels created during their special aerobic propagation, along with a high cell count, CellarScience yeast is intended to be sprinkled directly onto the surface of your wort. No oxygenation is required in the initial fermentation. Cheers!

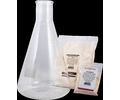
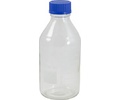
Propper starter concentrated wort makes it super quick & easy to make a yeast starter! No need to measure DME, no need to boil or extended prep time!
Instructions:
It's that easy!

 Download print friendly version
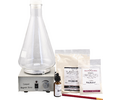
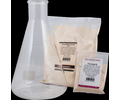
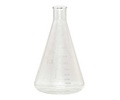
These are the instructions included with our 1000ml Yeast Starter kit. But as long as you have an Erlenmeyer Flask, DME (Dried Malt Extract) and Yeast Nutrient they will help guide you through making a yeast starter for 5-10 gallons of wort.
Recipe Ingredients: ¾ Cup DME • A pinch of Fermaid K • 900 ml of water
When conducting any yeast transfer or yeast culturing activities always spray your work surface with a diluted alcohol, Star San or water based solution to trap airborne bacteria. Work away from any drafts that would blow bacteria into your media. Bacteria attach to dust particles and then fall vertically, absent of any draft. Ideally, all yeast transferring activities would occur away from drafts and close to a flame source because a flame causes hot air, and therefore, bacteria to rise.
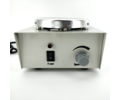
We recommend you cover the starter with aluminum foil as it fully covers the opening, allows oxygen uptake, and will only be in place for a short period of time. If you do use an airlock and stopper in preparing yeast starters you must flame the lip of the glass to kill the bacterial ring that develops between the stopper and the lip of the glass. Swirl your yeast starter as much as possible to stimulate cell growth and oxygen uptake. To get maximum growth from a starter, use a stir plate to increase cell growth. Using a stir plate and a 1000 ml starter is a great method of producing yeast for 5 to 10 gallon batch sizes.
Frequently Asked Question:
Question: Should I decant the liquid off the yeast bed and pitch or swirl the whole starter and add it all?
Answer 1: Unless you are making a really delicate beer or pitching a large volume (say 1000 ml in 5 gallons) we say swirl the whole starter and add it all. There are billions of yeast in suspension so why not take them? The “everyone in the pool” theory.
Answer 2: If you are making a delicate beer where you don’t want to alter the flavor in anyway or are pitching huge starters you can refrigerate the starter, decant most of the liquid and just pitch the yeast bed on the bottom.
All contents copyright 2024 by MoreFlavor Inc. All rights reserved. No part of this document or the related files may be reproduced or transmitted in any form, by any means (electronic, photocopying, recording, or otherwise) without the prior written permission of the publisher.


.png)
.png)
(1).png)
.png)