Top 5 tips for using Kveik!
07/31/2022
By Logan Prasser
So, you’re ready to brew your first batch of beer with Kveik yeast, but you don’t want a stalled fermentation, end up with DMS, acetaldehyde, or some other off flavor you’ve seen in the past…. Well, here’s my top 5 tips for harnessing the amazing properties of Kveik yeast!
First, a few notes that I think are relevant before we get started. This yeast has exploded in popularity amongst pro brewers and home brewers alike, and there’s good reason for that. This yeast is an absolute monster, it will ferment a 12pct abv beer (also meads, ciders, etc.) fast & furious, and grain to glass in 36-48 hours is not unheard of! This means more turns on your fermenter, a quicker realization of pilot recipes, and you get to drink the fruits of your labor all the quicker! However, this yeast needs to be respected as well.
The origin of Kveik yeast traces back to Scandinavian countries. In this culture, farmhouse brewing has been practiced for hundreds of years, and the yeasts have adapted to the traditional techniques utilized. One of the most fascinating blogs on the people and places where this yeast comes from is
Larsblog. Lars has single-handedly changed the landscape of beer worldwide by sharing the stories, processes, and strains of yeast throughout his travels in these countries, cheers Lars and all!
Tips for Fermenting with Kveik Yeast
Tip #1: Pitching rates don’t matter much... Really!
First tip, pitching rates don’t really affect this yeast! When you brewed a lager beer for the first time you were probably shocked that a 5-gallon batch, cold fermented, required a 5L starter minimum for a healthy fermentation! While temperature plays a big role in pitching rates, this yeast will do just fine without the flask and stir plate, just pitch your commercially available dry or liquid yeast packet in and let it rip! One note, with most commercial strains the further you “under pitch” Kveik the more the orange / citrus flavors tend to come out, so if you’re looking for a clean Kveik fermentation, go ahead and pitch 2 packets or make a quick
2L starter.
Tip #2: Pitch it hot and ferment it hot!
Much like the title of the 1959 film “Some Like it Hot” this is a sentiment shared by Kveik yeast! The common method of brewing with these yeasts in the traditional Norwegian farmhouses included pitching the yeast with very little to no cooling at all! Put your bag of ice and frozen 2L bottles back in the freezer, this is going to be a nice and easy day chilling wort. I recommend pitching around 95 degrees F, but I have pitched at 107 deg F and let it coast at this temperature with no phenols or off flavors… truly a mind-blowing yeast! Pitching this yeast hot doesn’t require much in the way of temperature control, but you must be aware that once this yeast starts fermenting the temperature will rise due to the metabolic activity. Many prefer to let this coast naturally and subside on its own, however if you live in a colder climate I would advise a
heating pad or a nice warm Christmas sweater for your carboy! Fermentation temps can be anywhere from low 70’s all the way to 100+ degrees F. I don’t recommend going much lower than 70 deg F with this yeast, if you are looking for a clean Pseudo lager strain many options are now available including
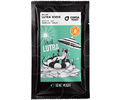
Omega’s Lutra (Dried and Liquid form) Escarpments KRISPY strain but these strains will struggle any lower than mid 50’s refer to the specific manufacturers fermentation range for those.
Tip #3: Add yeast nutrient
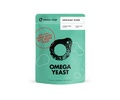
You are already adding yeast nutrients, right? Right?? Well, it’s critical in my experience to give Kveik a nutrient rich feast worthy of a Viking. If you want the best results, I would start with at least 2x the dosage recommended by the specific nutrient manufacturers. This yeast is fermenting hot, it is replicating fast, and doing all that at a record pace, so it stands to reason it needs really highly available YAN ready to go to support this. My personal recommendation is Wyeast’s Beer Nutrient:
https://www.morebeer.com/products/wyeast-yeast-nutrient-15-oz.html
Tip #4: Oxygenate the wort!
Similar to above, this yeast is doing work, you’re going to need to give it some support! Of course, you’re oxygenating your wort during the yeast pitch already, but this is a reminder that Kveik is not your average Sacc. Cerv. The oxygenation step is critical in the yeast growth and replication phase, and Kveik is going to do this at a face melting pace, so get ready to support that with plenty of dissolved 02 before pitching. I recommend using the
02 Wand with a disposable tank when starting out. Crack open the valve with the sanitized stone in the wort, wait until bubbles start coming out of the stone, and then set your timer for 1 minute. This should help you get to ~8-12 ppm DDO.
Tip #5: Get ready for a violent fermentation!
The best time to put a blow off tube on your fermenter is before you need to have a blow off tube on your fermenter… I know this from experience. Kveik gets from OG to SG quickly, and the volume of C02 and Krausen you would see in a normal fermentation is compressed into 1-2 days, so if you don’t have ample headspace get your blow off tube in place. Or if you’re like me and like to live dangerously, add some
ferm-cap as well and hope you can jam 6 gallons of finished beer in a 6.5 gallon fermenter without mopping the ceiling in the morning!
I hope this article helps to inspire you to go out and try your hand with this amazing new (to us) yeast! Skål!!
Related Products
All contents copyright 2024 by MoreFlavor Inc. All rights reserved. No part of this document or the related files may be reproduced or transmitted in any form, by any means (electronic, photocopying, recording, or otherwise) without the prior written permission of the publisher.
.png)


.png)
.png)
(1).png)
.png)