Brewing Setup for Those with Physical Limitations
05/09/2022
By Neil O'Leary
Hi everyone. My name is Neil and I am a physically disabled homebrewer. I was in an auto accident back in 2002 that resulted in ultimately four spinal fusions and a hernia repair. As such, I am very limited in what I can lift. This initially made brewing pretty difficult, to the point that I got out of the hobby for quite a while. Sob story over, now on to the good stuff. The ‘itch’ returned, so I set about planning, researching, and eventually purchasing a setup that was friendly for those with physical limitations. Here’s some general thoughts, and what I wound up with for a setup.
As for general thoughts, first and foremost, think small! I brew in 3.25 gallon batches, because water (and beer) weighs about eight pounds per gallon. A 5 gallon batch is 40 lbs, more than I can lift without significant pain. At a 3.25 gallon batch, you’re only talking 26 lbs, which for me is much more manageable. This size also works out nice for two other reasons: I only drink beer so fast and the size is right for several pieces of both necessary and nice to have equipment. Second, think ahead. Plan to use a
pump and
hi-temp silicon tubing wherever and whenever you can (which is just about everywhere and all the time).
Next, the basics – First sanitation matters! I wanted a setup that I could keep
clean and sanitize without a lot of fuss. For chemicals, I use
PBW for cleaning and
StarSan for sanitizing. PBW really reduces the elbow-grease required to clean things and lends well to cleaning stainless steel. StarSan has no iodine, so no after taste and it works very well. Also, a good,
high-temperature capable pump is essential for what we’re doing. There are a few options out there, and I have a recommendation which will follow this introductory section. Next, use as much grain as your setup will allow, and de-emphasize
Liquid Malt Extract (LME) and
Dried Malt Extract (DME) where you can. Any homebrew, if done right, is going to be better than commercial swill, but the more you can do to simplify the recipe and the less processed/modified/adulterated your ingredients, the better the result will be. Third, liquid yeast is worth the extra expense! I use Whitelabs exclusively, and have never had a bad batch – no ‘dud’ yeast, no stuck ferment, no skunked beer, etc. And I’ve made a lot of beer in my time. Fourth, if you can afford it, a miniature fridge and digital temperature controller will greatly enhance your finished product.
Ok, ok, enough intro, now on to my brewing rig. I brew all-grain, and my setup really lends itself to this. I use the
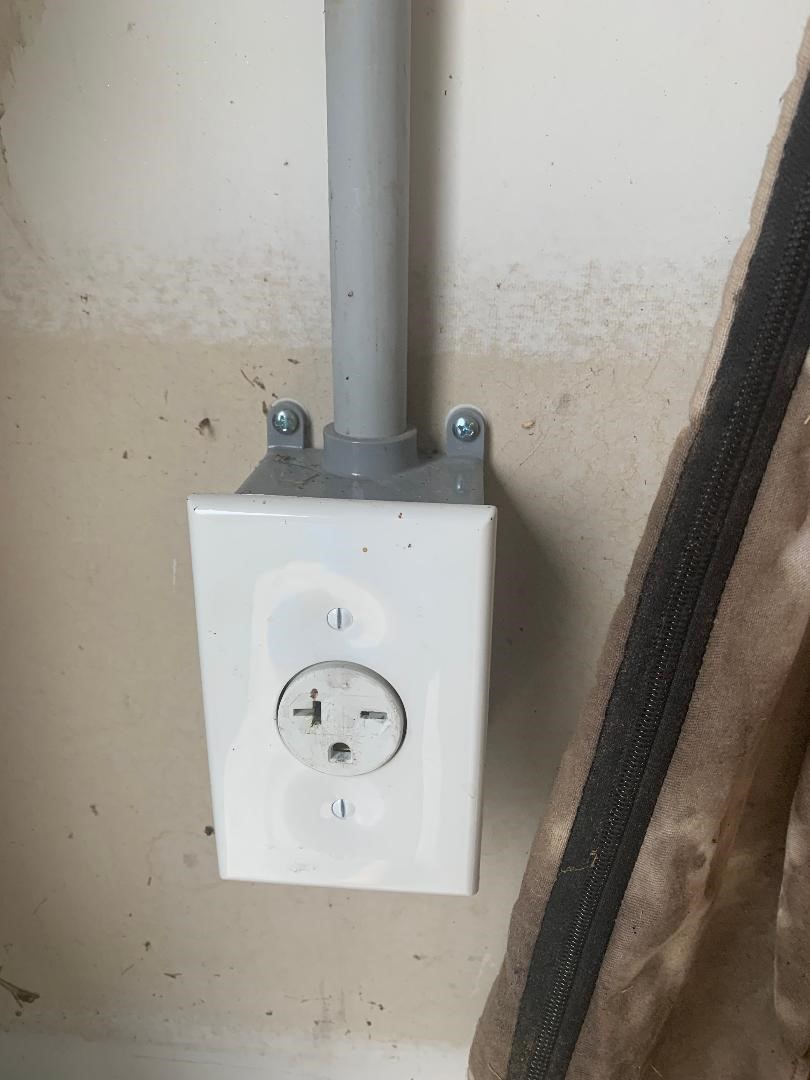
Anvil Foundry 6.5 gallon brewing system, with the optional pump. I paid $135 to have a 240V circuit wired in my garage, and followed the simple instructions to convert the Foundry from 110 to 240. This drastically reduces the time you spend waiting for things to heat, which in turn reduces your wort’s exposure to contaminants – this is a win-win and a no-brainer in my book. It also comes with a stainless steel chiller coil, which again speeds up the brewing process significantly. If you’re not comfortable rewiring the Foundry, have the electrician do it when they put in the 240v circuit and outlet. As for the pump, it’s high-temp capable and purpose-built for homebrewing. It’s easy to use, easy to clean, and plenty powerful enough to run beer from ground level through 20 feet of1/2” ID tubing up to a height of about 5 feet (to make it into the top of my fermenter).
Speaking of fermenters, I use the
Ss Brewtech mini brew-bucket. It’s stainless steel, so as long as you’re reasonably careful it won’t scratch and again is easy to keep clean. It’s also much lighter than glass and MUCH more durable. Capacity is 3.5 gallons, which again is perfect for the batch size of 3.25 gallons. It also has a spigot built in so you can gravity feed your finished beer into your bottling bucket (don’t lift what you don’t have to). I have a mini-fridge with a glass front and removable shelves (important so your fermenter will fit), and will really up your brewing game. Yeast is happy at specific temperatures (varies by strain and what you are trying to accomplish, for example I brew
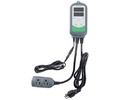
Hefeweizen at 67 degrees because I like the fruity notes), and it will definitely show in your finished beer. To make that happen, I use a
digital temperature controller. It has heating and cooling (I use a
plastic heating film – it’s flexible so will wrap perfectly around your fermenter), can be set to 1 degree of sensitivity, and works like a champ. Please note, this will require you to drill a hole in your fermenter and insert a thermowell
(See pictures below) . This is scary, but relatively easy to accomplish, just be patient and work methodically. You’ll need a stainless steel cutting bit of the appropriate size (varies depending on which thermowell you get). The thermowell is a steel tube with a flange and rubber washers to make the joint liquid-tight. Finally, you’ll need a regular drill bit to put a (SMALL, please) hole in the side of your fridge to pass the digital controller sensor wire through.
A small but significant effort-saver is a retractable hose – it’s lighter than conventional hoses so is easier to use and also stores compactly. 50 feet with brass connectors was about $30. I use a laser temp gun because I happen to have one, but only for temp gauging the sparge water. Finally, I use
ez-cap bottles – these are the wire basket, ceramic top with rubber gaskets style. This saves time, effort, and a small amount of money. Working the bottle capper was painful for me, and with the ez-caps you don’t have to worry about it. I use the 16 oz. size as that is the right amount of beer for me at one sitting. I have the
stainless steel hop spider. It’s a bit big for my small batches, but does the job well, and again is easy to clean and light-weight. You’ll also want a length of
silicone tubing sufficient to get from your brewkettle to your fermenter. (for me, that’s 20 feet)
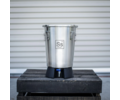
The only other major thing you’ll need is a decent size
pot to hold your sparge water – I use our household 12 quart pot filled about 2/3 of the way (so approximately 1.75 gallons) and heated to 175 degrees F. Sparging is the process of ‘rinsing’ your grain after you’ve made your wort to get maximum sugar extraction and the right boil volume.
My physically limited brewing process follows these steps:
-
Fill your brew kettle with 3.5 gallons of water
-
Heat to temp ( I use 152 degrees F for Hefe, 156 for stout)
-
Add your grains
-
Wait 15 minutes
-
Setup recirc with your pump
-
Wait 15 minutes
-
Turn off the recirc, stir the top 1/3 of your grain bed, then resume recirc
-
Repeat step 7 twice more ( 1 hour total steep time for your grains)
-
Pull your grain bed and rest it on the built in ring for this purpose.
-
Rinse slowly with your sparge water.
-
Allow to drain thoroughly (about 15 minutes)
-
At this point, your boil volume should be about 3.5 gallons
-
Heat your wort to boiling
-
Once boiling, start your timer and add your first set of hops when appropriate (for Hefe, I add Hallertau at 0 minutes and boil for 60 minutes)
-
At 50 minutes, put in your chiller so it sterilizes in the last 10 minutes of the boil ( for hefe, I also add 1 lb. of honey at this time so it also is sterile when done). Add any finishing hops your recipe calls for. You also should get your liquid yeast out of the fridge and let it come up to room temp.
-
At 60 minutes, turn off your Foundry brewkettle.
-
Connect your retractable hose to your chiller and turn on the water. You should have about 3.5 gallons of wort at this point. If you don’t, either add more sparge water or continue to boil until you reach that volume. Side note: I use the outflow of the chiller water to rinse things off while I’m waiting for the wort to cool – this makes final cleanup much easier and recycles the water that would otherwise be wasted.
-
Once your wort reaches 80 degrees, use the pump and built-in spigot in your Foundry brewkettle to transfer the wort to your fermenter (inside the mini-fridge)
-
Cool your wort to 75 degrees in general (for some yeasts, like the irish ale yeast I use for stout, it recommends you cool to low 60’s, add your yeast, then bring up to final fermenting temp – pay attention to your recipes and your yeast manufacturer’s recommendations for the style)
-
Pitch your room-temperature liquid yeast.
-
Use a short length of silicone tube as a blow-off – your fermenter is pretty much full and liquid yeast ferments vigorously, so this will prevent a big mess! I re-use the 3 foot length of tubing included with the Foundry brewkettle, stuck into a 2 quart container about half full of sterilizer/water at the right ratio.
-
Wait until vigorous fermentation has slowed, typically 2-3 days after you get your first bubbles, then switch the blow-off tube for the usual bubbler ( filled with star-san to prevent any backflow contamination).
-
Wait until fermentation stops completely ( pull the bubbler out, then re-insert. Wait at least two hours and if the level in your bubbler hasn’t changed, fermentation is done). After that, wait 2-3 more days for your beer to ‘round out’. This allows any final micro-fermentation to finish, allows sediment to drop out which makes for cleaner and yummier beer, etc. Total ferment time for me is about 2 weeks.
-
When ready to bottle, heat 2 cups water in a small pot (with a lid) until boiling, then add your priming sugar ( I use 4 oz., and get a lightly fizzy beer). Put the lid on the pot and let it boil for 5 minutes. This sterilizes the priming solution. Turn the burner off, leave the lid on, and wait for your priming solution to cool some – it doesn’t have to be room temp, but boiling solution kills yeast so I always wait about half an hour or so.
-
Drain your beer from the fermenter into your bottling bucket, THEN add the priming sugar. I feel this results in less stress on your yeast, which you still need healthy to carbonate your beer.
-
Stir your beer gently to ensure the priming sugar distributes evenly, then fill your bottles and cap your beer.
-
Leave at room temp for 2 weeks to allow for carbonation, then refrigerate and enjoy!
Here are some pictures of the equipment mentioned above
(This is the 240V outlet I had the electrician wire – it took a dedicated circuit breaker in my panel, so please keep this in mind.)
(This is my mini-fridge with the flexible heating film – To keep the hole in the side of the fridge small, I cut the cord about half-way down it’s length on the heating film, routed the rest of the cord "minus the plug" through the hole in the fridge, then spliced the plug back onto the cord. Pretty simple to do and all you’ll need is some wire stripper/cutters and a little electrical tape.)
(Here is the aforementioned hole in the side of the fridge "1/4” is big enough" – standard drill bit worked just fine.)
(This is the brew bucket with thermowell installed – you’ll need a special steel cutting bit and some courage to put a hole in your brand new fermenter, but in the end it’s worth it!)
(This is the inside of the brew bucket – I bought a long thermowell by mistake, so shortened mine with a hacksaw and pounded the now open tube closed with a hammer – not elegant by any means, but effective. That having been said, I’d recommend buying a short thermowell rather than a long one.)
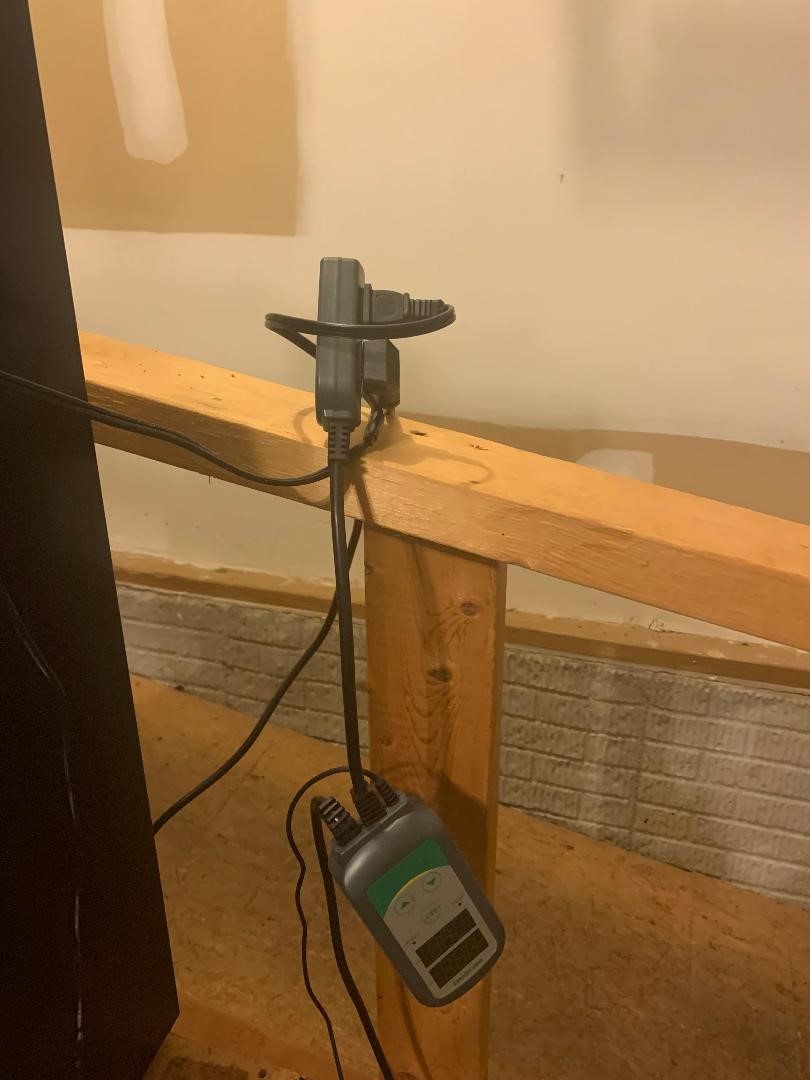
(This is the digital temperature controller – it has two plugs "one for heating and one for cooling", plus a temperature probe on a cord that you pass through the small hole in the side of the fridge.)
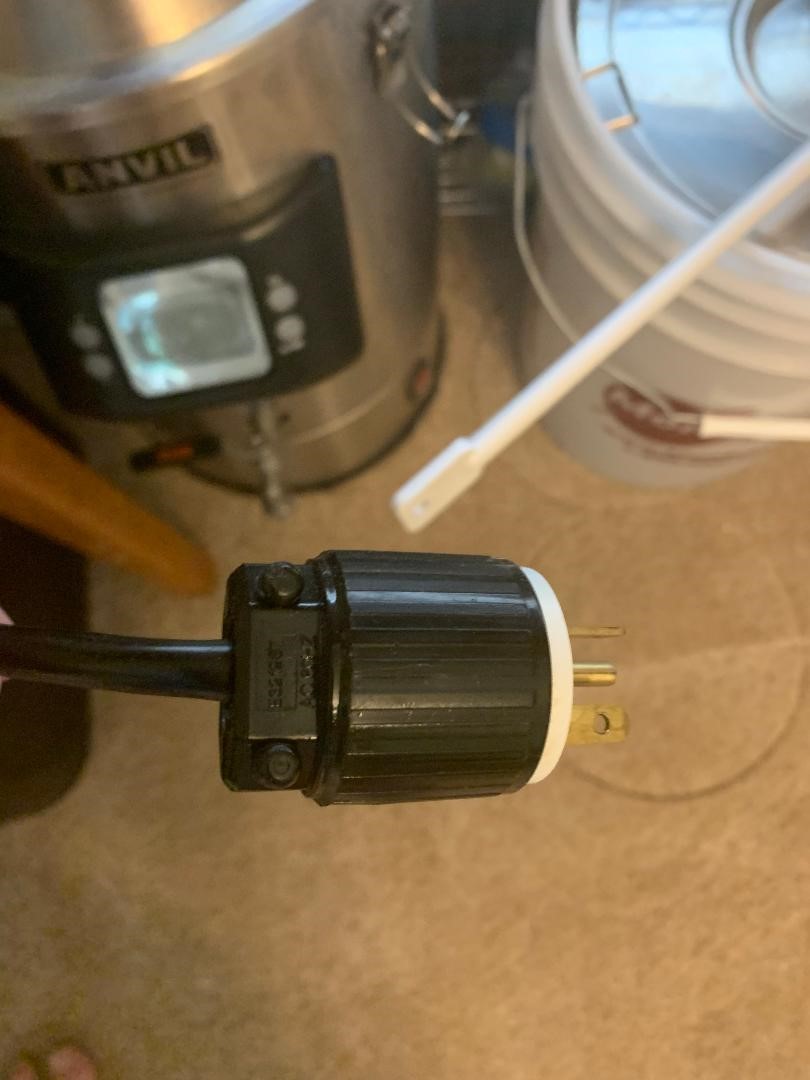
(Here’s the cord for the Foundry Brewkettle after I modified it for 240v. The scary part is you have to cut the 110v plug off the cord for it, but the work of rewiring is very simple. All the parts are included and you’ll just need wire stripper/cutters and a screwdriver to tighten the 240v plug housing onto the cord.)
In total, this all grain brewing rig with temperature control was around $1,000. Not cheap, but it works great for those with physical limitations and you’ll achieve professional brewery level control of your process and should get exceptional results. My only significant lift is to bring the partially-full bottling bucket in from the garage to the kitchen counter where I do my bottling. Even this could be avoided by using a second bottling bucket and again your pump and silicon tubing to get the beer to where you intend to bottle.
I hope you found this informative and insightful, and look forward to hearing from you if you care to drop me a line or have any questions. I’m at homebrewer0813@yahoo.com Thanks all!
Related Products
All contents copyright 2024 by MoreFlavor Inc. All rights reserved. No part of this document or the related files may be reproduced or transmitted in any form, by any means (electronic, photocopying, recording, or otherwise) without the prior written permission of the publisher.


.png)
.png)
(1).png)
.png)