I recently built a gas quick disconnect (QD) for my new Blichmann Beer Gun. The beer gun accessory kit comes with a QD for the liquid side, but, the gas side requires turning a wrench to connect your CO2 system to the gun and the keg. My beer fridge is a bit cramped and I didn't like the idea of having to move kegs to get to my CO2 bottle and regulator to connect and disconnect the gas each time I wanted to fill a few bottles. Instead I wanted a system in which I could reach in and connect a QD for the beer gun, connect the QD for the liquid side, and then start filling bottles. Now I have it.

The above photo is an overview of the design. Each piece is marked with an item code. Each item is described below. Click the links to find where to buy the product. All the links are for morebeer.com, except the 1/4" NPT X 1/4" Barb which I only found on Amazon.
a.
Blichmann Beer Gun Bottle Filler, $74.99
b.
1/4" NPT X 1/4" Barb, $3.00
c.
Beverage Tubing (1/4' ID) - By the Foot, 10' @ $0.75/foot = $7.50
d.
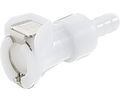
Beer & Gas Tubing Quick Disconnect - 1/4" Barb x Male, $7.50
e.
Beer & Gas Tubing Quick Disconnect - 1/4" Barb x Female Shut-off, $7.50
f.
CO2 Tee – barbed, $4.95
g.
Hose/Tubing Clamp (Small) , 7 @ $0.65 each, $4.55
h.
Flare Fitting - 1/4" Barb, $0.95
i.
Flare Fitting - 1/4'' Swivel Nut, $0.85
j.
Ball Lock Beverage Out – Flare, $5.49
Grand total: $117.28. Shipping was free from morebeer.com.
Note, the above list does not include purchase of the Blichmann beer gun accessory kit. The above parts replace that kit. The total price of $117.28 comes to $17.28 more than buying the Blichmann accessory kit with your beer gun. So my system cost an extra $17.28 to avoid the wrench turning described above.
Installation:
1. Turn off your gas and disconnect the 5/16" gas line from the regulator.
2. Cut the 5/16" gas line to prepare to install the CO2 tee. I used sharpened scissors to cut the gas line. I cut the line about 6" from the keg's gas QD. I wanted it relatively close to the keg gas post rather than down near the regulator.
3. Install the CO2 tee using 2 hose clamps. Be sure to tighten the hose clamps good to avoid CO2 leaks.

The above image shows the installed CO2 tee.

The above image shows the installed CO2 tee in relation to the keg's gas QD.
4. Cut a small piece (about 2") of 1/4" Beverage Tubing. You will use this to connect the C02 tee to the Beer & Gas Tubing Quick Disconnect - 1/4" Barb x Female Shut-off.
5. Place 2 hose clamps on the 1/4" Beverage Tubing piece and then connect one side of the beverage tubing to the CO2 tee and one side to the Beer & Gas Tubing Quick Disconnect - 1/4" Barb x Female Shut-off. You will need to heat the 1/4" Beverage Tubing before pushing it on the C02 tee. Hold 1" of the tubing in boiling water for 30 seconds, then, with gloves, press the 1/4" Beverage Tubing on the CO2 tee. The Beer & Gas Tubing Quick Disconnect - 1/4" Barb x Female Shut-off is 1/4" so it will go in the 1/4" Beverage Tubing without preheating.
6. Be sure to tighten the hose clamps good to avoid CO2 leaks.
7. Turn the gas on to your regulator and test the new connections you have just made. Submerge the hoses and the new QD in water and look for bubbles. Shake any air out of open orifices and then watch for any continuous streams of bubbles which will indicate a leak.

The picture above shows my new QD and the joints around it submerged in water. No bubbles = no leaks!

The above photo shows the gas QD sticking out in my fridge. It is high up where I can get at it easily.
8. Connect the 1/4" NPT X 1/4" Barb to one end of your 1/4" Beverage Tubing using a hose clamp. Be sure to tighten the hose clamp to avoid CO2 leaks. I used a long piece of tubing (close to 10'). I wanted the CO2 line to be similar length to the liquid line so both stretched just as far.
All contents copyright 2024 by MoreFlavor Inc. All rights reserved. No part of this document or the related files may be reproduced or transmitted in any form, by any means (electronic, photocopying, recording, or otherwise) without the prior written permission of the publisher.


.png)
.png)
(1).png)
.png)