by George De Piro (Brewing Techniques)
.jpg)
In the last issue we showed you how simple it can be to assemble an all-grain brewery. Just in time to add to your Christmas wish list, this article discusses the reasons why you might want to upgrade your equipment and some of the options for doing so.
If you assembled a brewery using the previous article in this series as a guide, you may be wondering why you need any more equipment. The fact is you don’t need any more stuff than the last article described to brew excellent beer at home. Some people, however, find that they need to take brewing further than they ever thought they would. You may consider adding to your basic brewhouse for four basic reasons:
How can these goals be reached? Some require nothing more than increasing the size of your brewing vessels. Others demand a little more ingenuity. You need not try to attain all of these goals at once. Some of them are related to others, so that achieving one goal will move you in the direction of another.
The first step most home brewers want to take is to increase their brew length (batch size). You can do this by brewing the highest gravity wort that you can with your current vessels and diluting the wort to the gravity you desire at pitching time. You will need to adjust your hop rates because of the high gravity boil. A typical five-gallon (19-L) system can turn out as much as eight gallons of wort at S.G. 1.048 if you push it to its limits. If you want to brew 10 gallons or more, expanding the size of your current “hot side” brewing vessels is the only option.
You will need more fermentation capacity for all that extra wort. The inexpensive option is to buy more carboys or buckets as you need them. The costly alternative is a small cylindroconical fermenter. A cylindroconical fermenter makes yeast harvesting easy and allows the beer to be fermented and aged in the same vessel. The choice is yours.
The next improvement most all-grain brewers wish to implement is decreasing the amount of time and effort spent in the brewhouse. A brew day can be only so short, of course, but time savings can be realized. You also have a few options that can decrease the overall time it takes for the beer to get to your glass.
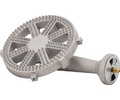
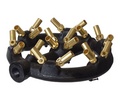
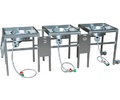
Burner upgrades: Heating liquids is a major time consumer in most home breweries. If a kettle is placed across two 9,000-Btu stove burners, it will take them more than 90 minutes just to bring 15 gallons of liquid to a boil. That same volume can be brought to a boil in less than 30 minutes by a 180,000-Btu propane burner. Considering the amount of liquid that must be heated to high temperature during a typical brewing session, you can save a lot of time by investing in a propane burner (or two).
Propane burners generate a lot of heat and toxic exhaust gases, such as carbon monoxide. They must be used in a very well-ventilated area. There are several good burners on the market for less than $100. I prefer the ring burners to the jet style. Although the heat output is usually lower, the jet burners are very loud, and it is nearly impossible to reduce their output without generating a lot of messy soot.
Mash mixer: A motorized mash mixer can save both time and sweat in the brewery. Gentle mixing of the mash makes for more even temperatures and will increase the rate at which enzymatic reactions occur, so complete saccharification can be realized quickly. Efficiency (meaning the degree of saccharification of malt starches) will generally be a little higher than in an unmixed mash, too.
Sparge arm: A sparge arm is another worthwhile brewery option. Although it does not actually save time, it does decrease the amount of effort you must spend pouring sparge water into the lauter tun. A sparge arm can be purchased ready-made, improvised from a shower head, or fabricated at home. One simple design is a perforated copper loop that lies on top of the grain in the lauter tun. It is connected to the hot liquor tank by food-grade tubing, and you control the flow of water from the hot liquor tank using a ball valve. Water is run through the copper loop onto the grain bed at a rate about equal to the rate of wort leaving the tun. You need only peek at the lauter tun occasionally to make sure that the flow of hot water is neither too fast nor too slow.
|
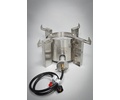
Making an In-line Wort Oxygenator |
|
If you want to oxygenate wort like the pros do, you can easily make an in-line wort oxygenator. This device ensures uniform and thorough oxygenation of the entire wort. It can be part of a “closed system,” which helps ensure good sanitation. This setup also saves the brewer a bit of time; the wort is transferred to the fermentor and oxygenated in one step. Wort enters through food-grade tubing from the chiller, exits the T at a right angle, and goes to the fermentor. The aeration stone sits in the outlet tube, connected to the oxygen tank by tubing (also food-grade) that passes through the T, and oxygen can be gently bubbled into the wort as it enters the fermentor. This ensures maximum oxygen content of the wort. This entire assembly can be boiled to sanitize it; the plastic tubing may turn opaque when boiled, but that will not hurt its performance. Assembly: The diagram serves as a guide to assembling your setup. The parts needed depend on the size of your aeration stone — it must fit into the tubing — and the parts available at your local plumbing supply store. You might need to wrap some Teflon tape around the oxygen tube going into the compression fittings to make a good seal. |
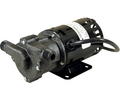
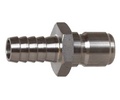
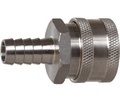
Pumps: Pumps for moving liquids around the brewery save effort and improve quality and safety. Transferring hot wort from the lauter tun to the kettle using a measuring cup is not only tedious, but also invites burns and oxidation of the hot wort (referred to as hot-side aeration, or HSA). A pump can be used to transfer hot wort from lauter tun to kettle quickly and easily. The outlet hose can be positioned so that it fills the kettle from the bottom, thus eliminating worries of oxidation.
The ideal home brewery pump should be easy to keep clean and maintain, made from food-grade materials, and resistant to heat and acidic conditions. Several manufacturers make pumps that fit these requirements.
A magnetically coupled centrifugal pump is far more desirable than one with a drive shaft. Shaft-drive pumps require periodic maintenance of their seals. If the seals should start to fail, air can be sucked into the pump, aerating the hot wort or infecting the cool wort. Neither of these situations is desirable. Magnetically coupled pumps eliminate these worries.
Moving Brews (College Park, Maryland) is one supplier of pumps suitable for the home brewery. Surplus equipment suppliers often have magnetic-drive pumps, but find out what used to run through them before you use them for your precious beer.
Oxygenators: A wort oxygenator can accelerate fermentation and improve beer quality. Providing oxygen for the yeast at pitching time is critical to ensuring a strong and complete fermentation. Shaking a carboy full of wort not only is a good way to break a carboy (or yourself), but it also gets only a small amount of oxygen into the wort. An aquarium pump is another option to aerate the wort, but they pump air, not pure oxygen. You can get much more oxygen into the wort in just 60–90 seconds by using an oxygen tank and a porous, stainless steel aeration stone. Disposable oxygen tanks, available at home improvement stores, cost about $9. A regulator and stainless steel stone will cost about $30 at a homebrew shop.
|
Lautering Tips |
|
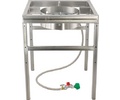
Lautering is one area where fancy equipment can’t compensate for technique. Most brewers have experienced a stuck runoff at one time or another. If it happens during vorlauf (recirculation), it is relatively easy to fix: Simply stir the grain bed, allow it to settle for a few minutes, then restart the vorlauf at a slower flow rate. Scary, but not too awful. If it happens during the sparge itself, you’ll have to stir the bed periodically to maintain the liquid flow, which means you’ll probably end up with some cloudy wort. The resulting beer can still be quite drinkable, though. The best solution is to avoid the problem in the first place. Assuming you don’t have some inherent flaw with your system’s design, some fine-tuning of your technique can help. Avoiding a Stuck Lauter Underlet: The grain bed needs to be well established so that wort will flow at a reasonable rate and clarify it adequately. If you are using a false bottom in your lauter tun (or combitun), add hot water to cover the false bottom before adding the grain. This process is called underletting and will help prevent the grain bed from becoming too compacted. Control the speed of runoff: The grain bed can also be compacted if the wort is run out too quickly during vorlauf or sparge. Be patient. Depending on your system, you can control the flow rate using a ball valve or a pinch clamp on a piece of tubing. It should take 45–60 minutes to run the sparge water through the grain bed. Sparging more quickly will result in lower efficiency, but some home brewers would rather use extra grain than spend an hour sparging. Get a proper crush: Milling the grain too finely is a very common cause of a stuck lauter. If there is an inadequate amount of intact husk material, the fine particles will stop liquid flow through the bed. Control wort viscosity: High molecular weight proteins and beta-glucans increase wort viscosity and slow the lauter. Raw grains, such as unmalted wheat and oats, tend to be high in these tun-clogging substances. Using a step mash that emphasizes the appropriate temperature rests will minimize these problems. Wort viscosity is also dependent on temperature. Higher temperatures decrease a liquid’s viscosity, so a well-insulated lauter tun will promote the free flow of wort. The temperature of the grain bed should be maintained as close to 168 °F (75.5 °C) as possible. In my experience, an all-barley malt grain bed can get as low as 145 °F (63 °C) without any problems, but it is best to keep the temperature higher. Consider your malts: Wheat and rye malts present special challenges to the brewer because they lack husks, which means they contribute nothing to the filter bed. Use of these grains makes it that much more important to have plenty of intact barley malt husks (or to use oat or rice hulls as a lautering aid). Avoiding Cloudy Wort Clear wort is important to the production of quality beer. Wort from the lauter tun will never be as clear as finished beer, but it should at least be devoid of large chunks. If your lauter runoff is unacceptably cloudy, the most likely source of the problem is that the recirculation volume was too small; take the time to recirculate the first runnings until they are acceptably clear. Another common cause of cloudy wort is too fine a crush during milling. Cloudy lauter runoff can also be caused by too shallow a grain bed. Modern brewers tend to use a grain bed a foot or so deep to ensure good wort clarity and a reasonable runoff time. |
Recirculating infusion Mash System (RIMS): RIMS is currently the ultimate in home brewery automation. Quite simply, a RIMS uses a pump to circulate the mash liquor through a heating device. A thermostat is used to control the temperature. The brewer need only set the dial and check on the system occasionally to make sure everything is all right.
There are a few possible disadvantages to RIMS, however. The biggest drawback is the relatively high cost of building the system. The cost can be quite high if you are mechanically challenged and therefore require prebuilt components. The nearly constant wort circulation yields a very clear wort, although that means the system must be well designed to avoid aeration of the mash liquor. The shear forces produced when pumping wort are also a concern to the RIMS brewer. Proteins (like enzymes) may be denatured more rapidly when subjected to shear forces. When shear forces are excessive, beta-glucans can form a gel that can inhibit filtration of the finished beer.
Once you are making great beer, you will find that you cannot get enough of it. Keeping beer supplies stocked becomes especially problematic during the hot summer months when it is difficult to chill wort and ferment and store beer at appropriate temperatures. Wintertime can also present obstacles for those in cold climates. A little ingenuity can allow you to brew year-round.
Chilling the wort: In summer, chilling the wort can be a problem for some people because their tap water is warmer than the desired wort temperature. A two-stage wort chiller can be used to cool the wort to pitching temperature. This can be easily set up by connecting the wort outlet of a counterflow chiller to about 20 ft of soft copper tubing, which is immersed in an ice bath. Efficiency can be increased by placing a small, submersible aquarium pump in the ice bath to circulate the cold water around the copper tubing.
If you prefer to use an immersion chiller, you can reach the desired wort temperature by first cooling the wort with tap water and then pumping ice water through the chiller.
Regardless of the type of wort chiller you use, it is not at all efficient to use ice water to cool the wort from boiling to pitching temperature. The nearly boiling wort will warm the ice water very quickly, necessitating replenishment of the ice at frequent intervals. It is much more efficient to cool the boiling wort with tap water and then use ice water to chill it the last few degrees to pitching temperature.
Keeping fermentors cool: Fermentors can be kept cool in the heat of summer by a variety of means. The easiest (and most expensive) is to buy another refrigerator and an external thermostat to maintain the appropriate temperature. A cheap alternative is to place the fermentor in a water bath with some plastic jugs of ice. Through trial and error the desired temperature can be maintained by replenishing the ice at appropriate intervals.
Keeping the beer cold: You will need a refrigerator to keep the finished beer its freshest. A used refrigerator can be obtained fairly cheaply and can be used to hold bottles of finished beer or even a carboy or two of lagering beer. A chest freezer offers more room than an upright for storing kegs and carboys.
Another refrigeration option is to build your own cold box. You can do this easily with an air conditioner, some plywood, and some foam insulation. Gently bend back the thermostat probe under the air conditioner so that the probe will always be in warmer air than the interior of the box so that the unit is always on. You can then use an external thermostat to keep the temperature anywhere between 32 °F (0 °C) and room temperature. I have been using such an arrangement for over a year with excellent results (see sketch above).
Choosing the right yeast: Certain strains of brewing yeast are well adapted to warm fermentations. Some of them actually will not work well at “normal” ale temperatures (60–68 °F [15.5–20 °C]). Many strains used by brewers of Belgian-style ales need to be fermented at about 78 °F (25 °C) to reach full attenuation. Yeasts cultured from bottles of La Chouffe tripel and Ommegang’s Hennepin are two such strains. Yeast cultured from Cooper’s Sparkling Ale (from Australia) also works best at warmer temperatures.
Keeping fermentors warm: In winter, some brewers need to heat their wort to keep it at the desired fermentation temperature. An easy and cheap solution to this problem is to keep an electric heating pad (available at any pharmacy) under or around the fermentor. A separate rheostat (such as a light dimmer switch) can be used to fine-tune temperature control. Another option is to place the fermentor in a water bath heated by an aquarium heater.
Milling: Milling is often a challenge to the new brewer. A fine line exists between crushing the grain coarse enough to ensure good wort clarity during lautering and crushing it fine enough to get decent extract efficiency. Large breweries use six-roller mills, which do an excellent job of crushing the endosperm while leaving the husk material fairly intact. Although home brewers don’t usually have such luxurious items, we are lucky enough to have several good quality, adjustable two-roller mills available to us for as little as $100. With these mills you can achieve a balance between decent efficiency and acceptable wort clarity.
|
Avoiding Post-Fermentation Problems |
|
The following problems can happen to both extract and all-grain brewers. The all-grain brewer may have an easier time dealing with some of them because of the increased control that mashing gives the brewer. Poor head retention and thin body: Medium- and large-sized proteins are necessary for good body and foam retention in beer. A protein rest during the mash can reduce the concentration of these proteins to unacceptably low levels. All of the barley malts I have worked with are quite well-modified and require no protein rest (Briess Malting Company says that even its wheat malt does not require a protein rest). Some brewers will try to compensate for a lack of body in their beers by using a high saccharification temperature to create a less fermentable wort. Be aware that this does not really increase body. It does make a sweeter beer but in the extreme it can taste “worty” and underattenuated. Haze: Chill haze, as the name implies, forms only when the beer is cooled, and it’s reversible early in the beer’s life (the beer clears when warmed). Protein-tannin complexes that are soluble at room temperature precipitate at cool temperatures. These suspended particles scatter light, causing haze. Chill haze can be minimized by good brewhouse practices: Ensuring a good hot break and cold break and minimizing the amount of high molecular weight protein degradation products in the wort. Even with the best brewhouse controls, beers will throw some chill haze. If you want your beer to be completely clear, you can use fining agents, filtration, or long, cold lagering (yes, even for ales). If the beer suffers from haze regardless of temperature, it is called “permanent haze.” This condition can be caused by the presence of starch in the beer, nonflocculent yeast, or bacterial contamination. To test for the presence of starch you can drop some iodine into a sample of the beer. The iodine will turn black-blue in the presence of starch. The presence of starch in the beer indicates incomplete saccharification or too high a temperature during the lauter. If the temperature of the grain bed gets much over 170 °F (77 °C), unconverted starch (and other undesirable substances like excess tannins) can be released from the grains and contaminate the wort. The solution to this problem is simply to lauter with cooler water. If your yeast strain does not flocculate well, you can try fining with gelatin or filtering to clarify the beer. If the cause of the haze is a microbial intruder, the flavor of the beer is likely to be pretty bad, in which case clarity is no longer an important issue! Unexpected final gravities: The final gravity of the beer may be farther from your target than you had hoped. If the measured gravity is too low the cause could be too low a temperature during the saccharification rest (lower temperatures result in more fermentable worts). The next time you brew the recipe, rest at a higher saccharification temperature and be sure the temperature is relatively even throughout the mash. If the final gravity is much lower than expected and the beer has some phenolic off-aromas, wild yeast is likely the culprit. Control of sanitation is beyond the scope of this article, but it is important to know that certain problems have multiple causes. It will not be necessary to alter your mash schedule if you determine that wild yeast are the reason your beer is over-attenuated. A high final gravity can indicate that the saccharification temperature of the mash was too high. Beta-amylase, which produces the majority of fermentable sugars in the mash, is rapidly denatured at temperatures over 158 °F (70 °C). A wort produced at 158 °F or higher will therefore be rich with unfermentable dextrins. Reduce your saccharification temperature the next time you brew the recipe to achieve greater attenuation. Too high a final gravity may also indicate a stuck fermentation. The most common reasons for stuck fermentation are either underpitching or underaerating the wort and too low a fermentation temperature. Fermentation control is beyond the scope of this article, but it should be said that if you are going to all the trouble of making an all-grain beer you should pitch a large quantity of healthy yeast to ensure a sound fermentation. |
When deciding on what mill to purchase, keep the following in mind:
Lautering challenges: Many of the all-grain brewer’s potential headaches are born during the lautering process. The most dreaded of problems for the all-grain brewer is a slow or stuck lauter, when wort flows very slowly (or not at all) from the lauter tun. It can turn an 8-hour brew day into a 14-hour torture session. Fortunately, well-designed equipment and attention to the brewing process minimize the risk of a stuck lauter.
Sight tube. Large breweries have sight tubes installed on their lauter tuns. Sight tubes allow you to visualize the pressure difference that exists between the liquid under the grain bed and the outflow pipe and control the flow of the wort in an informed manner. If the wort is run off from the tun more quickly than it can percolate through the grain bed, the pressure beneath the false bottom will become too low, causing the grain bed to compact tightly and the flow of liquid through it to be greatly restricted.
Lauter grant. When using a pump to move wort from the lauter tun to the kettle, it is easy to pull liquid from the tun faster than the grain bed wants it to flow, compacting the bed and causing a stuck runoff. Aside from being a large pain, a stuck runoff can also damage the pump (magnetically coupled pumps can be damaged if run dry).
One solution to this problem is to purchase a speed controller for your pump, but these are expensive. Another option is to install a ball valve on the outlet side of a centrifugal pump to restrict flow, but ball valves can be difficult to use for fine-tuning liquid flow. A lauter grant represents another possibility.
A lauter grant is simply a vessel that collects the wort from the lauter tun. The pump is plumbed directly to the lauter grant instead of the lauter tun. Gravity gently pulls the wort from the lauter tun, thus minimizing compression of the grain bed. A float switch can be used to turn the pump on when the grant is full, thus freeing the brewer to tend to other things.
My lauter grant is an old plastic bottling bucket (see photo on page 45). A hose runs from the lauter tun to the bottom of the grant (to avoid aeration of the wort) and a pump is attached to tubing that leaves the grant through the spigot. This simple arrangement eliminates the need for an expensive pump speed controller.
Manifolds vs. false bottoms: Some home brewers favor perforated manifolds over false bottoms in the lauter tun. I think manifolds increase the risk of channeling through the grain bed. Channeling would decrease efficiency, although the runoff would be fast. Commercial breweries generally use false bottoms, unless they are using a wort filter.
In the boil: One of the reasons we boil wort is to coagulate proteins that have bound with tannins. This gummy-looking material is called hot break. The substances that comprise hot break are responsible for the formation of chill haze, so it is important to remove them. Hot break formation is dependent upon wort pH, boiling time, and the vigor of the boil. The pH of the wort can be measured and adjusted to optimize break formation. (A pH of about 5.2 is ideal, but much below that may result in a poor break.) A boil time of two hours will promote maximum break formation, although many brewers boil for less time in the interest of brewhouse economy.
If you are having trouble with your boil, consider upgrading your heat source. Using a heat source of adequate size will ensure a vigorous boil, which will promote a good hot break because the protein and tannin molecules have more chance to collide and bind.
A well-designed brewery will suit your needs for years to come, but a home brewery should be only as complex as your needs require. Buying expensive equipment or building complicated systems won’t necessarily help you make better beer — better techniques make better beer. Whether you decide to get fancy or to keep it simple, it pays to weigh your options carefully before making investments of time or money. Once you are comfortable brewing with your new all-grain system, you will be able to explore new brewing techniques and beer styles. You will discover novel refinements to your process and continually improve your beer’s quality. Your taste buds will be forever grateful!
All contents copyright 2024 by MoreFlavor Inc. All rights reserved. No part of this document or the related files may be reproduced or transmitted in any form, by any means (electronic, photocopying, recording, or otherwise) without the prior written permission of the publisher.


.png)
.png)
(1).png)
.png)