Simple Ways To Beating Homebrew Haze
11/16/2016
By Don Put (Brewing Techniques)

Simple Low-Tech Methods for Beating Homebrew Haze
In an ideal world, our home-brewed beer should remain clear, develop a nice, stable head, and have a consistent flavor profile. In the real world, it takes a few simple techniques to produce ideal-world beers.
One of the first things that our friends who are not home brewers notice about our hand-crafted product is that it’s sometimes not as clear as the “professional” beer they’re used to drinking. Major-brand advertisers have not missed the opportunity — some have publicly derided homebrew’s lack of clarity. For the uninitiated, these perceptions often cause preconceived sensory biases, especially when a novice taster equates clarity with quality.
Although the struggle against hazes in your homebrew depends largely upon the importance you attach to it, it is nevertheless important to understand the methods that can be used to clear your beer. Fining and cold conditioning are two of the ways that this problem can be dealt with on a home-brewing level.
It is important to note that the most common type of haze — chill haze, named for its appearance only when the beer is chilled — has no effect on the beer’s flavor. That fact is worth considering carefully before embarking on a mission to eliminate hazes from your finished beer.
The Two Types of Haze
The hazy appearance of finished beer has many causes, but these causes can all be categorized into roughly two groups, biological and nonbiological.
Biological hazes: Biological hazes are usually caused by a poorly flocculating yeast strain or an infection by a wild yeast strain or bacterium. Nonbiological hazes can be either permanent (they are present no matter what temperature the beer is at), or temporary (they are temperature-dependent and form when the beer is chilled).
Little can be done about biological hazes except to learn from your mistakes and try to correct the problem in future batches. Biological hazes are easily identified because they affect the flavor and aroma of the beer in a very short time. Most of these can be attributed to poor sanitation at some point in your production process. Tighten up your cleaning and sanitation practices, and the problem will most likely disappear with yout next batch.
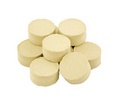
Make sure your homebrew equipment is clean and sanitary, browse our selection of PBW, Star San, SaniClean and more!
Nonbioiogical hazes: Nonbiological hazes are much more process-dependent. They are produced when proteins (present in malt) and polyphenols (also called tannins and present in malt and hops) combine to form a protein-polyphenol complex as the beer is chilled. Chill haze forms readily at about 32–45 °F (0–7 °C) and typically dissipates when the beer warms up to 68 °F (20 °C). This haze is temporary because the bonds between the proteins and polyphenols are weak and easily broken. Temporary hazes can become permanent, however, through oxidation reactions that increase the strength of these bonds — yet another reason to eliminate or at least minimize the aeration of finished beer.
Whether you are an extract, extract and specialty grain, partial-mash, or all-grain brewer, you can take preventive measures to minimize or eliminate these comment-provoking hazes. Although all-grain brewing practices can greatly affect the haze-forming constituents in beer, all-grain brewing is beyond the scope of this column, so I confine the discussion to the simpler extract and extract and partial mash methods.
In an ideal world, our home-brewed beer should remain clear, develop a nice, stable head, and have a consistent flavor profile. These characteristics depend largely on the presence or absence of the protein half of the haze-forming protein–polyphenol complexes. Medium-sized proteins give beer its body and mouthfeel and contribute to head formation and retention; thus, they are necessary for overall balance in our beers. It is therefore essential that we retain enough medium-sized proteins to keep all the good things that they have to offer while at the same time eliminating enough of them, or the polyphenol part of the haze-forming complex, to ensure a clear, stable product.
Click here to check out our selection of Extract and All-Grain Beer Recipe Kits!
“Finings” and How They Work
The term fining is used by brewers to describe the forced clarification process. Fining increases the brightness of the finished beer by removing suspended yeast and haze-forming proteins and polyphenols. It also shortens aging times by removing excess flavor-destabilizing components from the finished beer.
Finings can be divided into two groups: those that are used during the boil (commonly called copper finings) and those that are used after fermentation, during the aging process; for lack of a better term, I refer to these as postfermentation finings.
Some clarifiers, such as the protein-degrading enzyme papain, remain in the finished beer and are considered additives. Others, called processing materials, work by adsorption — yeast cells and haze-forming complexes adhere to the surface of the fining agent and fall out of the beer before final packaging. Adsorption is an active system because the electrical “charge” of the fining agent is opposite that of the yeast, proteins, or polyphenols. This opposition of charges creates a strong attraction between the fining agent and the particular suspended matter that is targeted for removal. The “flocs” that result from this interaction become denser than the surrounding liquid and fall out of suspension.
Because adsorptive finings react by attraction, they must be thoroughly mixed into the green beer to be completely effective. Gentle mixing is the key here, because it is important to prevent unnecessary oxidation of the finished beer.
Browse our selection of finings and clarifiers to improve the clarity of your homebrew!
|
Beer Hazes — Causes, Characteristics, and Remedies
|
|
|
|
Nonbiological
|
|
|
Biological
|
Temporary
|
Permanent
|
|
Cause
|
Poorly flocculating yeast
Wild yeast/bacterial infection
|
Protein-polyphenol complexes
|
Oxydation of protein–polyphenol complexes
|
|
Charateristics
|
Off-flavors/aromas
|
No flavor/aroma
|
No flavor/aroma
|
|
Remedies
|
Change yeast strain Improve sanitization
|
Finings
Cold Conditioning
|
Filtration
|
Process Variables
Before discussing specific fining agents, it is important to examine two very important parts of any clarification process — the boiling and chilling of the wort. These two processes result in what is known as hot break and cold break, respectively. Although they are much more noticeable in all-grain batches, they can also be observed in extract-only recipes.
Among the large number of reactions that take place in the boil, the hot break is among the most important because it effectively reduces, by a large percentage, the amount of haze that forms. During the first 15–20 minutes of the boil, you may notice that small particles start to appear in the previously clear wort. These insoluble precipitates — called hot trub — result from the coagulation of proteins. Removing the hot trub is an important step in removing excess proteins that may contribute to chill hazes in the finished beer.
At the end of the boil, rapidly chilling the wort produces the cold break, or cold trub, which consists of the same components that make up chill haze; that is, proteins and protein–polyphenol complexes. Any proteins remaining after boiling and chilling can later react with polyphenols to produce cloudy beer. Although the jury is still out on whether to eliminate any cold trub carryover into the fermentor, hot trub removal is considered essential in the brewing procedure.
Kettle Finings
Kettle finings promote the removal of proteinaceous materials from the wort. They also provide an adhesion site for larger, coagulated proteinaceous particles and other complexes, enhancing the formation of larger, heavier flocs that settle out of the wort faster and produce a tightly packed sedimentation.
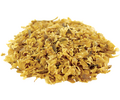
Numerous types of copper finings are available. Some of them require subtle changes in the general instructions that follow, but for the most part the main ingredient in these products is Irish moss. Because each brewing system has its idiosyncrasies, I encourage you to try out a few of the kettle coagulants on the market to see which one works best with your particular process and equipment.
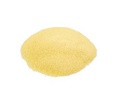
Irish moss, a red marine algae, is negatively charged and attracts the positively charged proteins to form larger hot trub particles that sink rapidly at the end of the boil. It comes in both powder and flake forms. I have used both forms with success, though I prefer the flaked form for use in my current brewing setup.
For a 5-gallon batch, soak 1 teaspoon of Irish moss in a cup of warm water and let it rehydrate for at least a few hours before use. I try to remember to do this the night before a brewing session, but I have also started rehydrating it at the beginning of the brewing session with no observable difference in performance. The Irish moss should be added to the boil about 15 minutes before knockout; that is, before turning off the heat source. Recently, I’ve started to experiment with larger quantities (1½ tsp) of Irish moss for those “big” beers whose starting gravities are higher than 1.060 or so. It’s still too early to draw any conclusions. I’d like to hear from those of you with thoughts about this.
Post-fermentation fining agents
Once the primary and secondary (if applicable) fermentation is complete, you are ready to use any of a number of postfermentation fining techniques.
Before adding finings, you might consider exploiting the beer’s own natural tendency to sediment. If you have refrigeration capabilities, chill the beer down to encourage the majority of the yeast crop to settle out. The temperatute required here depends on the strain of yeast (lager or ale) and its flocculating characteristics. Generally, though, most ale strains will drop out quickly at temperatures between 45 and 55 °F (7 and 13 °C); lagers require temperatutes as close as possible to freezing (32 °F [0° C]). Chilling not only helps to clear the yeast, but also helps the fining agents do their work. The more sediment falls out of solution, the less carryover of sediment into bottles or kegs. The downside is the need for a dedicated brewing refrigerator, which, if you’re dead serious about this hobby, is a worthwhile investment.
Irish moss and its variants seem to make up the bulk of the wort clarifiers used in the boil, but the products available for postfermentation fining are numerous and varied. They range from simple gelatin to the more esoteric beechwood chips made famous by one major beer producer. They all reduce chill haze by removing suspended yeast, excess proteins or polyphenols, or a combination of these substances. The trick here is to remove enough of either the polyphenols or the proteins to prevent chill haze formation but at the same time to leave enough of the proteins to provide adequate head formation and retention.
The most common fining agents used by home brewers are
isinglass,
gelatin,
Polyclar,
bentonite, and cold storage. Note that finings will not remove all of the yeast, so you don’t have to worry about adding fresh yeast at bottling time. In fact, if you’re pressed for space or time, you can add isinglass or gelatin to the primed beer during your bottling process. The yeast will get the carbonation accomplished before the fining agent pulls it out of suspension. I personally would not use bentonite or Polyclar in this manner, though.
Isinglass: Isinglass, one of the purest forms of collagen found in nature, is derived from the dried swim bladders of selected fishes, most notably the sturgeon. Isinglass carries an overall positive charge in an acidic environment like that found in finished beer. It reacts strongly with negatively charged yeast cells and negatively charged proteins. It has the added benefit of removing foam-negative material such as lipids. In fact, isinglass is considered foam-forming; that is, it can assist in head formation and retention. Once the isinglass and the adhered matter fall out of solution, it produces a dense and stable sediment that is not easily disturbed.
The fining agent of choice in Britain for cask-conditioned ales, isinglass used to be difficult to use on the home-brewing scale because of the fairly involved preparation process required, but this has recently changed with the introduction of “freeze-dried instant isinglass.” These new prehydrolized powders require only a short soak and mix in cold water or green beer, which means they can be prepared in a matter of minutes. Liquid forms of isinglass are also now on the market and are sold ready to use. Because a few variations of isinglass are currently available, prepare it according to the directions on the package — isinglass can be rendered useless by improper activation. Once treated with isinglass, the finished beer will usually fall clear in about three to four days.
According to Greg Noonan, author of Brewing Lager Beer, isinglass should be used only to clear ales, because it does not clear lagers and may even damage them. So, what can you use for lagers?
Gelatin: Simple unflavored gelatin works well in both lagers and ales, although it is not quite as effective as isinglass. Gelatin works in much the same manner as isinglass; it combines with suspended yeast and other haze-forming materials to make dense flocs that readily settle out of the finished beer. Although isinglass can be used at warmer temperatures, like gelatin it works best if the beer is chilled to 50 °F (10 °C) or less. To prepare the gelatin, simply mix 1 teaspoon in 1 cup of cold water and allow it to soak a few minutes. Stir and heat the solution to no more than 180 °F (82 °C) to completely dissolve the gelatin. Do not boil. Once prepared, it should be added to the beer immediately and mixed in thoroughly. Gelatin is easy to use, so don’t be afraid to give it a try if you are working on winning the war against cloudy beer.
Polyclar: Polyclar (PVPP) is a finely ground — almost as fine as talc — plastic material that works in relatively the same way as isinglass and gelatin with one important difference: it reacts more with the polyphenol part of the protein-polyphenol haze-forming complex so it does not seriously impede the foam quality of the beer. Polyclar’s electrostatic charge attracts the polyphenols in the beer, thus eliminating one half of the haze-forming equation. It settles out quickly and forms a packed sediment that is easily left behind when the beer is racked. Another interesting by-product of Polyclar’s fining action is that it can remove some oxidative browning; that is, it can lighten the color as well as clear the beer.
The difficulty with Polyclar seems to arise from the discrepancy among the recommended dosage levels. I have seen everything from 2 teaspoons to ¼ cup per 5 gallons in the literature. Most recommend amounts around 2 tablespoon. To start, I would stick to 2 tablespoons and adjust the dosage from there once you’ve dialed into how it works with your technique and system. Lighter beers (light lagers, for example) may need a higher dosage to get the desired clarity.
To use, simply make a slurry out of the Polyclar and a little preboiled, sterile water and add it directly to the green beer after the majority of the yeast crop has settled out. Mix it in thoroughly and let it settle for a few days.
Bentonite: Bentonite, an absorptive and colloidal clay, has been used for quite some time by vintners for clearing proteins from wine. It also works well in removing the protein half of haze-forming protein-polyphenol complex from beer. It can be found in most homebrew stores. Bentonite comes in powder form, so it must be combined with water to make up a slurry that can then be added to the beer. According to Dave Miller, the preparation of bentonite consists of the following:
Begin by bringing 1 qt of water to a boil. Weigh out exactly 2 oz of bentonite. When the water boils, fill your blender to the 3-cup mark. Add the bentonite, and let it soak for a few minutes. Then blend at medium speed until all the granules are dispersed. Top up the blender to the 4-cup mark, then blend again to get a smooth, uniform mixture. Store in a sealed jar. This slurry is thinner than the standard 10% suspension and will have to be stirred before each use, but measurement is easy; 2 tablespoons (⅛ cup) of this suspension will add 0.1 parts-per-thousand (ppt) of bentonite to 5 gallons of liquid. The usual dose of bentonite is 0.1 to 0.5 ppt.
Combine with care: Miller recommends combining bentonite with Polyclar to “chillproof almost any beer.” But he cautions that overuse of clarifiers can have a negative effect on the overall quality of beer. So use combinations of clarifiers judiciously.
Cold conditioning: Cold conditioning — storing the beer for 5–7 weeks at 32 °F (0 °C) — can be used successfully to clear most chill hazes from finished beer. It works by allowing the haze to precipitate completely, which causes it to slowly fall out of solution. The key word here is “slowly”; it doesn’t work nearly as fast as fining agents do. There are also some times when this process alone fails to clarify the beer completely; however, other clarifiers can be added to assist the clearing of these “problem” beers.
The cold conditioning of beer requires that you have the refrigeration available and that you have the patience to wait for the beer to age. The first issue can be dealt with easily if you have the space for another refrigerator (you can usually find a used one for nothing or next to nothing). The second one relies on your ability to wait for your reward. This can be easily cured by brewing often enough that you always have some beer coming into condition when you finish your last bottle or glass of the previous batch. I personally cold condition all of the beers I make without regard to whether they are ales or lagers. Without exception, I have found that beers aged in this manner seem to develop a much cleaner flavor profile than those conditioned at room temperatute.
Other clarifiers: Other clarifiers are available, such as papain, grape tannin, and silica gel, but each of these has a few idiosyncrasies that make them more suitable for professional use. In the case of papain and grape tannin, the dosage level is critical to ensure adequate performance. Silica gel, a mixture of silica and sterile water, has not yet been approved by the FDA for use in unfiltered beer; however, they suggest that it is safe to use if the beer is carefully decanted off the sediment before serving. I believe that these clarifiers, while no doubt being effective when used ptoperly, can be replaced by any of the clarifiers outlined above without sacrificing the clarity of the treated beer.
Aesthetics, Aesthetics
So what does all of this boil down to? Basically, to use finings is really an aesthetic decision: Do you want crystal clear home-brewed beer that will dazzle your friends, or are you happy with your beer even though it’s a little cloudy at times? Clarifiers have their place in home brewing, but they are not the be-all and end-all to producing great beer; they are just another tool that you can pull out of your bag of tricks if and when the need arises.
The most important thing to remember when using finings is that the if-this-much-is-good-then-more-should-be-better school of thought definitely does not work here. If you are going to err when using finings, err on the side of underdoing it. You can always adjust the quantity on the next batch to achieve the right balance that will produce a clear, presentable beer that forms and retains a nice, stable head.
Related Products
All contents copyright 2024 by MoreFlavor Inc. All rights reserved. No part of this document or the related files may be reproduced or transmitted in any form, by any means (electronic, photocopying, recording, or otherwise) without the prior written permission of the publisher.


.png)
.png)
(1).png)
.png)